


elcom! In this article, I'm going to show you guys how to PROPERLY set up Google Authenticator app on your iOS or Android devices.
The reason I say PROPERLY is that many people, including friends of mine, they go onto these sites that support 2FA, which stands for Two Factor Authentication and it's going to generate a one time QR code. And then they use the app to scan the QR code. Then they move on with their day...
What happens here is that down the road or in the near future, if you happen to lose your phone or don't have access to your phone, you're basically screwed because all the authentication code is stored on software on your phone.
So if you don't have access to it, you won't be able to log into these platforms that you set up with. So in this article I'm going to show you guys a little trick or strategy you could say to have a backup options available so in case if you lose your phone you don't have to worry about it. All you need to do is grab a new phone and every backup option is available.
You can deploy all the Authenticator set up on the new device without any worry or concern. And do me a favor, if you enjoyed this article and find it valuable, make sure you share it with your friends or family as many people need to know this before setting up their google authenticator app. And without further Ado, let's get into it.
What is Google Authenticator?
Right before we get into the setup stage, let's quickly talk about what is Google Authenticator?
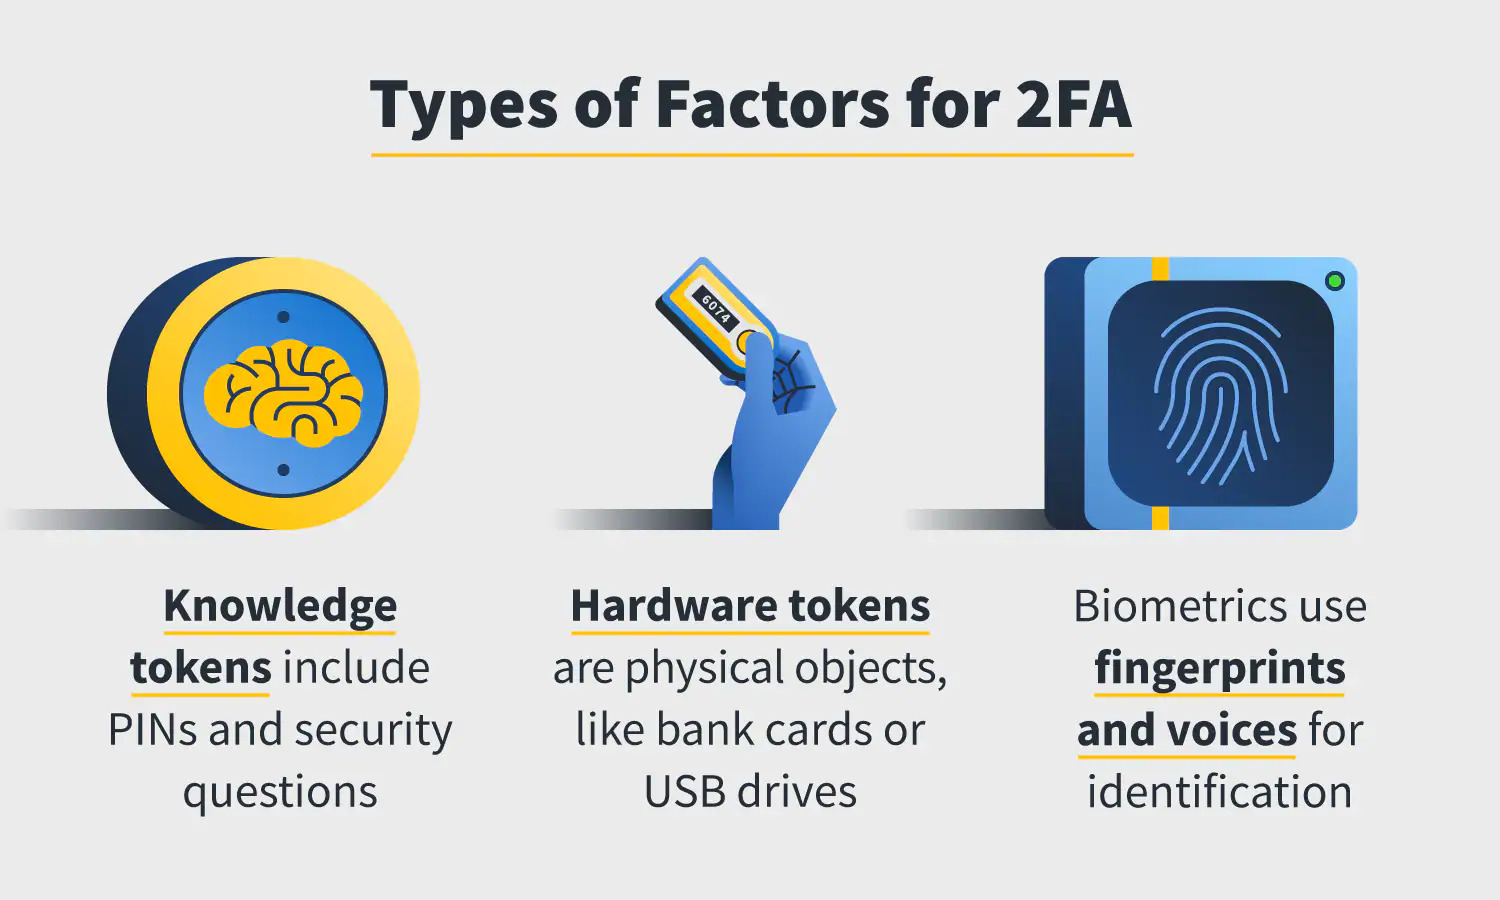
Google Authenticator is a software based authentication solution developed by Google that implements two step verification service by using something called time based one time password algorithm for authenticating users of software applications.
So basically every 30 seconds the app is going to generate a 6 digit code. Without entering the correct six digit code, you won't be able to log into the platform. This makes it much more secure on top of your regular password.
Think about it. If someone has your email and password, they also have to have Authenticator code, otherwise they won't be able to log in to the platform.
Install Authenticator App (iOS & Android)
Now I'm going to show you on my iPad how to set up Google Authenticator app.
If you are on any other Android or iOS devices, the steps should be very straightforward and they're identical. Since I'm on iOS, just click on App Store. If you're on Android, just go to Google Play Store and do the same thing on the search bar. We're going to search for "Google Authenticator". I'm going to click on download and install this app to my iPad and click on Open and we're going to click on get started right away.
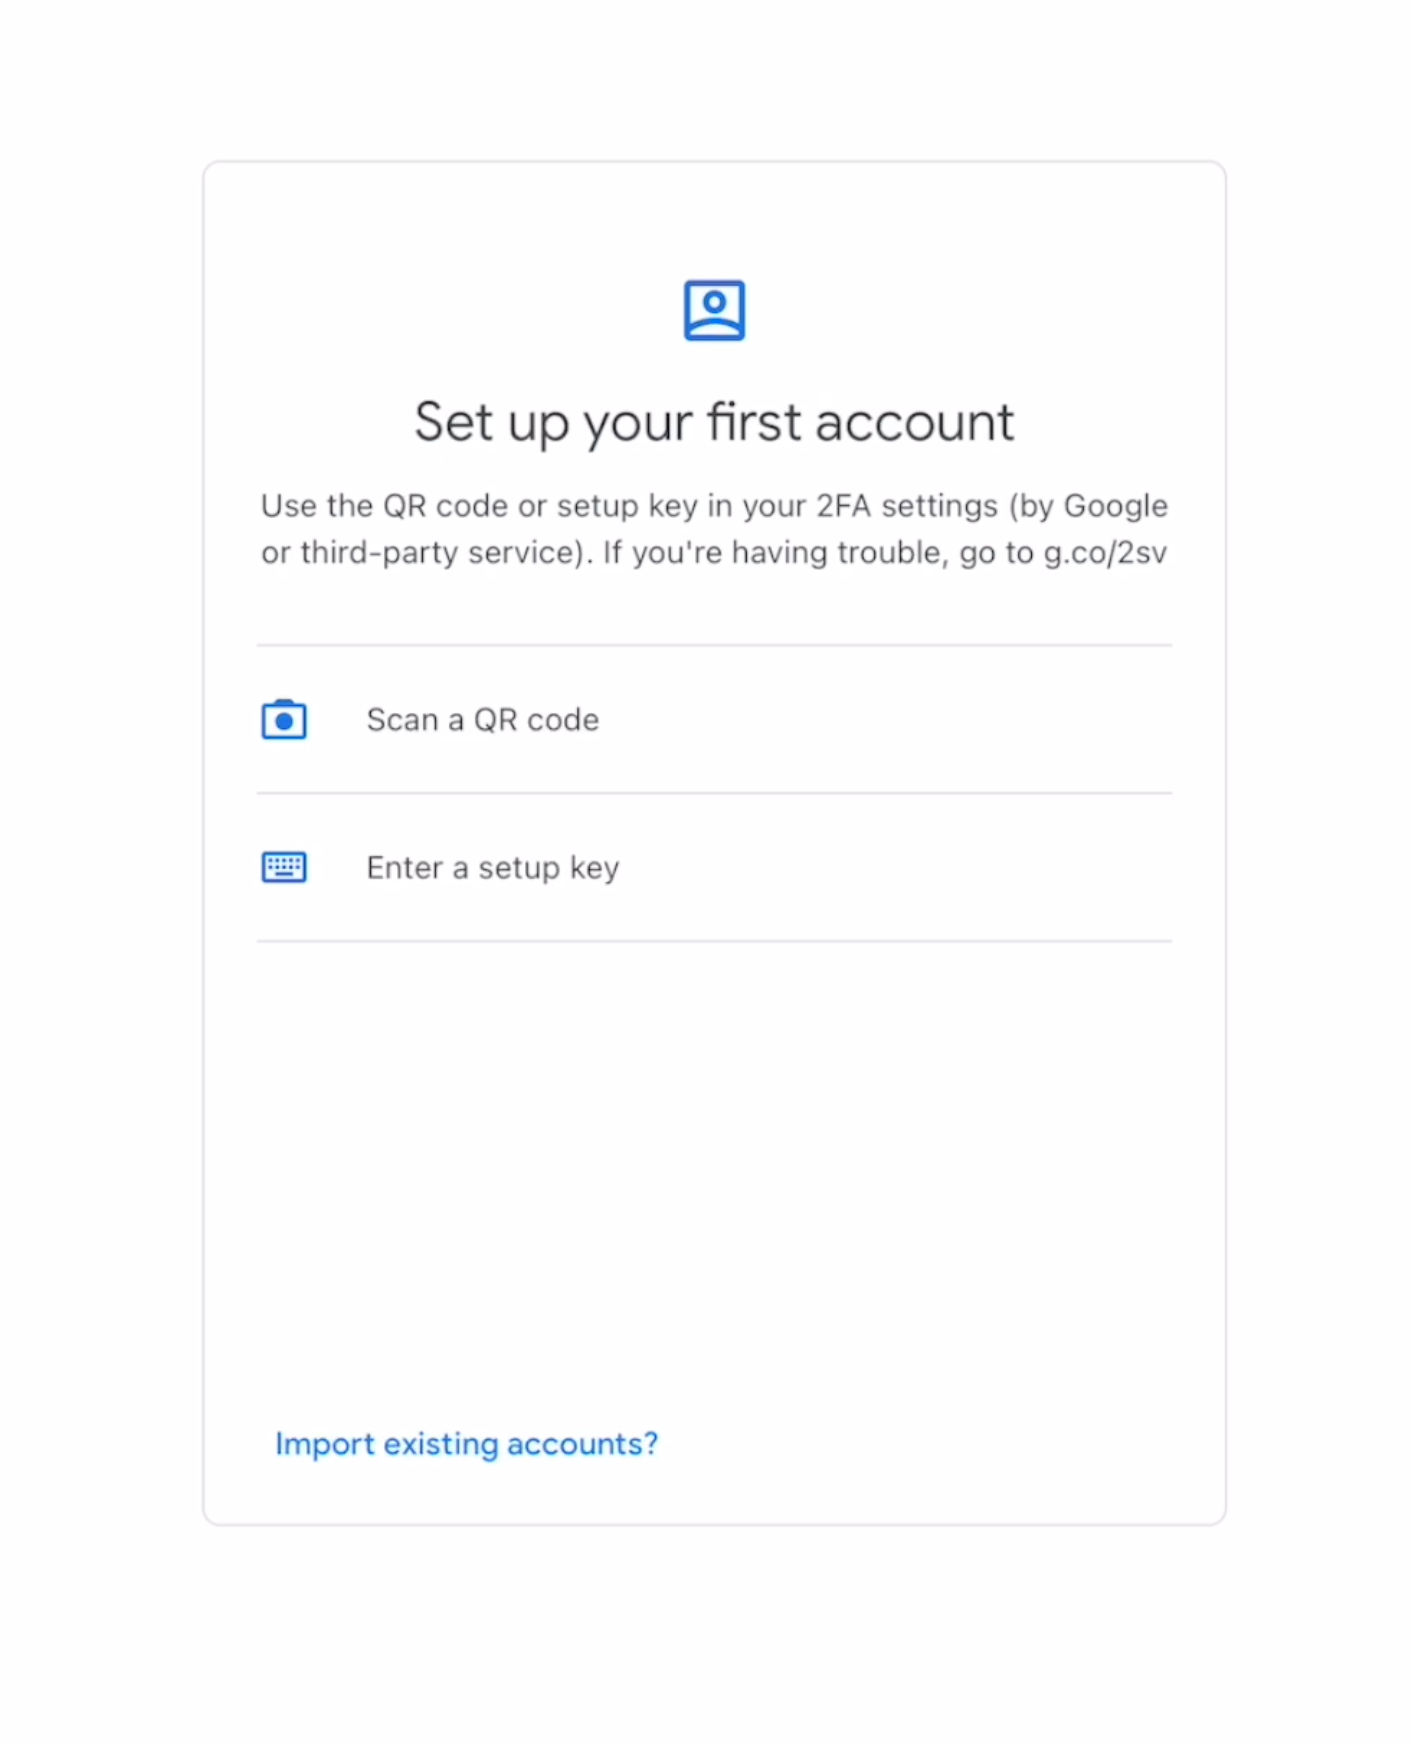
There's going to be two options for you. First one is Scan the QR code. Second is enter manually. Majority of the time you're going to use Scan the code feature just in case. If your device doesn't have a camera, you probably want to enter the code manually.
2FA Demonstration (with Facebook)
For demonstration purpose. I'm going to use Facebook account as an example. Any other platforms, the steps should be identical.
Login to your Facebook. First come to the settings page, you're going to see something called a security and a login. A lot of platforms call them security.
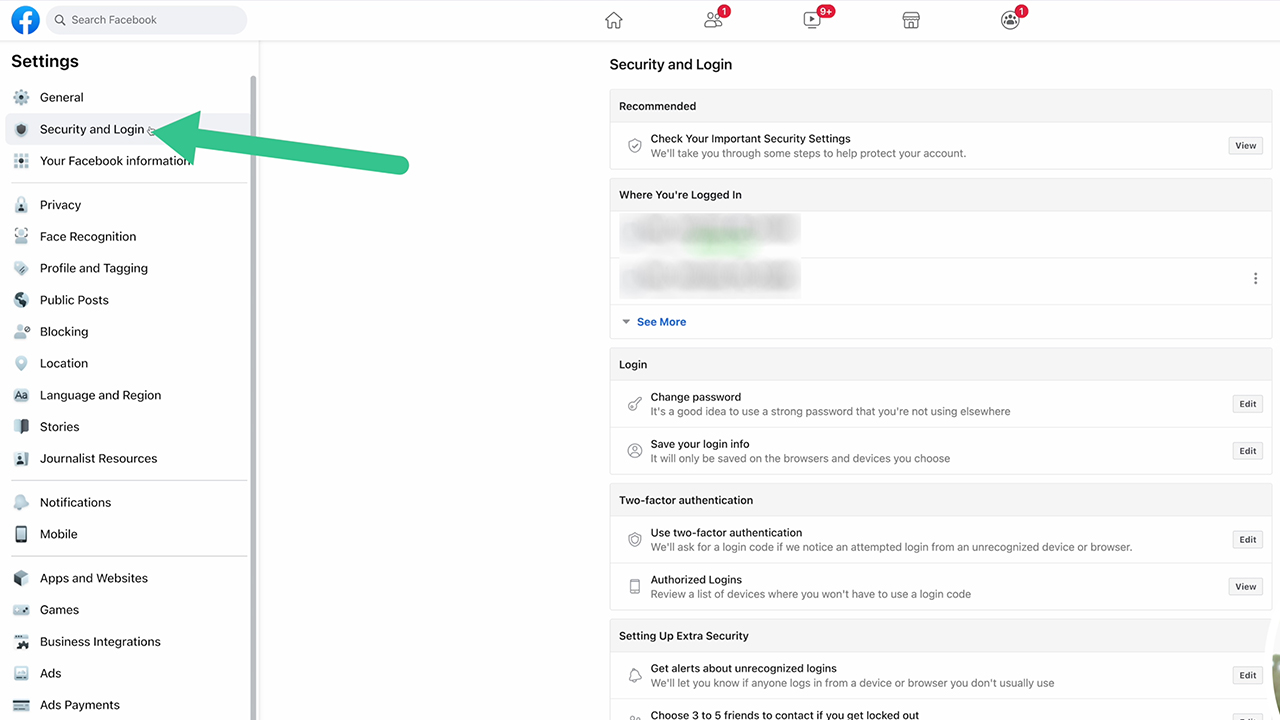
That's all you need to remember. You're going to see one section says two factor authentication. You want to click on edit. Just a side note, the SMS feature. I don't personally recommend it because a lot of hackers are able to Port your phone number or reverse engineer SMS. So it seems like it's sending to your device, but in reality it's sending to their device to get the SMS code.
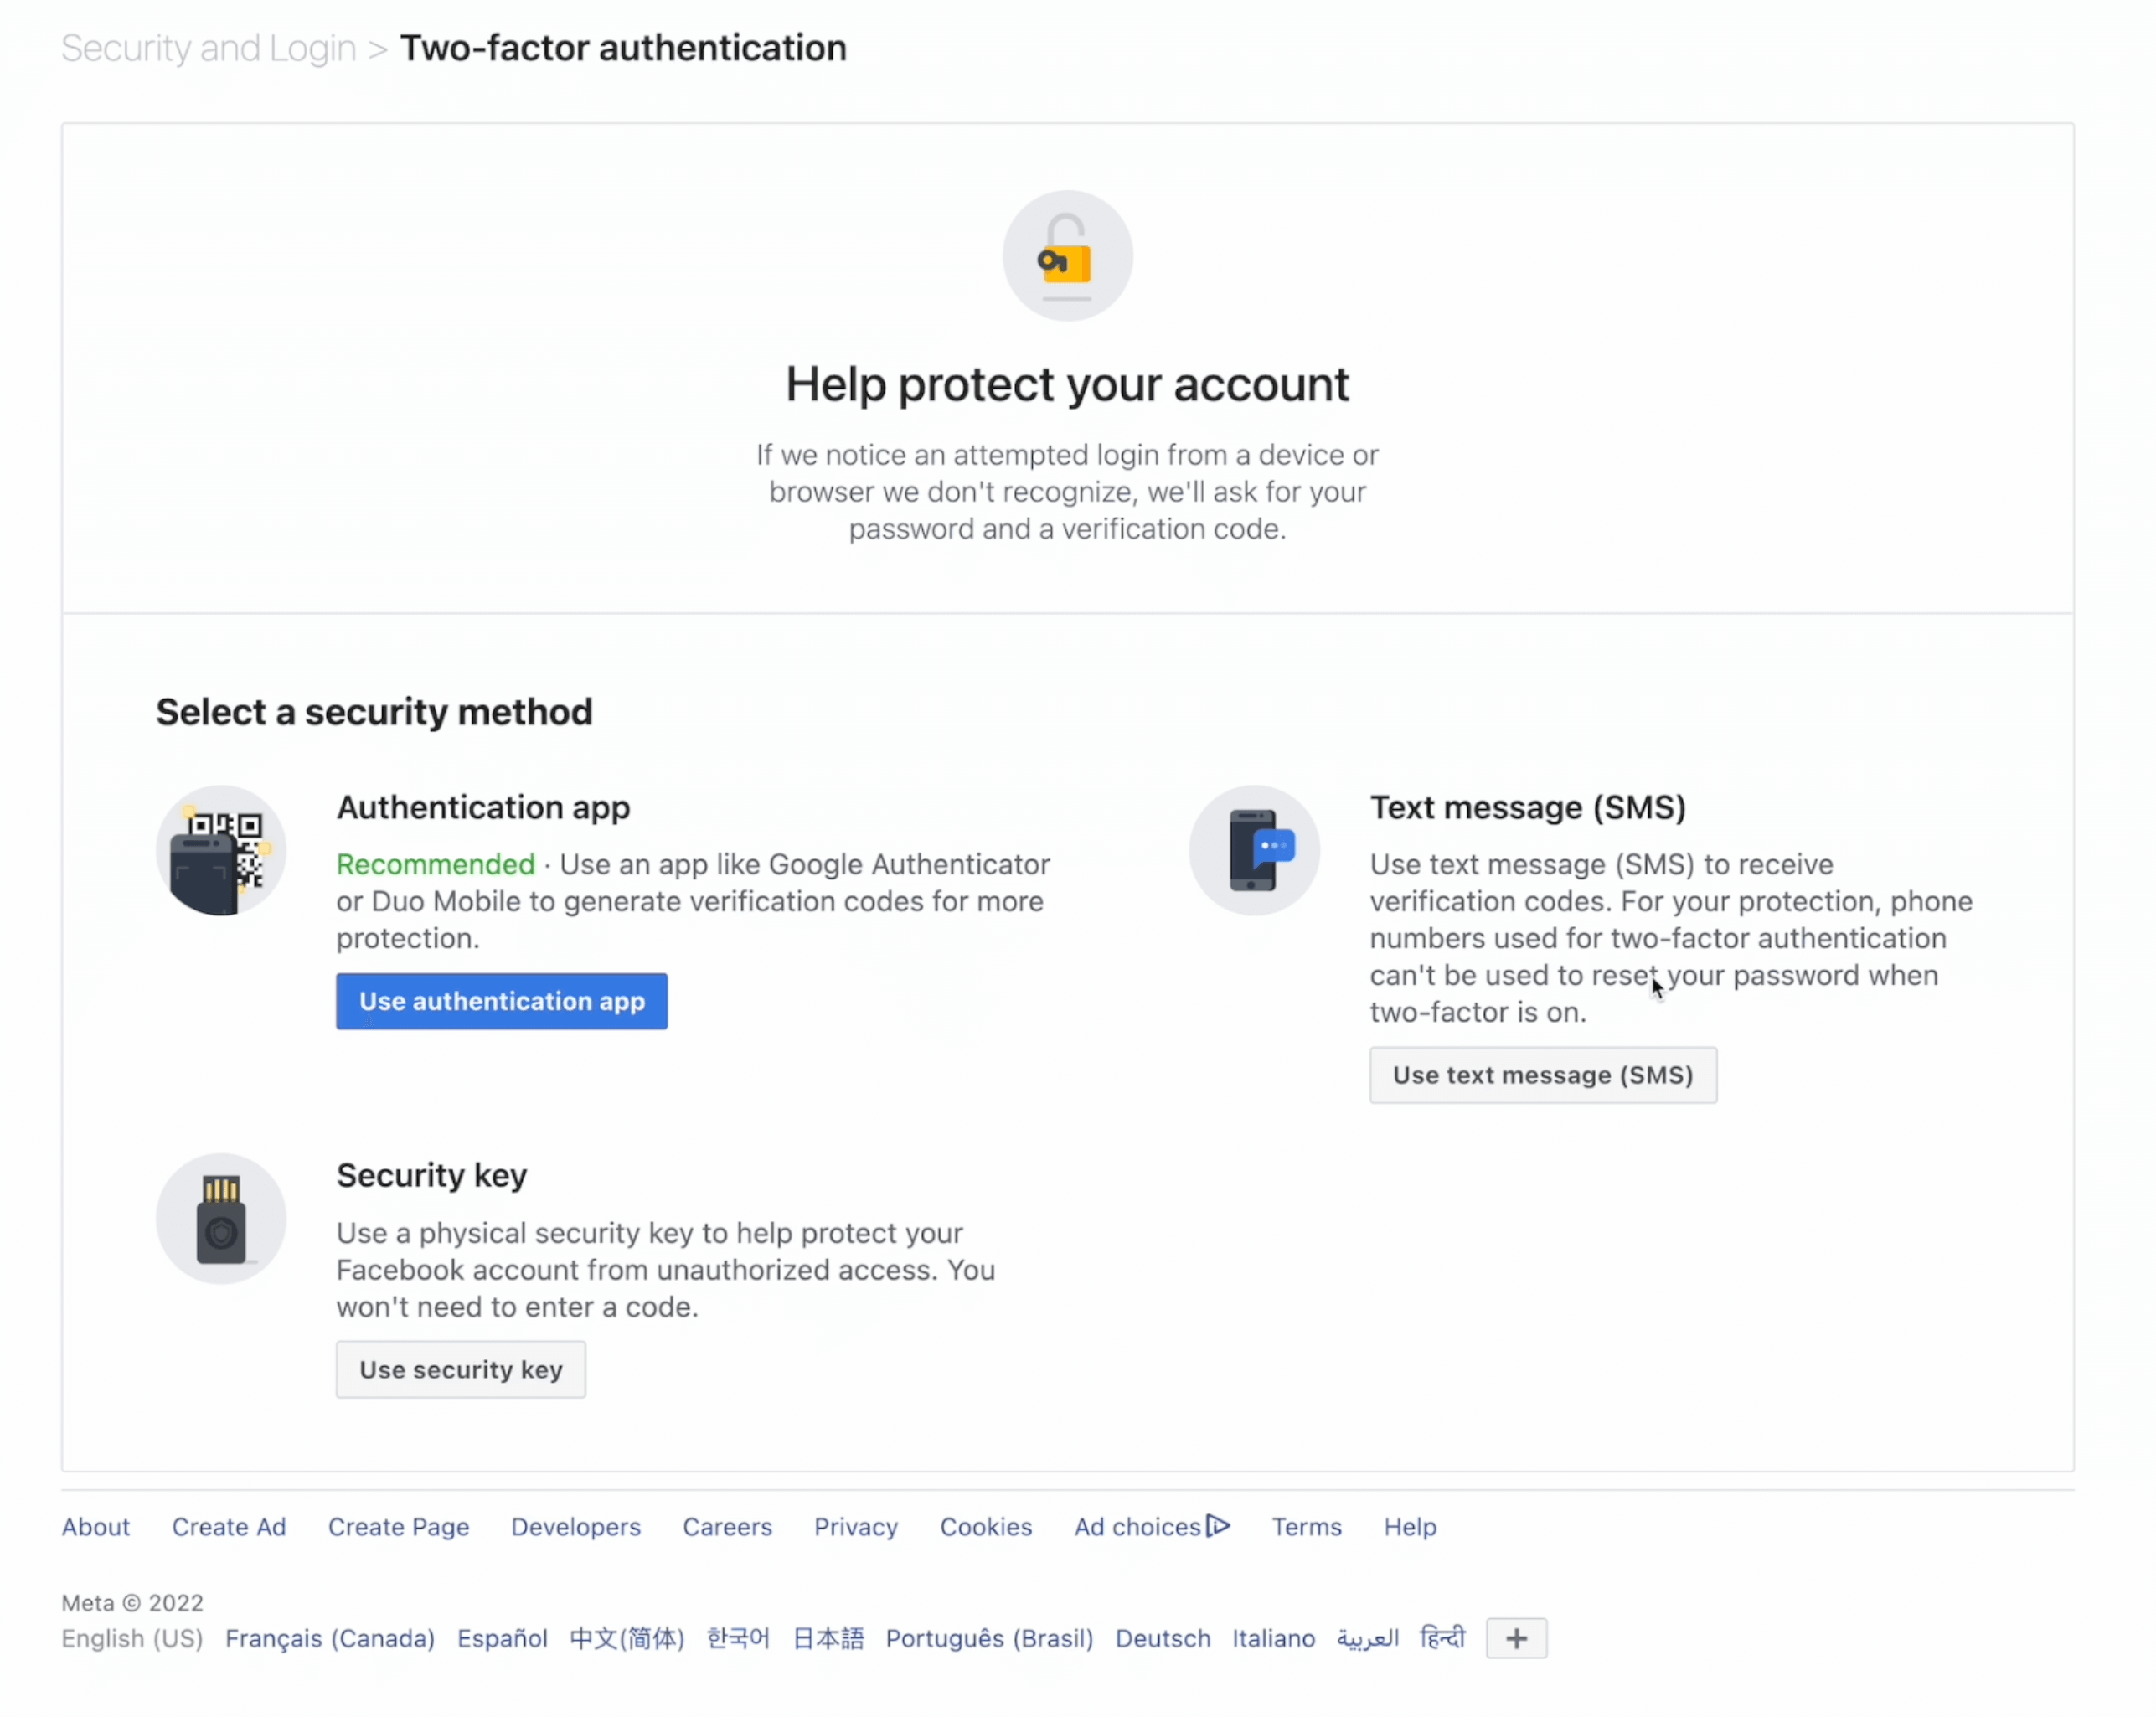
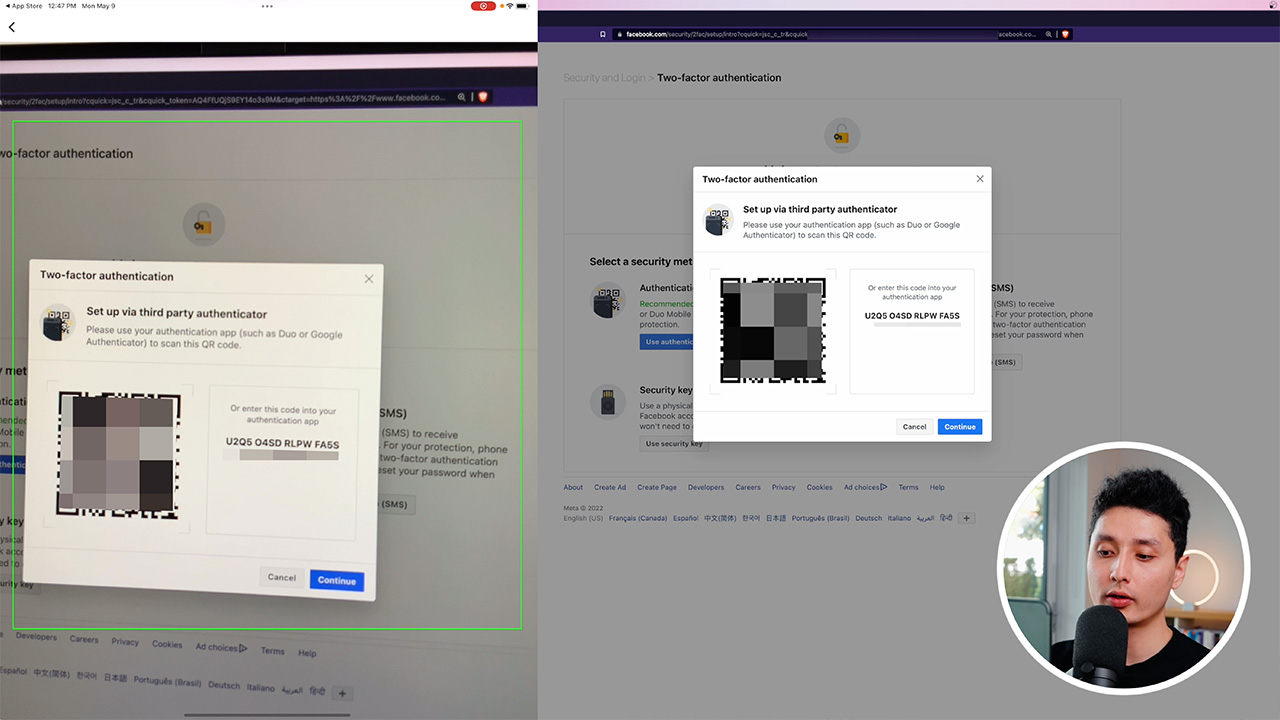
Just click on Authentication App. Facebook generates an authentication QR code for us to scan with Google Authenticator app. So just grab your device that you already have the app downloaded. Click on the first option that says Scan QR code and you want to scan this QR code.
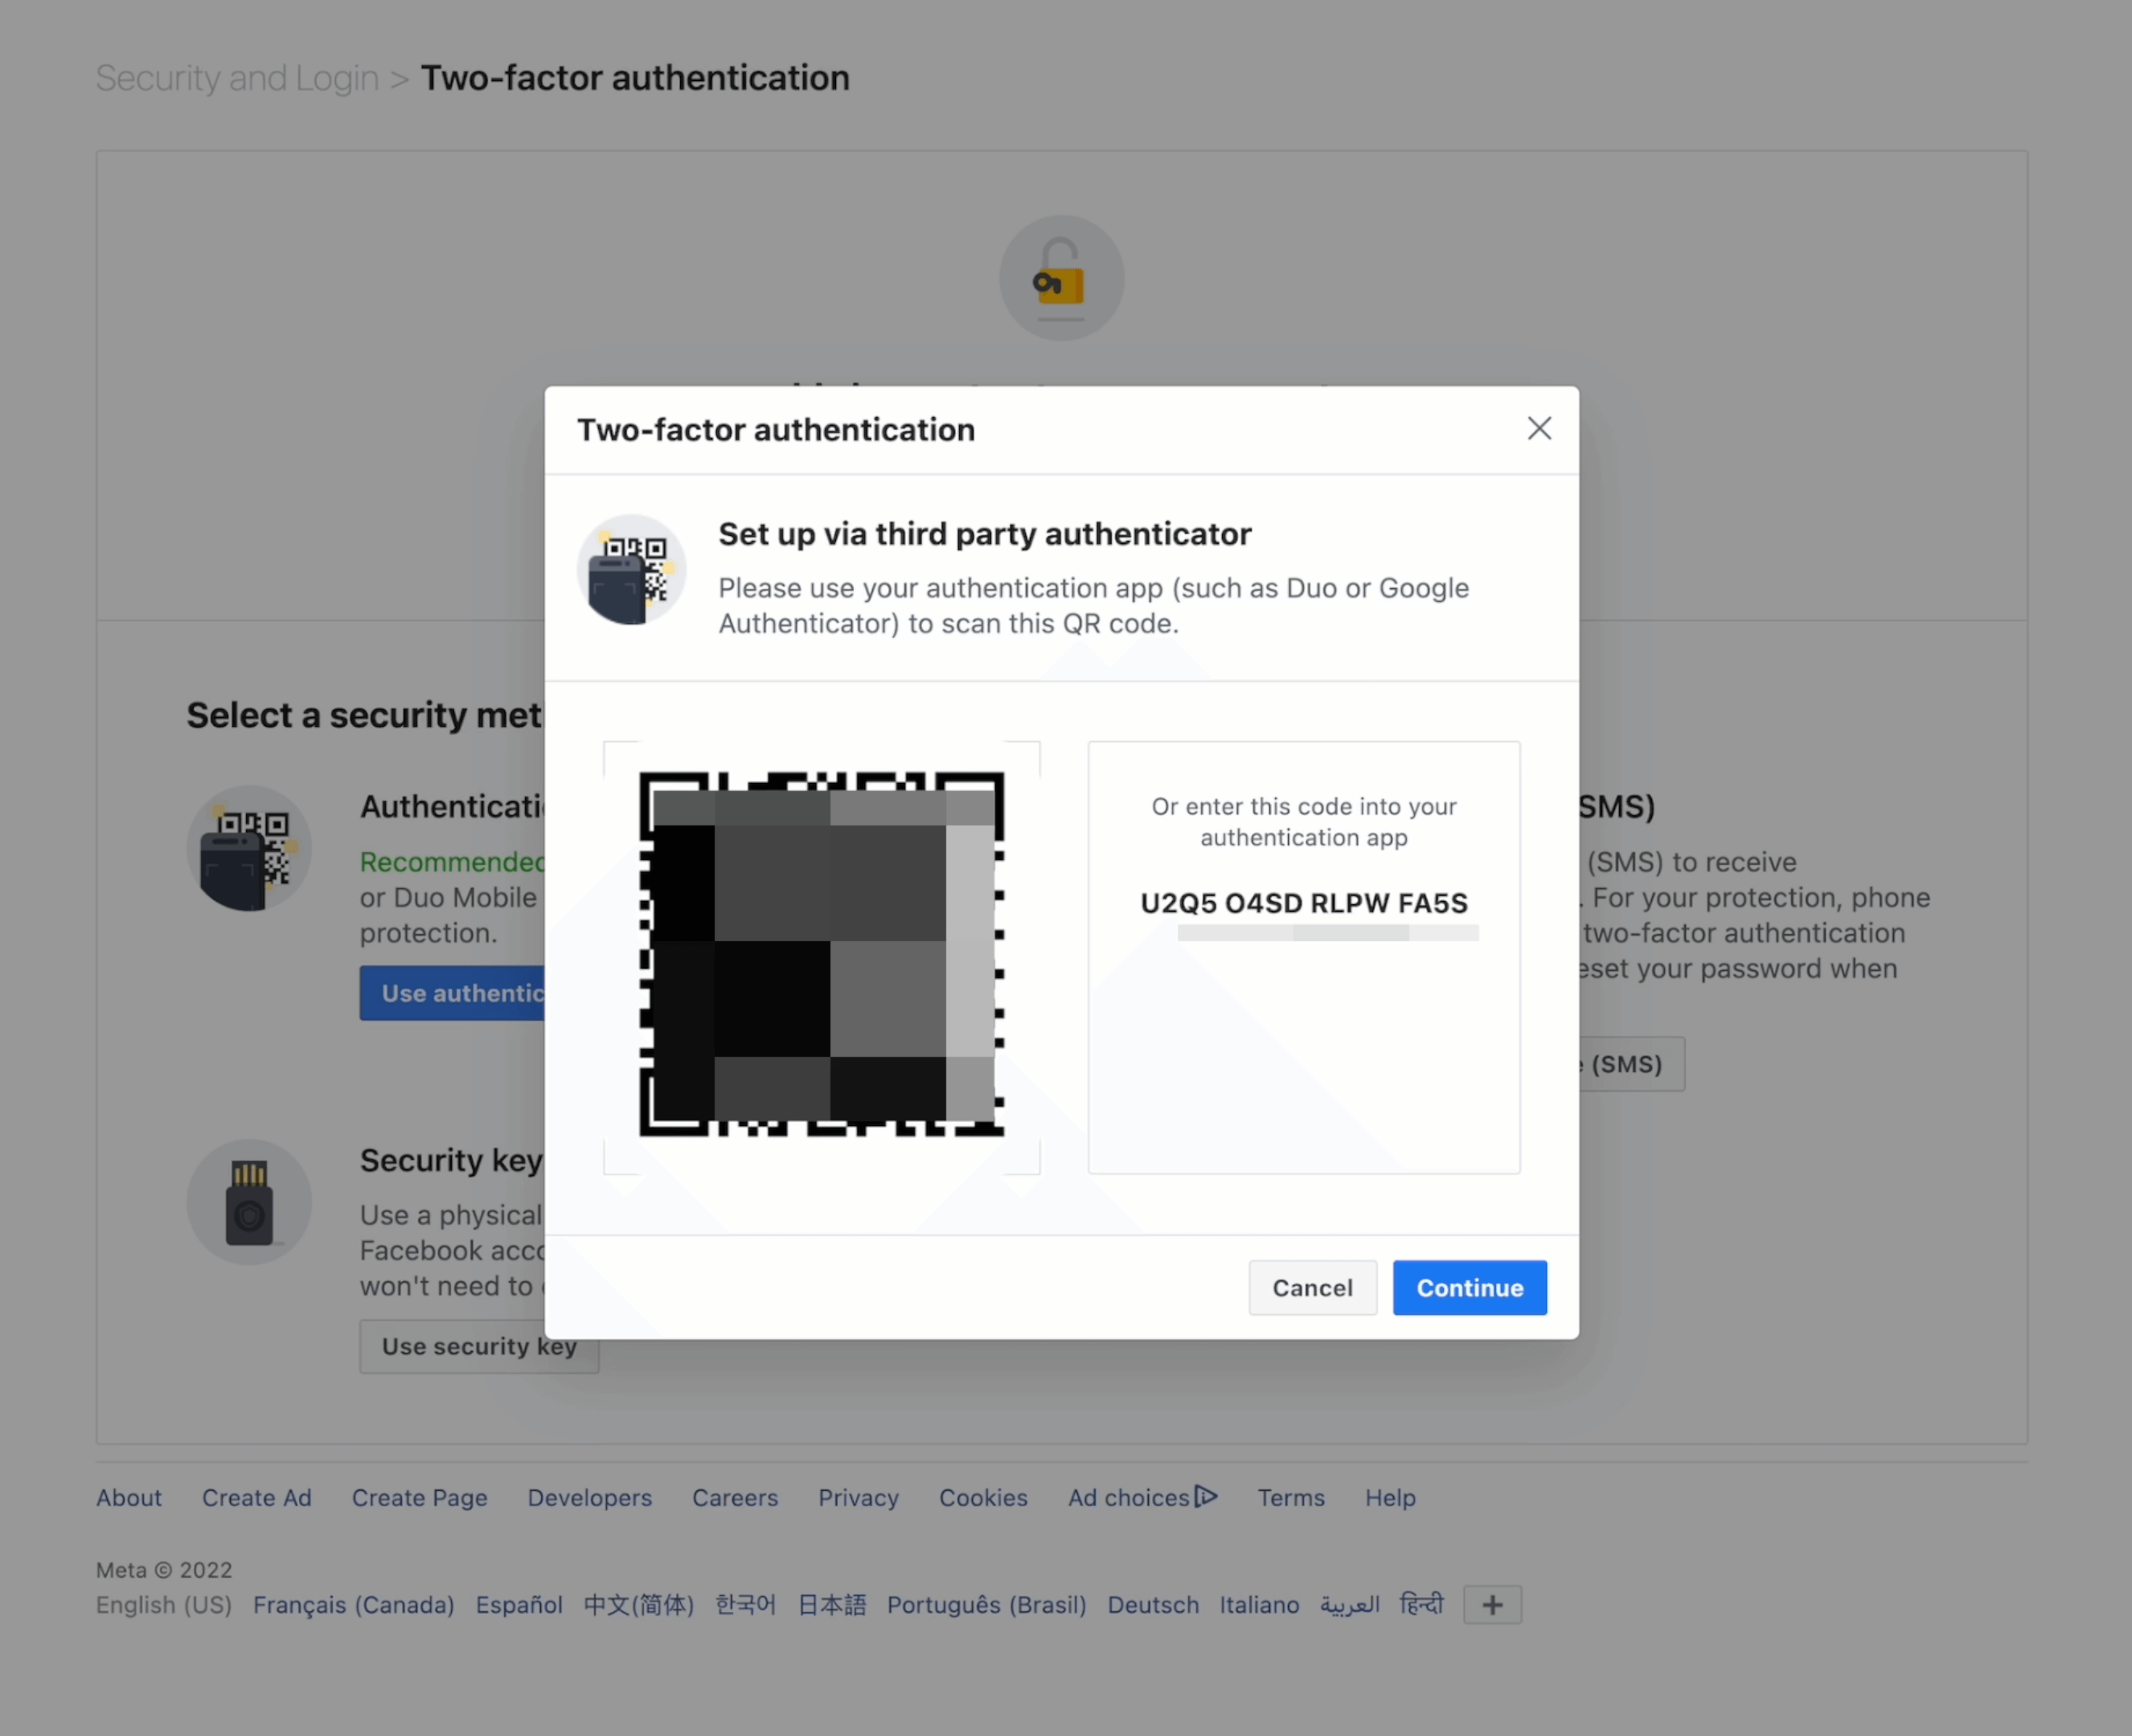
As soon as you scan the code immediately, you're going to see the six digit code appeared on my app. Earlier I mentioned this mistake. A lot of people do, which is actually click on Continue and move on. Finishing the setup. However, I want to show you a personal trick of mine.
What we want to do is we're going to screenshot this QR code page (on Mac is Command + Shift + 4), it will let you take original screenshot for the screenshot. I'm going to include the URL as well because that clearly indicates it's Facebook.com.
My Secret Trick
Once you do the screenshot, that's basically our backup file. And I'm going to show you guys my personal trick on how to securely store this QR code or this backup file in a thumb drive that you can encrypt this thumb drive with a password so a random person picks it up, won't be able to open it, and only you are able to log into the thumb drive just in case. If you lose your iPhone or your iPad, you are always able to locate this QR code to scan it on a new device.
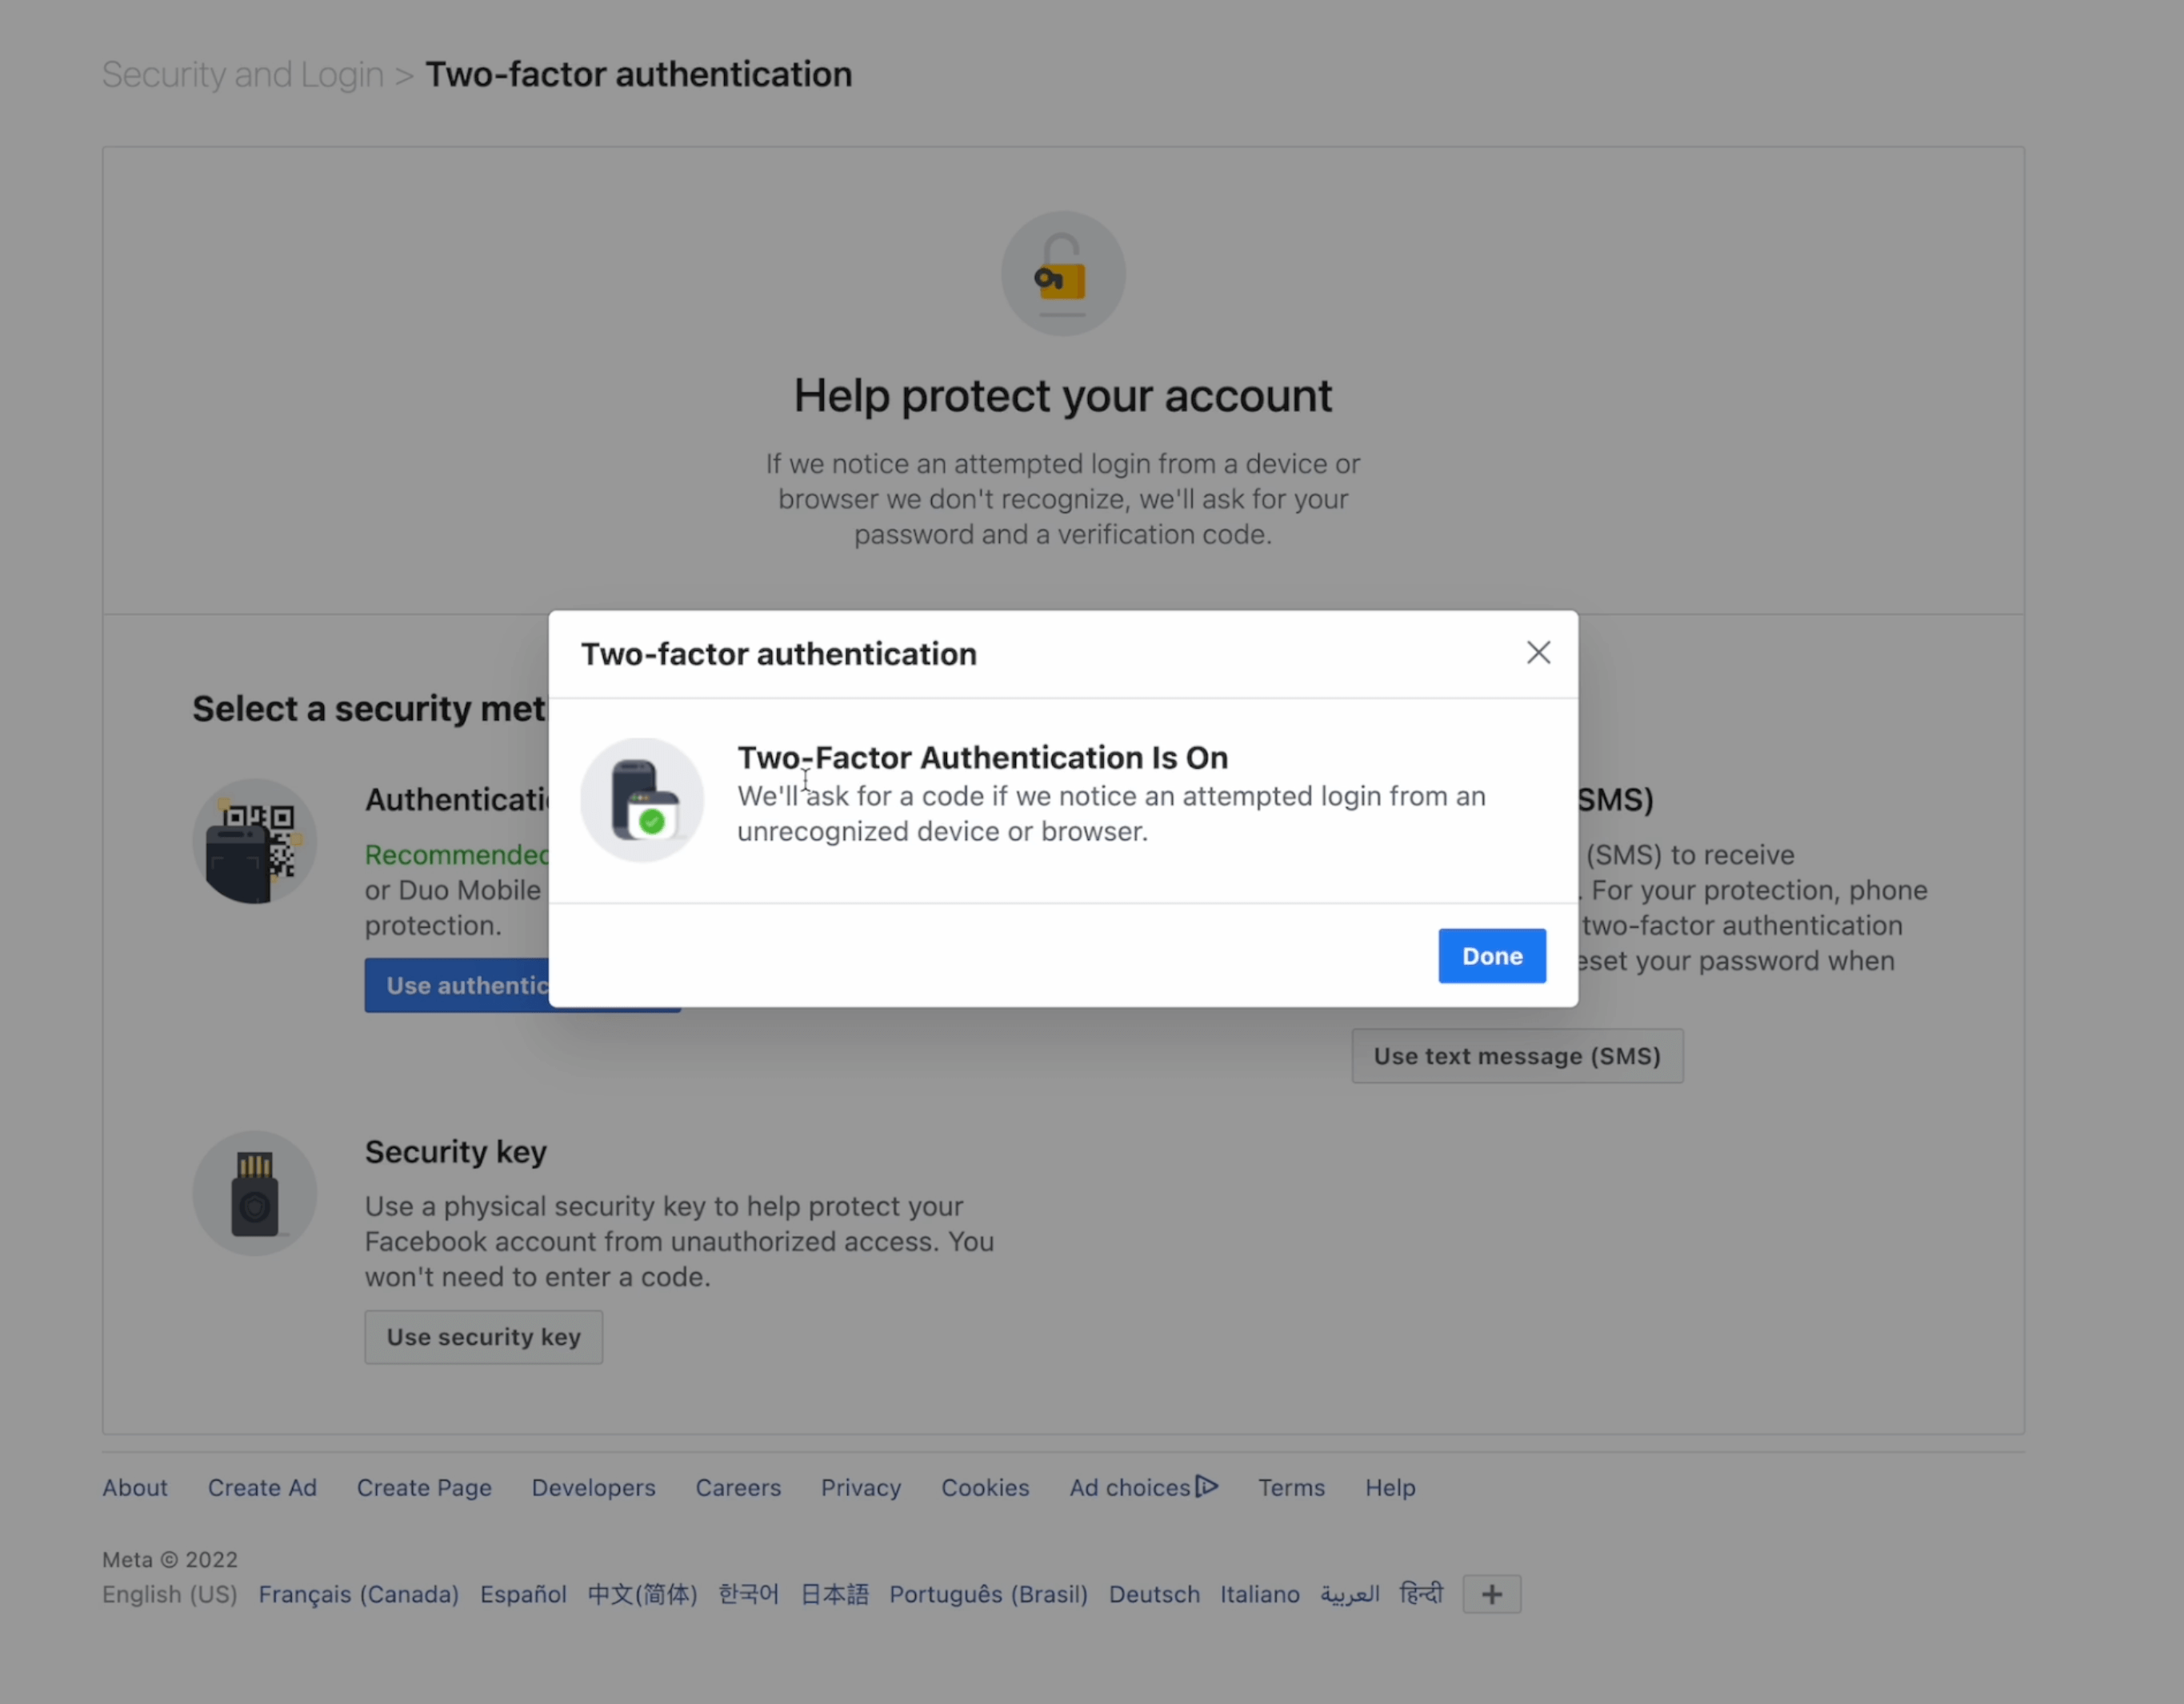
This is my personal backup trick and I'm going to show you guys step by step in a moment. For now let's come back to this page. We're going to click on Continue. To finish up the set up, you need to enter the current six digit code.
So now you can see my two factor authentication is on. Click on done. Just to show you guys how it works, I log out of the Facebook account and now I'm going to enter my email and password and log in again. You're going to see it's going to prompt you to enter the six digit code from your authentication app. Once I enter the correct code, that's when you are able to come into the platform.
So that's basically how authentication app works.
How to Encrypt A USB Thumb Drive
Now, in the next phase, I'm going to show you guys how to encrypt a thumb drive and how to properly store this file, which is a QR code on this thumb drive, because the QR code generated earlier on the Facebook will work whenever you scan it on different devices.
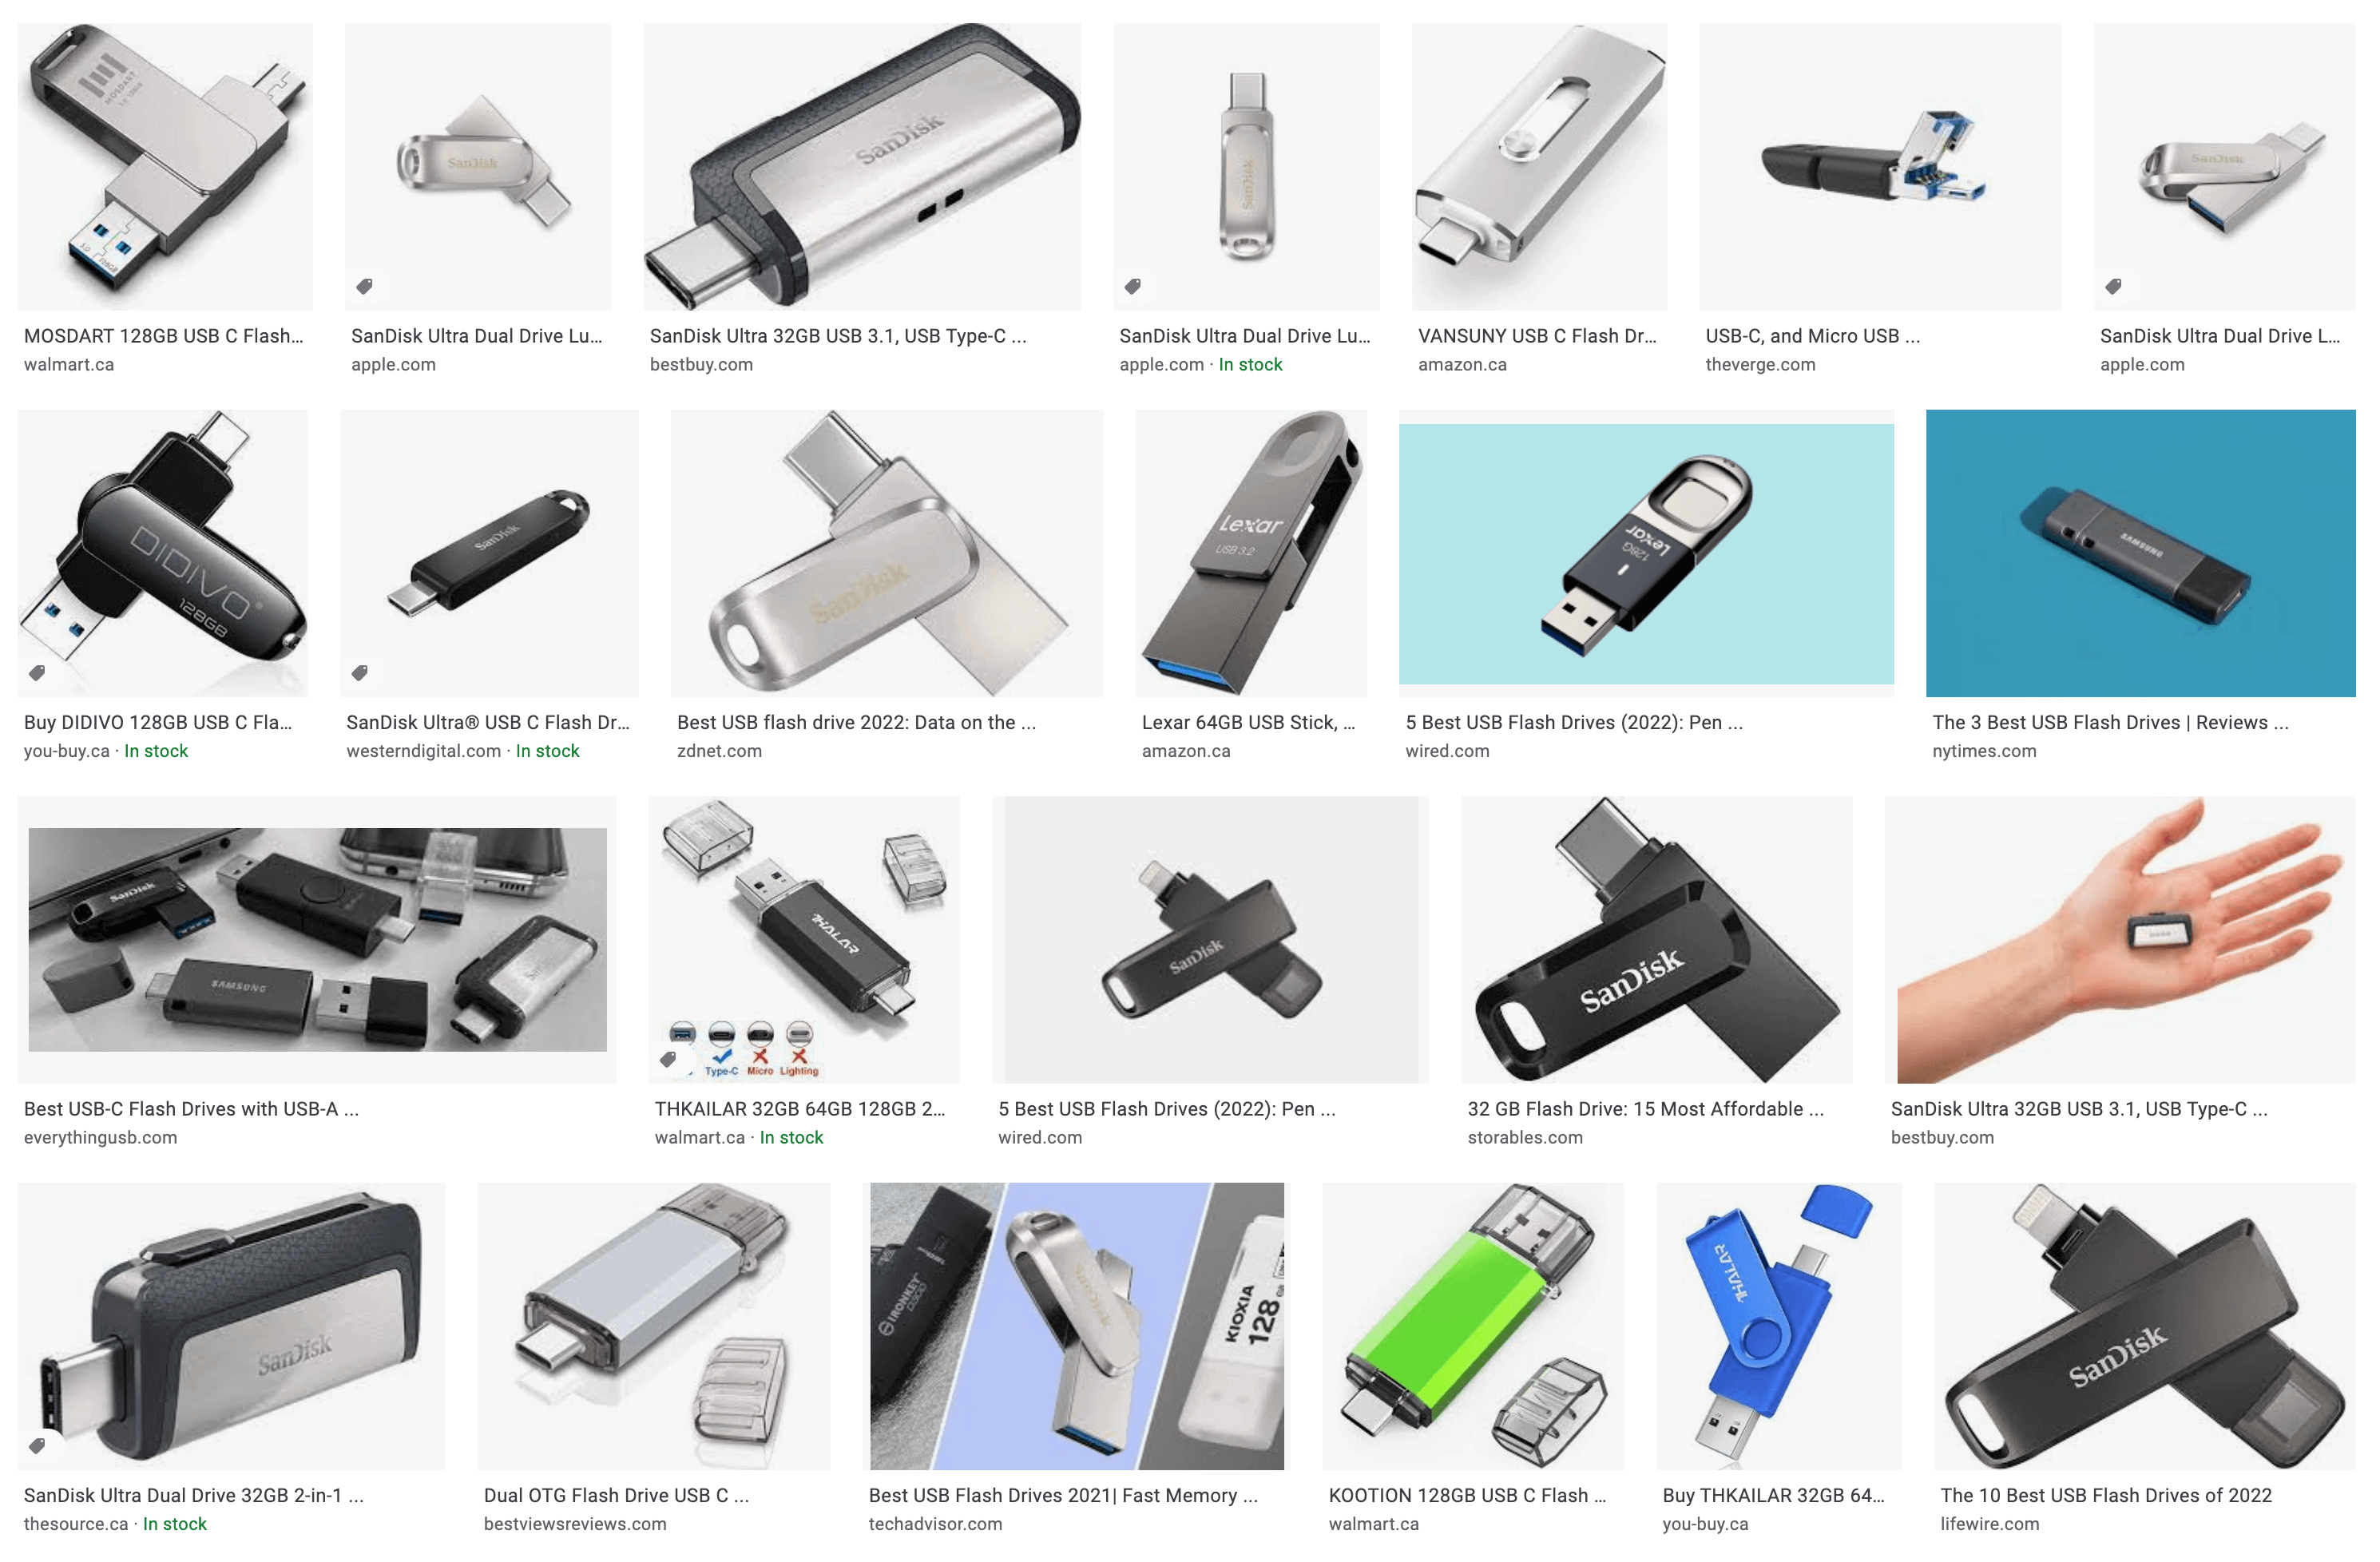
Now, in terms of thumb drive, which one should you get? Keep that in mind. You don't need a fancy thumb drive. This could be like 2GB, 4GB or 8GB is more than enough because you're not going to use a lot of storage.
A lot of people use SD card, such as micro SD card, that will do as well. With that said, I do recommend a lot of thumb drive like shown below that you can convert between USB-A Port and USB-C Port. Just in case you upgrade your Mac or your computer or desktop, you can always use different ports to use the thumb drive. That's just a little icing on the cake.
And now what we want to do is this is a really old Send Disk thumb drive that is 4GB.
I'm going to insert it onto my Mac. And what we want to do now is use search bar (command + space) and we want to search for something called a Disk Utility. Click on enter it's this Send Disk option. First thing we want to do is click on Erase option. And then what we want to do is just give it a name.
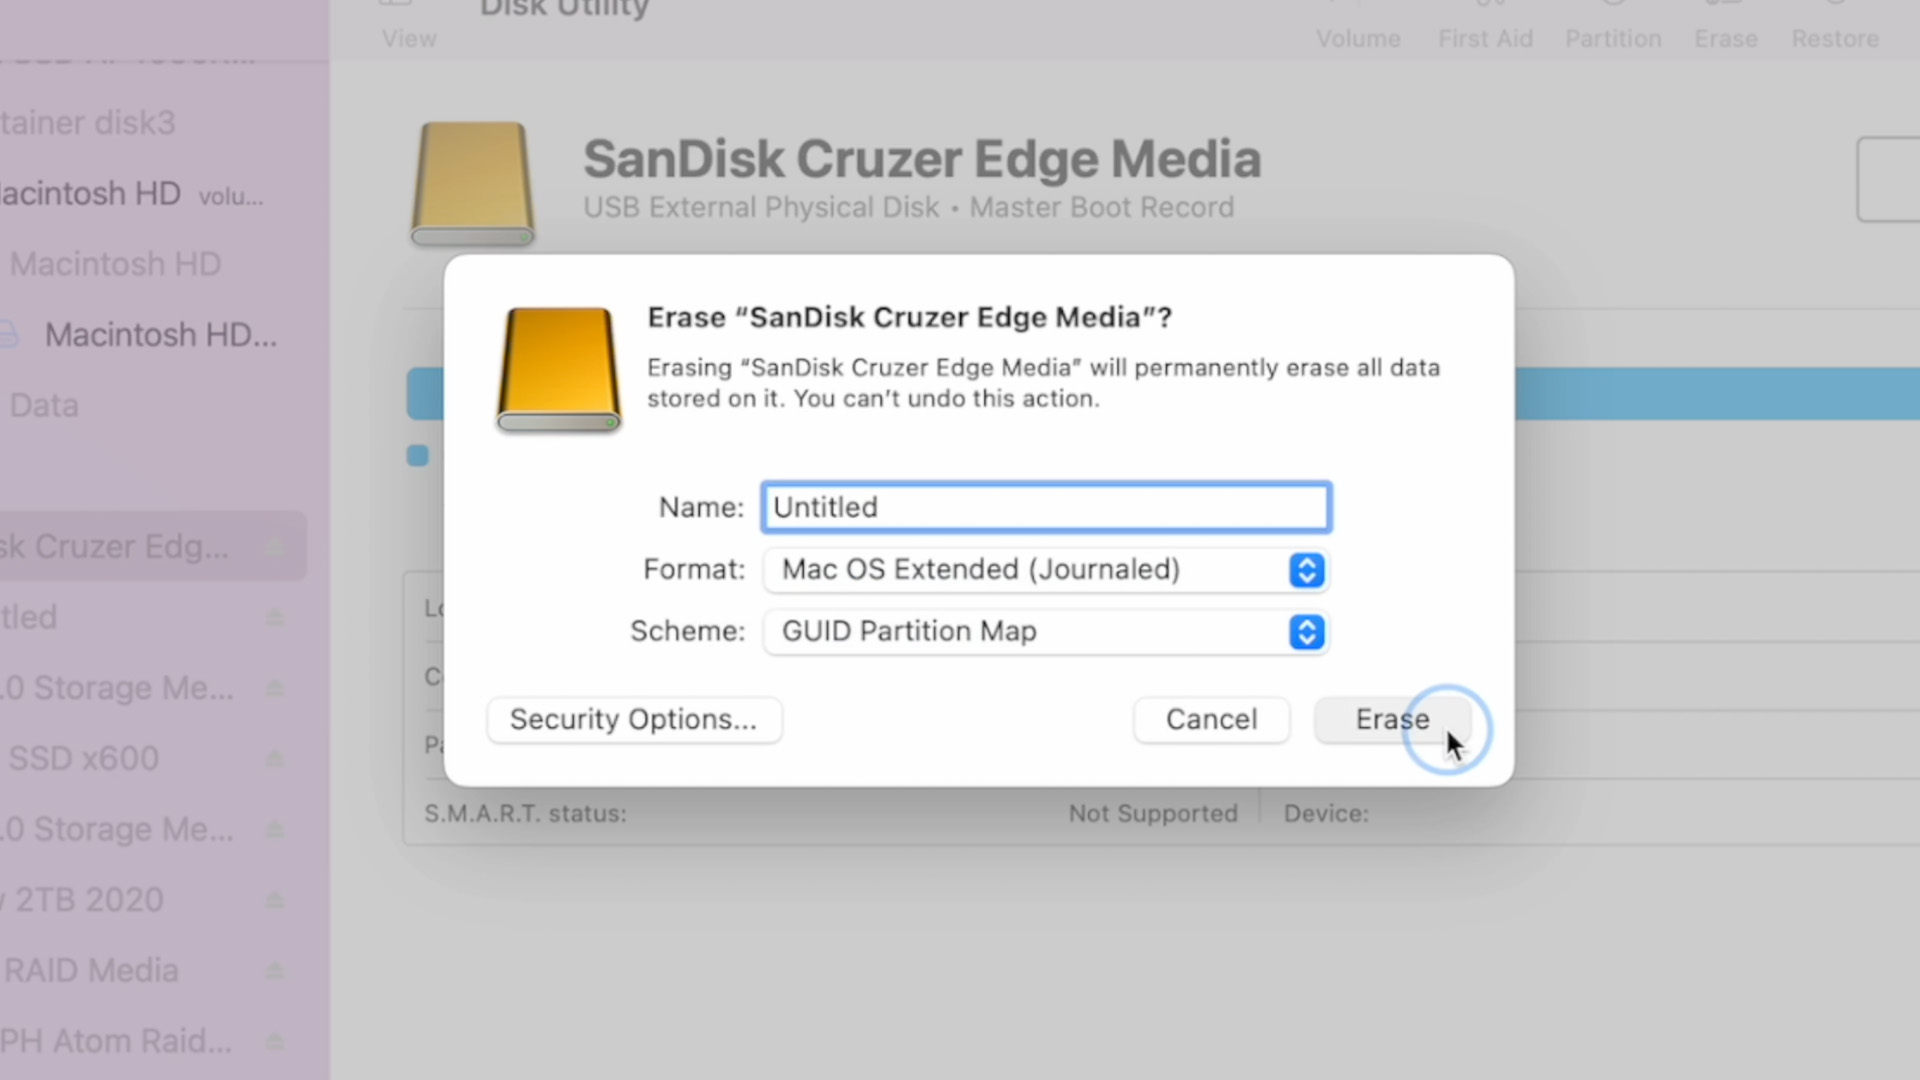
Because I'm a consistent Mac user, the format I'm going to go with the Mac OS Extended. The Scheme option is going to be GUID Partition Map and click on Erase. Now, what we did is we formatted this SD card. It might take you 5-10 seconds. Just be patient with it.
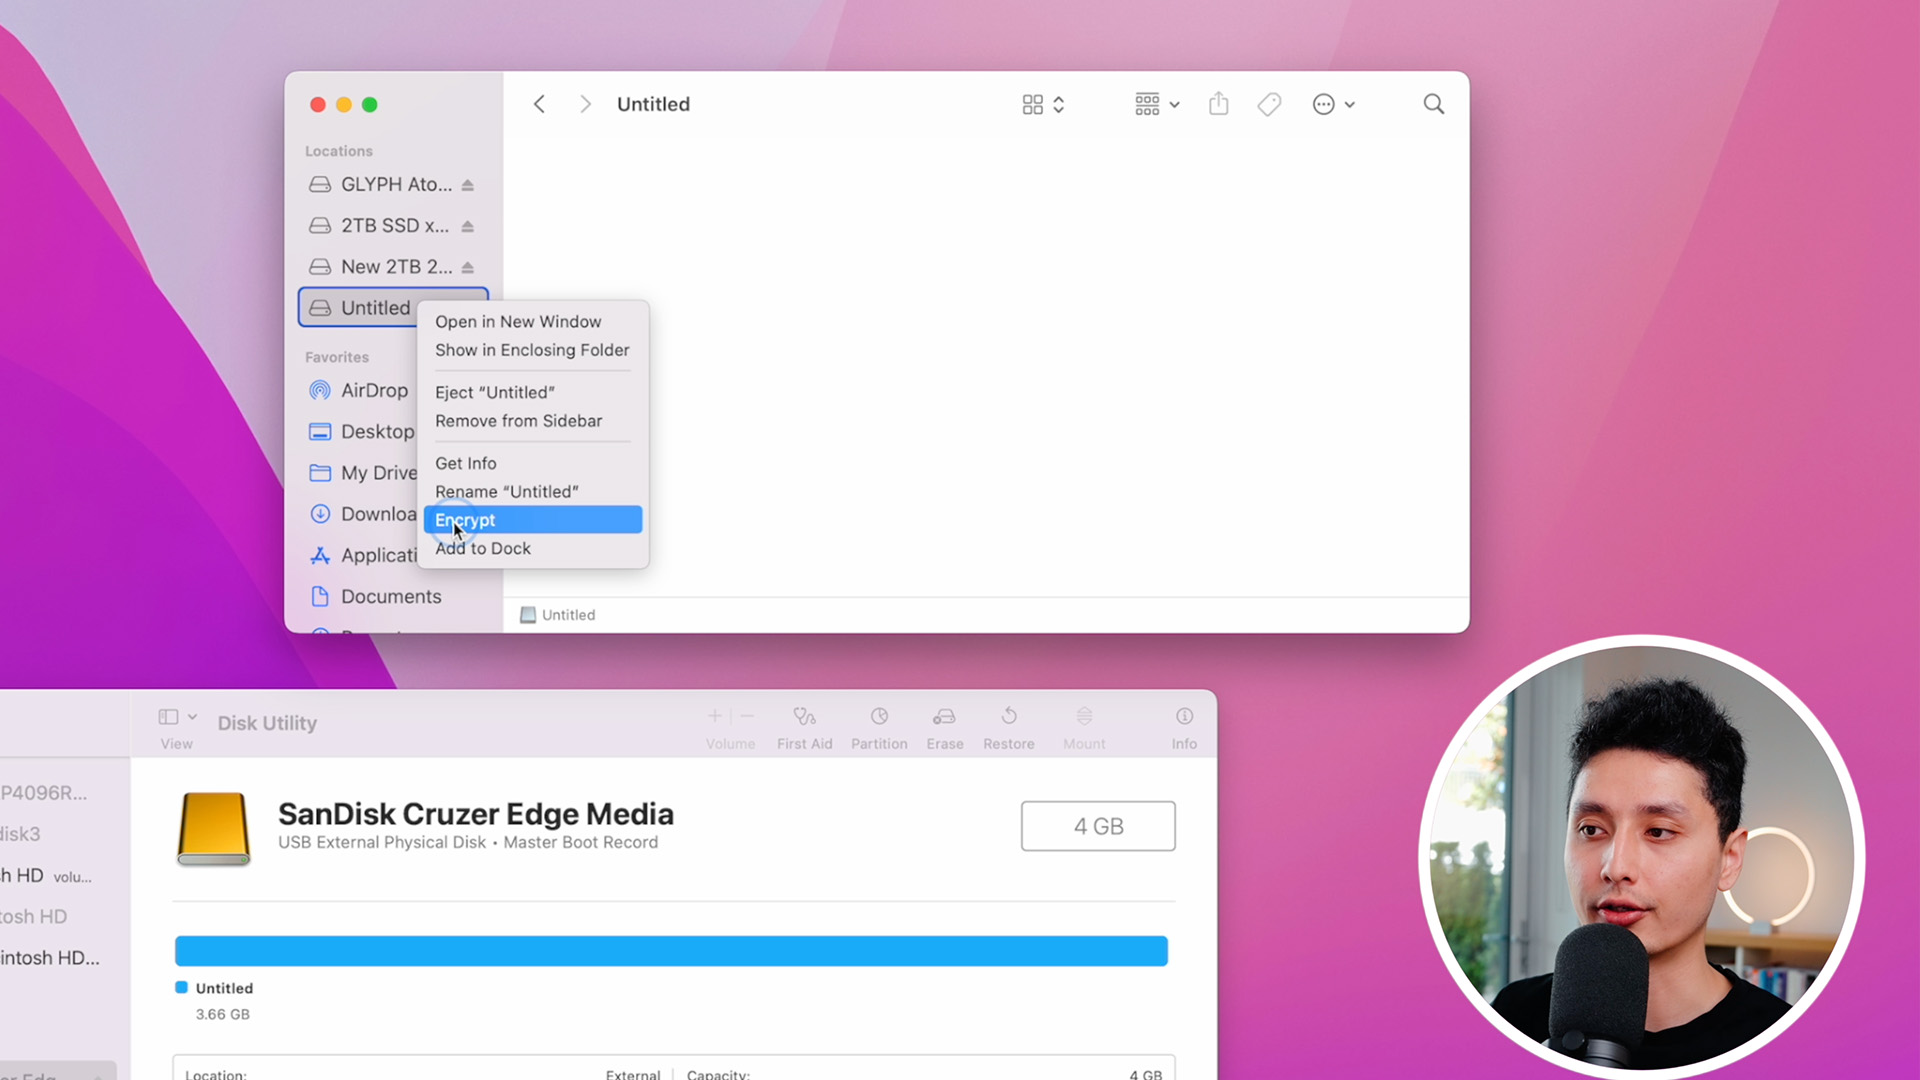
Once you're done with it. You will see it on your Finder Menu bar. You want to right click on this newly formatted USB thumb drive and you want to click on Encrypt option here. Now, you want to enter a password and you want to verify a password.
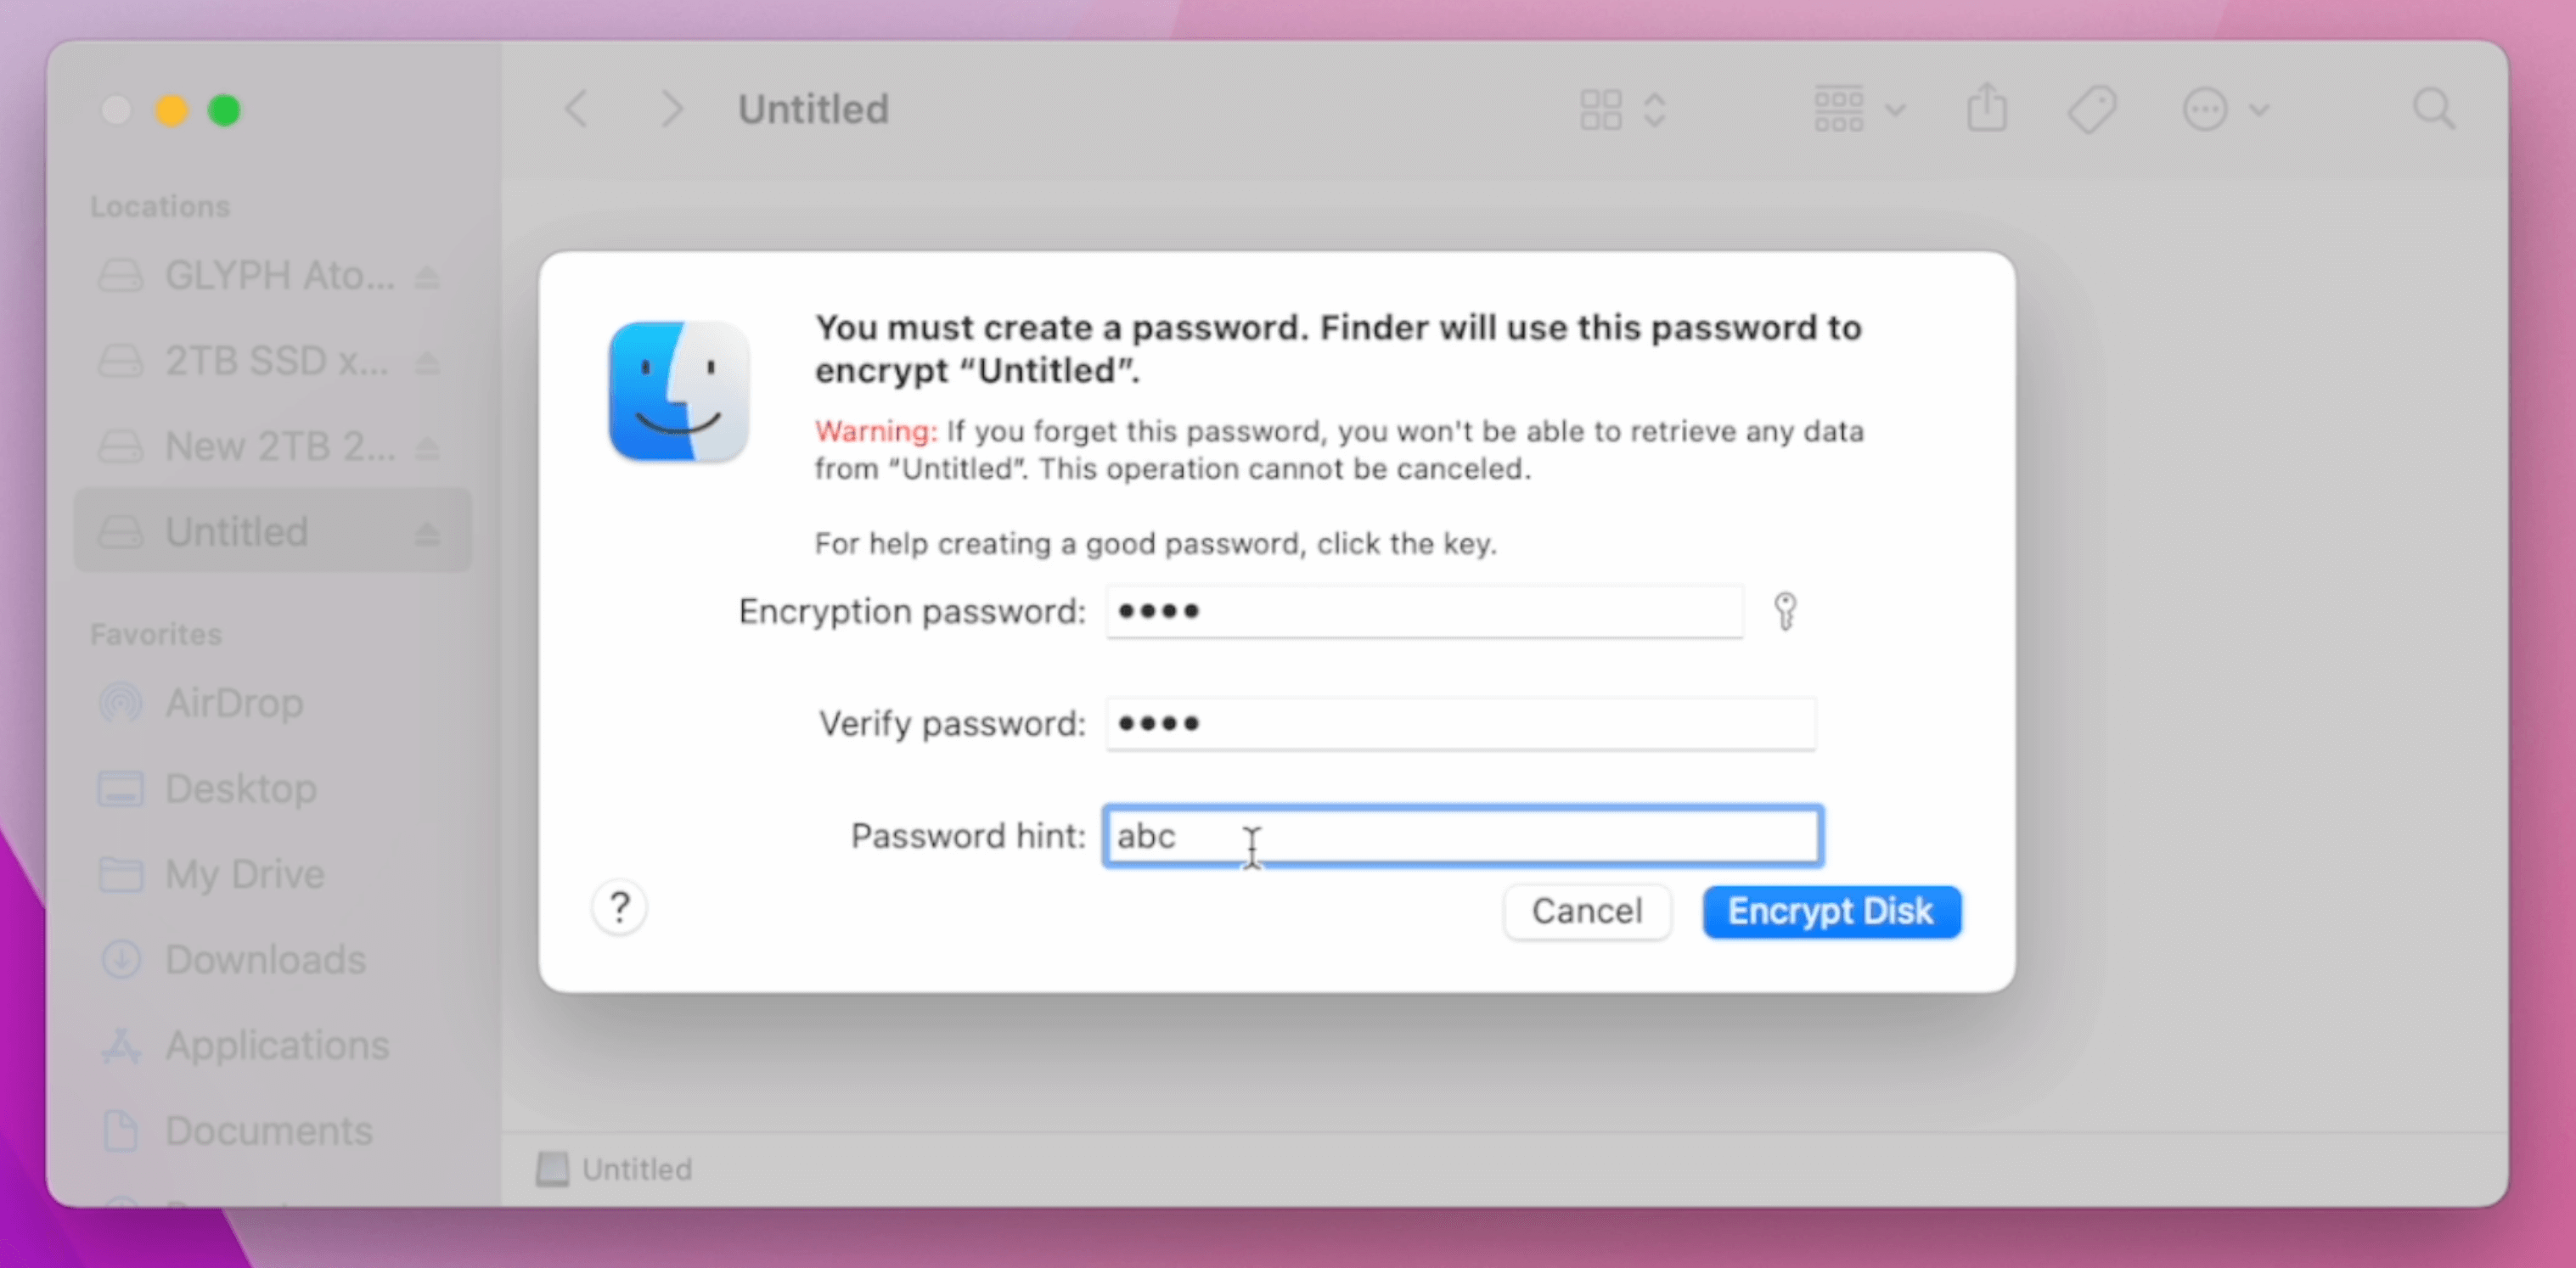
Make sure the password you enter is something more complex, not too simple, not like 1234, 2224, etc. Just make it a little bit more complex and the password hint is required. Make sure you leave it a hint. So two years down the road, if you plug this in, if you completely forgot the password by looking at the hint, you can always remember what the password is. Once you're done with that, I'm going to click on Encrypt disk.
So now this entire disk has been encrypted. Just to show you guys how it works, I'm going to eject this USB right now, then I'm going to unplug it from my Mac and I'm going to plug it back in. Once you plug it back in the first option including the password. That is the password. I said earlier again, make sure it's complex, not too simple.

Store QR Code on Encrypted USB Drive
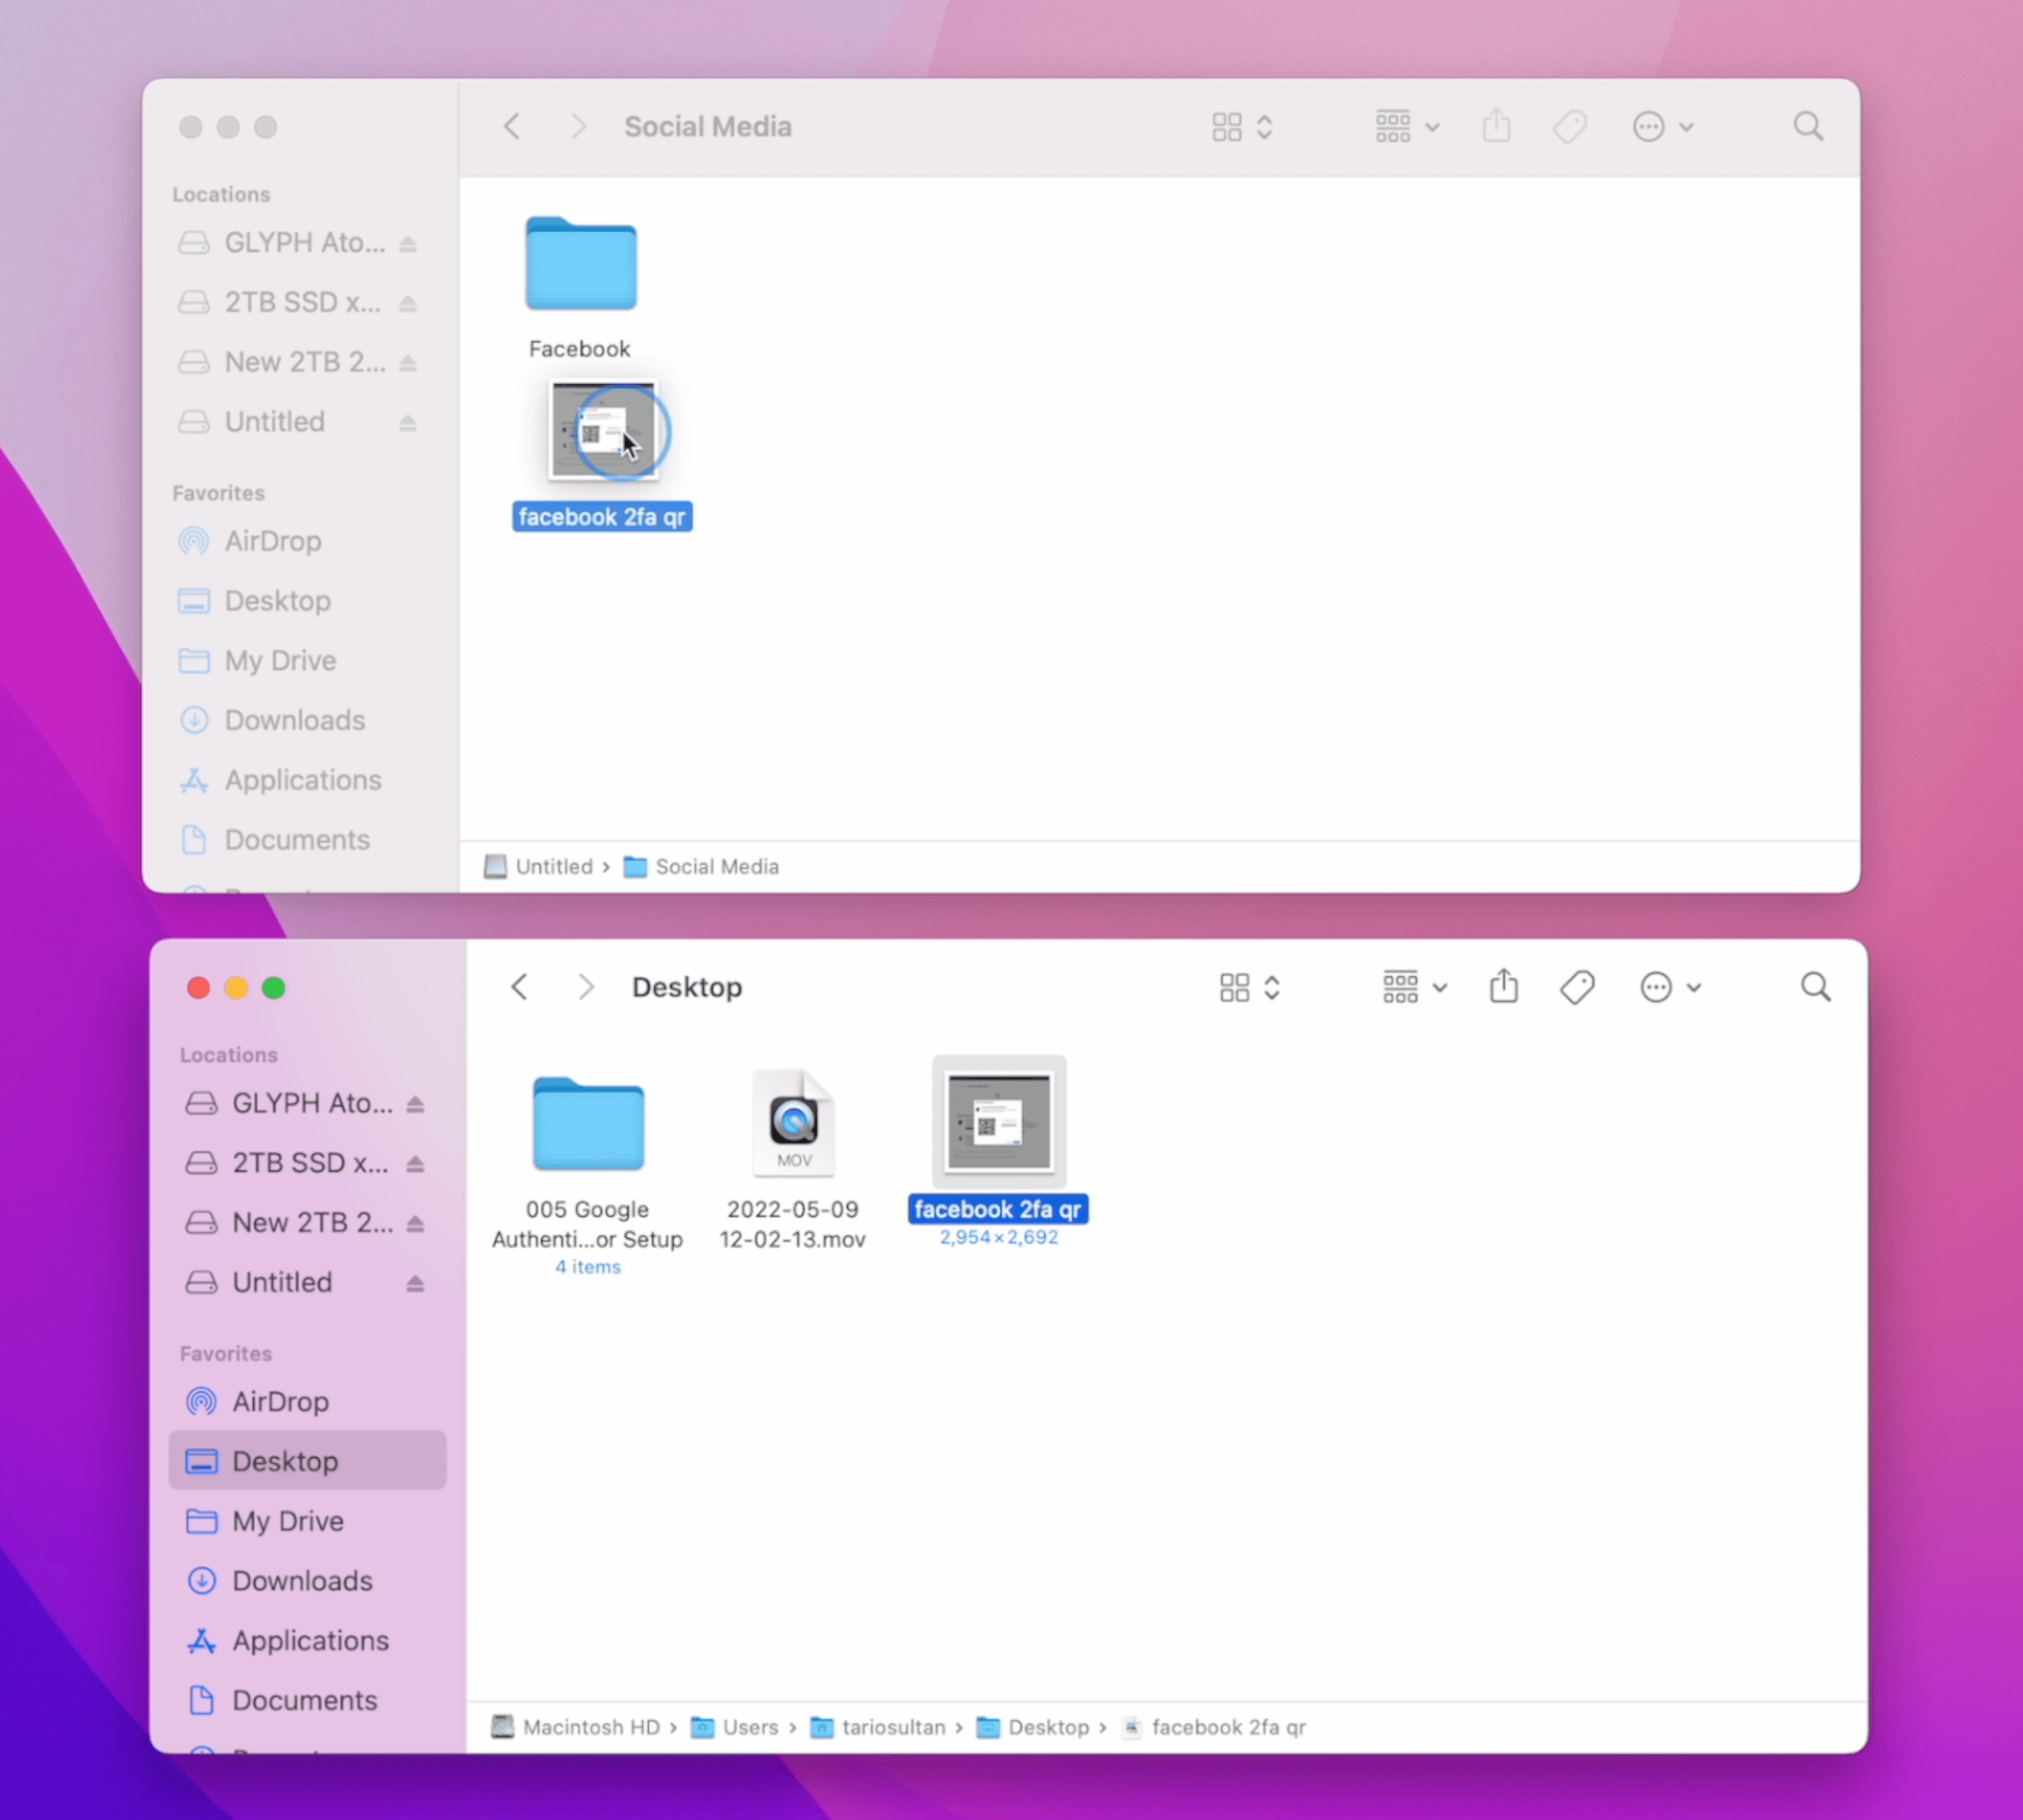
Once you enter the correct password then you are able to come into this thumb drive. And remember earlier we had a screenshot on the QR code. What you want to do first is I'm going to rename this file. So I renamed this file Facebook 2FA QR and now come back to the thumb drive. You could just throw this in here, but I personally recommend to have a little bit of file management or organization.
So what I'm going to do here is creating a folder name it "social media", which is a category of the platform. If I double click on it, I'm going to create one more folder to call it "Facebook", by holding on command, drag and drop into this folder, that will do a cut and paste. And now the file from your desktop is gone from your computer.
It's stored on this thumb drive. And now you can eject this thumb drive and put it somewhere SAFE!
One of the most important tips I can give you is don't rely on one thumb drive. Always have a two to three around and store them in different locations. If you store this thumb drive at your home, probably leave another thumb drive at your parents or a different location in case if one of them gets really corrupted you can't open it.
You can always go locate to the second thumb drive or the third thumb drive. And now moving on forward. In the future, if you happen to lose your phone again, you don't have to panic or worry because even though all the authentication code is stored on software on this phone, you can always locate the QR code that's stored and encrypted in this thumb drive with a password and only you have access to the thumb drive and open the QR code. Use the Google Authenticator app to re-scan the code to deploy them on your new device.
Bonus Tip
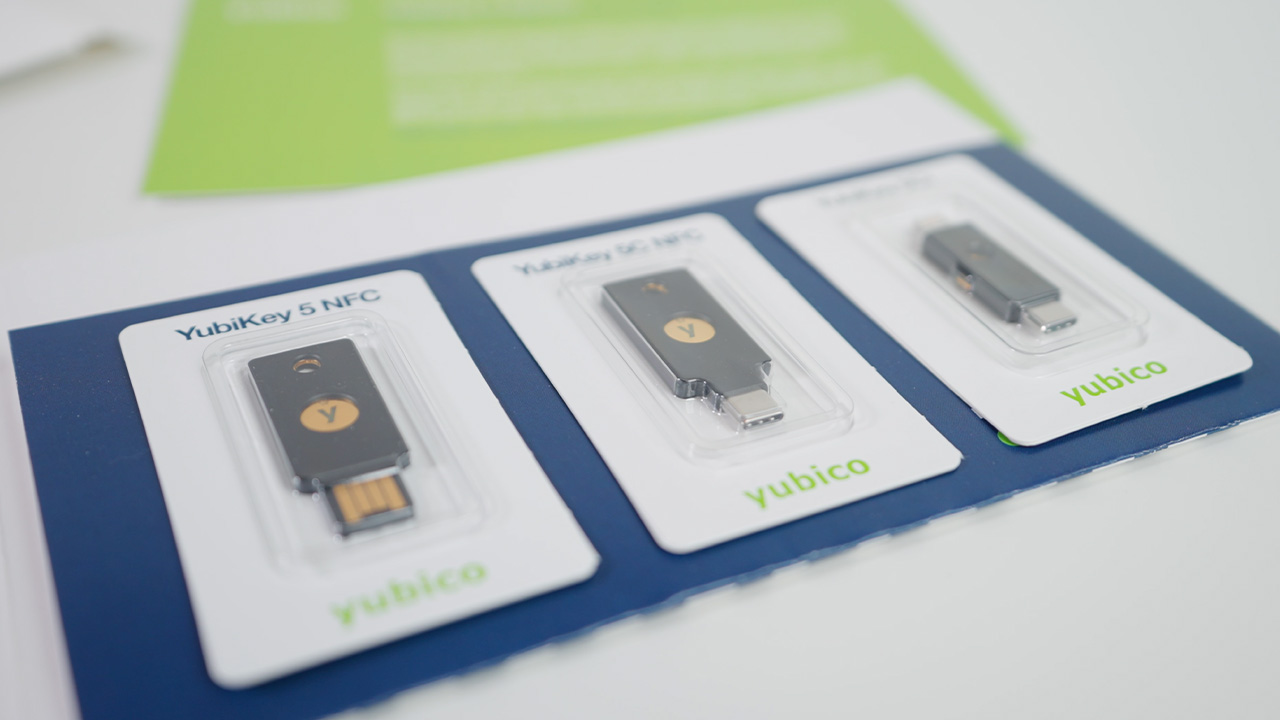
And now I want to show you guys one last option which is my favorite option to have all the two FA or authentication codes stored on hardware device which is by something called a Yubikey by a company called Yubico. I have a full tutorial on this on how to set it up. The benefit of having these UBike is all the two FA authentication codes are stored on this physical device. It's not based on a software like Google Authenticator. So what that means is I can grab any of my iPhone and iPad or Mac.
Checkout my blog post: Yubikey - The Ultimate Beginner Guide (How To Setup & Use)
I can use this key to locate to see all my codes in case one of them is gone. I have a second one as a backup. If the second one is gone, I have a third one here as another backup. In this case I always have access to my two factor authentication code if I lose my phone I don't have to worry about it because the two FA codes are on this. As long as I still have this hardware device I can easily access to all my authentication code.
Final Thoughts
So moving on forward I want you guys to take Google authentication seriously because a lot of hacking scenarios can totally be eliminated by having Google authentication set up. If you give the hacker your password and your email they still won't be able to log into the platform without entering the correct authentication code.
Currently a lot of platforms do support Google authentication so this is going to be your bare minimum the base security line on top of your regular password. Hope you guys enjoy this blog post.
All the best!
Cheers!
More from
Tutorial
category


.png)

