


ver since I switched to Mac over ten years ago, I've picked up so many useful tips and tricks along the way that helped me to live a super productive life. In this video, I'm going to share with you my top 25 tips and tricks that every Mac that user should know about so you can get more done in less time.
If you're here for the first time, my name is Tario. On this blog, we explore all things related to tech, crypto and productivity so you can live a more fulfilling life. Here's my.
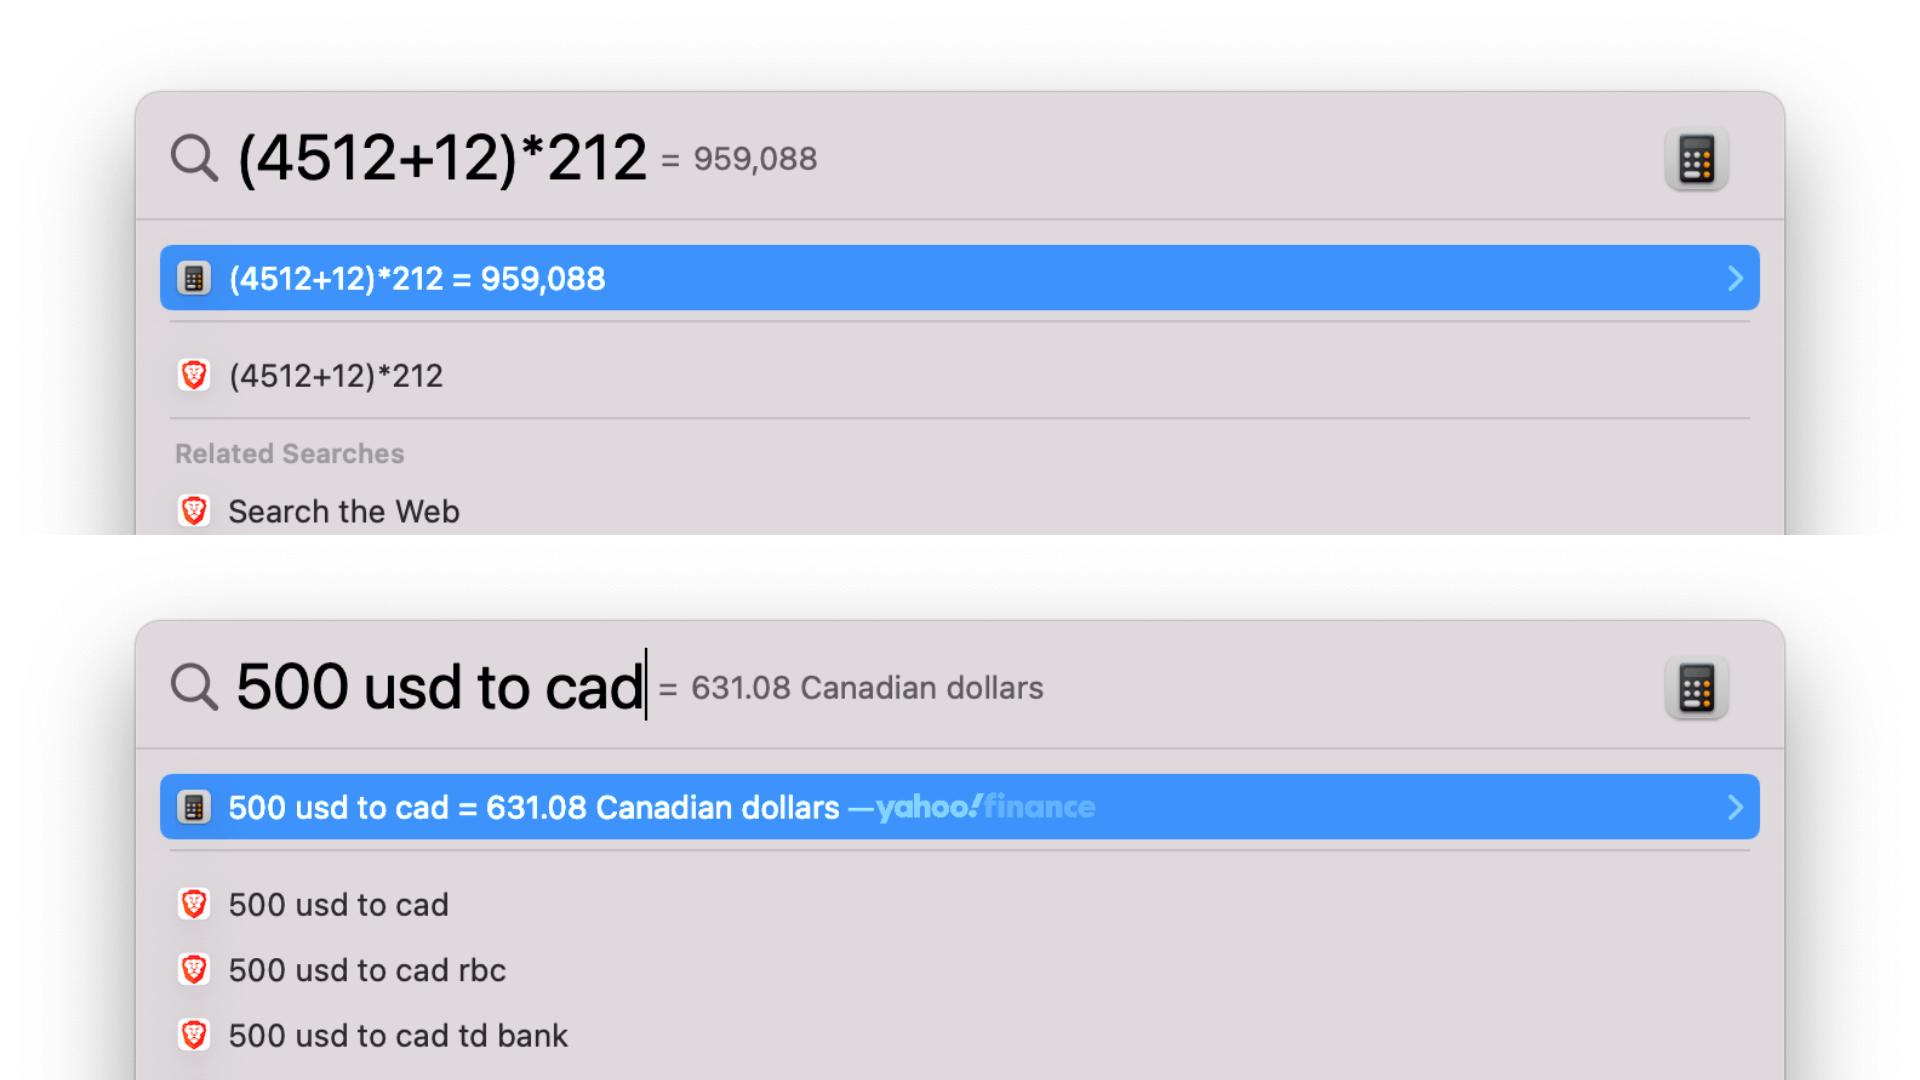
1. Spotlight = Calculator & Currency Converter
Tip number one. When you click on [CMD + Space], you're going to bring up something called a Sportlight search bar and you can use this for basic searching your files and folders. However, you can also use this as a calculator so you can actually save time. Just do your mathematical formula inside of the search bar. THE second thing, what you can also do with it is the currency conversion, so you can actually do it inside the Spotlight Search pulling data straight from Yahoo Finance.
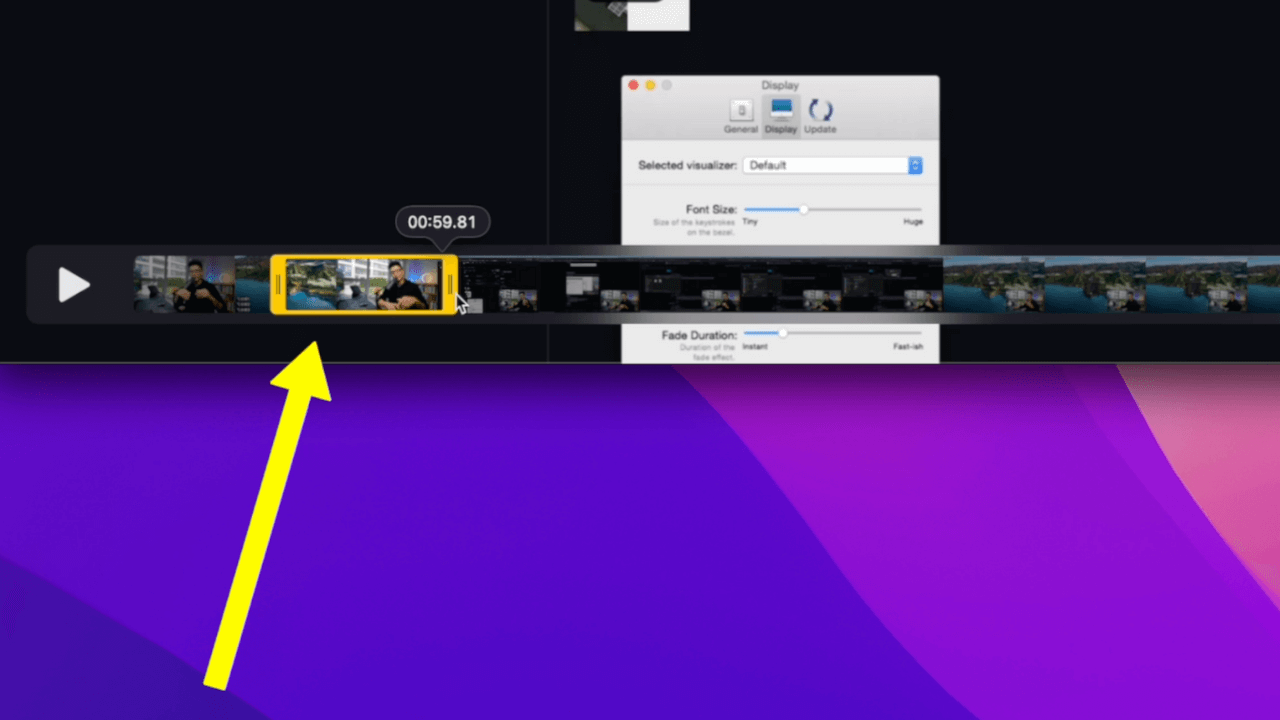
2. Trim Clips with QuickTime Player
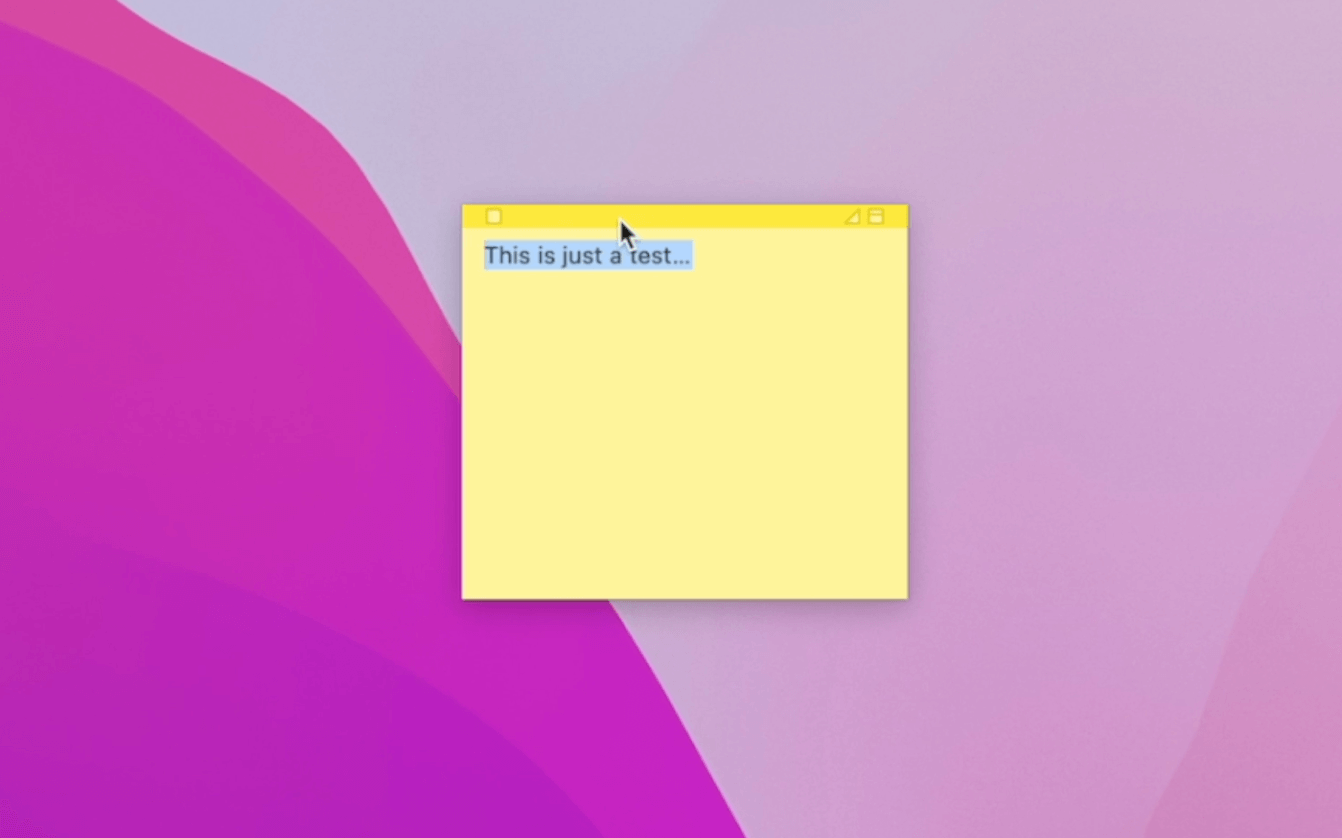
The default video player on Mac is called QuickTime Player, and sometimes if you want to trim a clip, what you can do is you can open a clip, click on [CMD + T]. You're going to bring up a yellow bar at the bottom of the clip, choose a certain part of the clip you want to trim and click on trim and this will trim it to that specific region and just click on [Command + W] When you close it, it will ask you, do you want to save this specific file. Let's just do this test file and save it to my desktop.
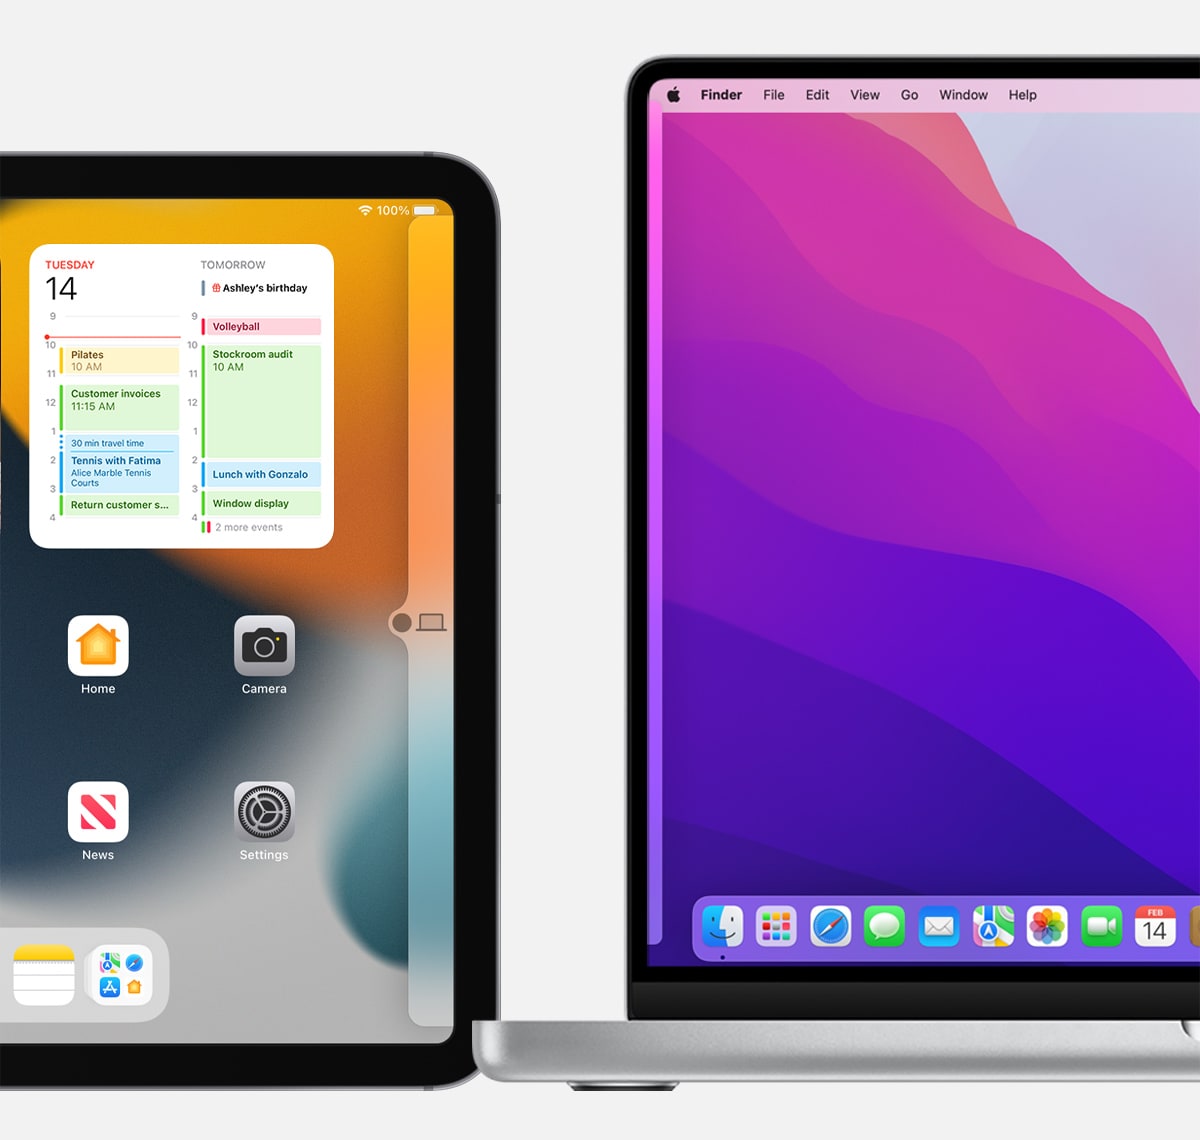
3. Universal Control
This is going to be one of my favorite tips and tricks for this year because Mac recently released a new feature. It's called Universal Control.
If you have any iPad laying around, come to System Preferences and click on Display at the bottom. You're going to see Universal Control. When you click on this, I turned on the third option, which will automatically connect my iPad with my Mac. The cool part is I can move my mouse straight into my iPad and I can control my iPad this way. It reduces the number of keyboards you have on your desk, which is a really cool feature and I really enjoyed it so far.
4. Recover Closed Browser Tab
This trick works with all types of browsers. Sometimes when you accidentally close a browser, you want to bring it back. The key command for it is [CMD + Shift + T]. It will bring back the previously closed window so you don't have to go through the History and Find tab you just opened inside of a browser. When you want to create a new tab, you can click on [CMD + T] so it will bring up a new tab or Command n that will bring up the new browser window. Same thing you can apply to your Finder or folder. So when you choose one of the folders, if you click on [CMD + T], you can create more tabs on top or you can press [CMD + N] to bring up a new window instead of a new tab.
5. Increase Mouse Speed with Terminal
In order to be more productive, you need to reduce the time spent on repeated tasks. For example, if you want to move your mouse from one corner of your screen to the other corner of your screen, if your tracking speed is really low, it will really take you a very long time to get to the other corner.
Come to System Preferences , click on Mouse or Trackpad. Depends on which one you want to boost the speed, when I maxed out my tracking speed, I still feel a little bit slow. Here is a trick to bypass the limitation Apple set on the max tracking speed by default. So the first thing you want to do is press [CMD + Space] and you want to bring out the search bar and type Terminal.
Click on Enter and you want to bring out the terminal. In below, you're going to see a few lines of codes. I'm going to paste the first code here. Click on Enter.
Copy paste this code in terminal to check system mouse tracking speed max:
defaults read -g com.apple.mouse.scaling
Copy paste this code in terminal to modify MAX tracking speed:
defaults write -g com.apple.mouse.scaling 6.0
(*Feel free to modify the "6.0" yourself to your liking)
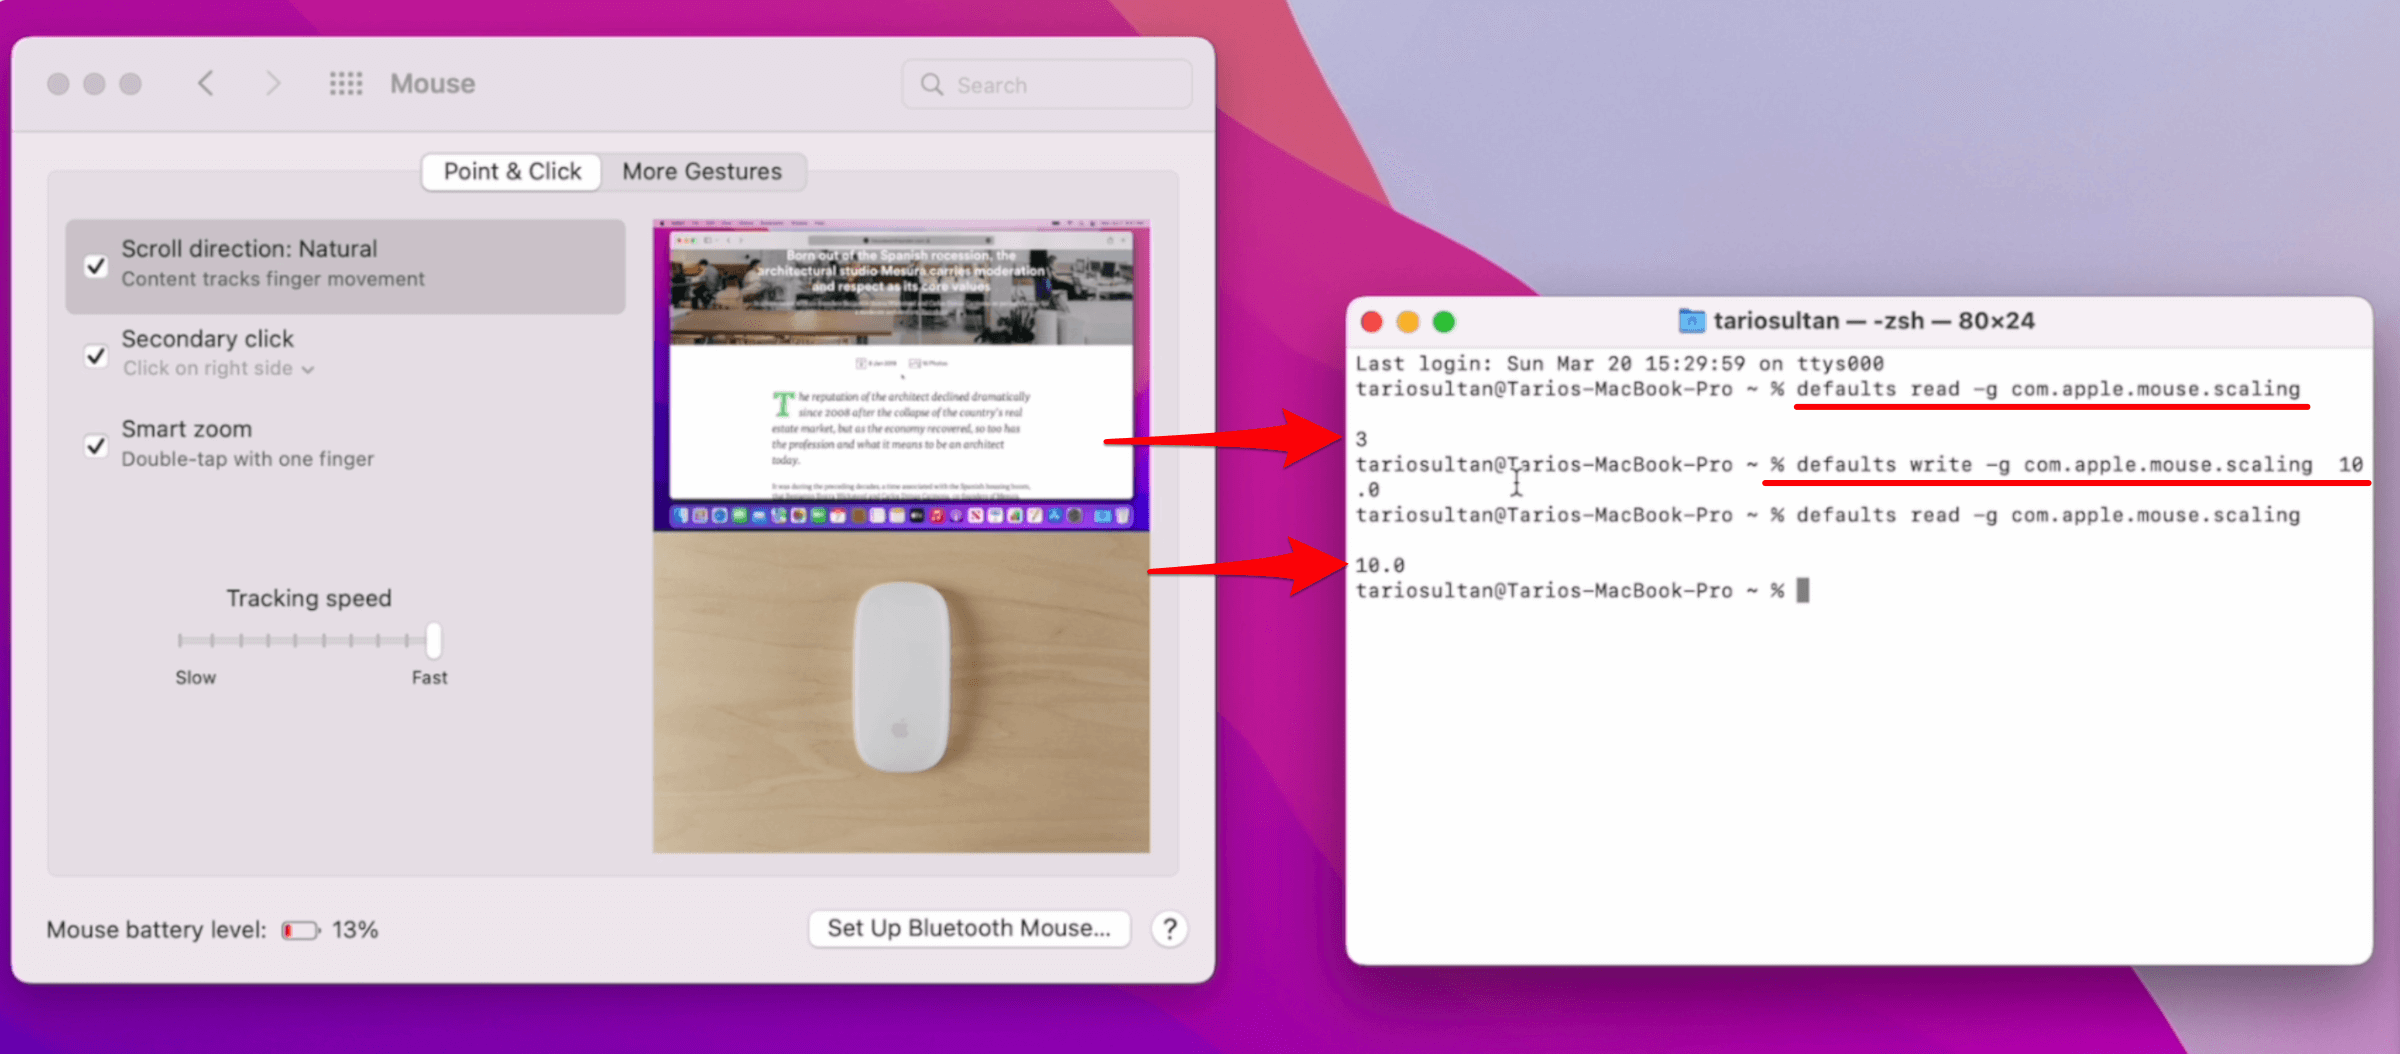
The default mouse tracking speed by Apple is 3.0. What we want to do is to copy the second code below. Due to my large monitor, I set my tracking speed to 10.0 (I recommend between 5.0-7.0 depends on your preference) and click on Enter. This way my tracking speed is way faster. Right before we close the terminal, I just want to pace the first code to read the default and click on Enter.
You can see here the default right now is set to 10.0 instead of 3.0. It might take you a day or two just to get used to it. Once you get used to it, it will really speed up the tracking speed and get more done in less time.
6. Emoji Keyboard on Mac
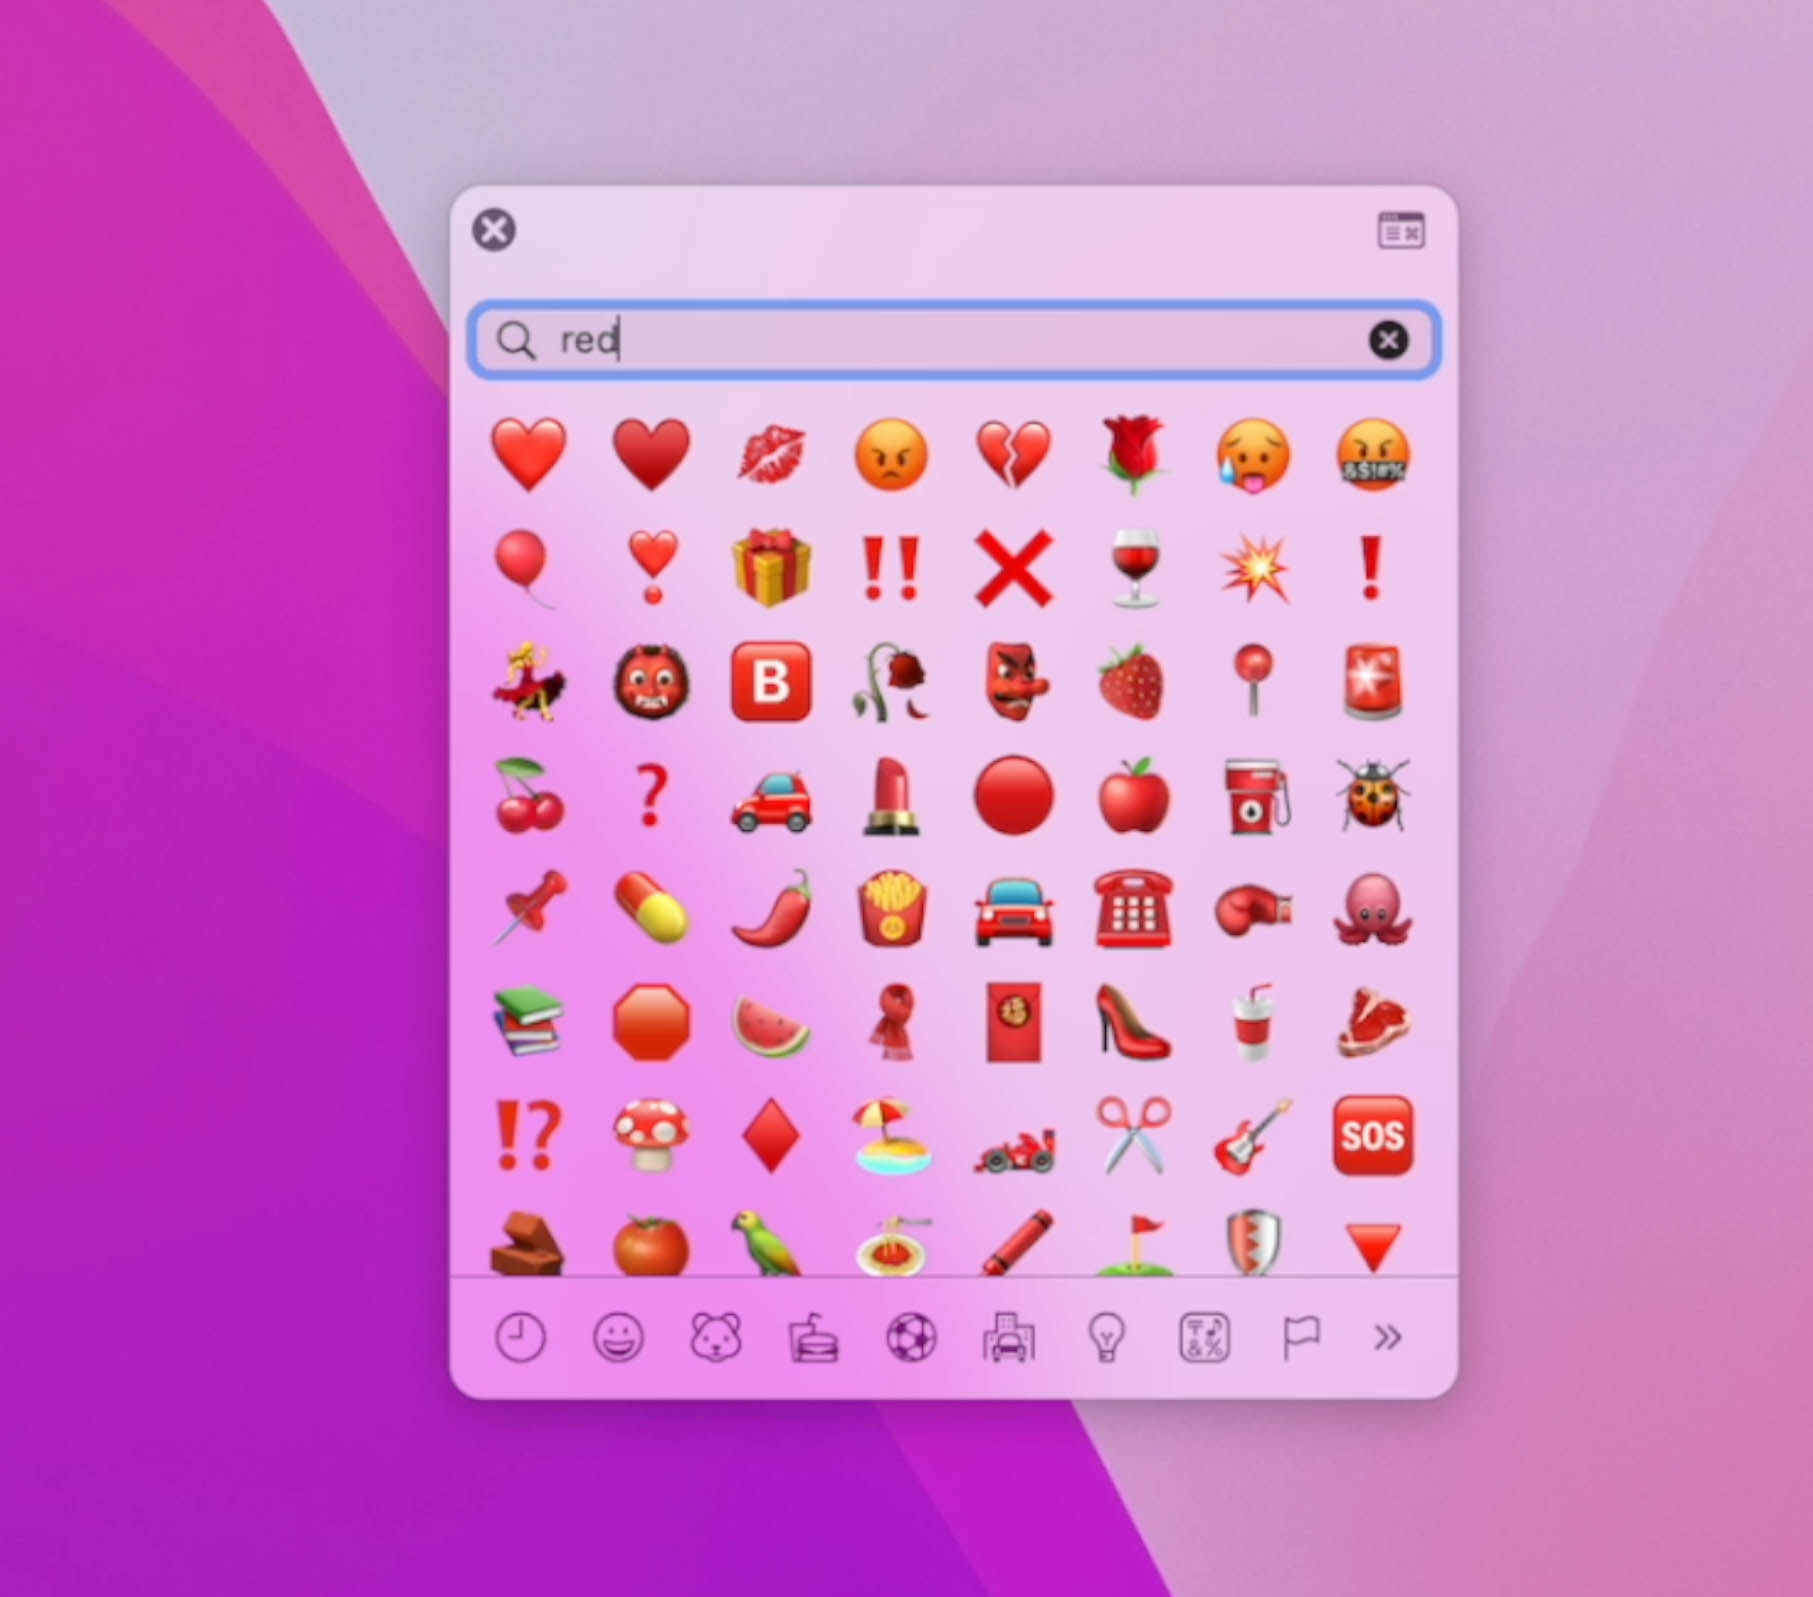
I'm sure a lot of you know how to bring out the emoji keyboard. On Mac, the shortcut for it is [Control + CMD + Space].
Anywhere you want to type in emoji, you can bring out the keyboard. This way you can also search certain terms such as red. You'll show you all the red emoji. So this way you can search up your emoji fast and insert it into your text.
7. FREE Window Management App (Spectacle)
To be productive on Mac, you need to have a window management system.
For example, it takes less than a couple of seconds where I can actually bring out another window and put it onto the top right corner. So this app is called the Spectacle. It's basically window management (splitter) plugin that you can download for free.
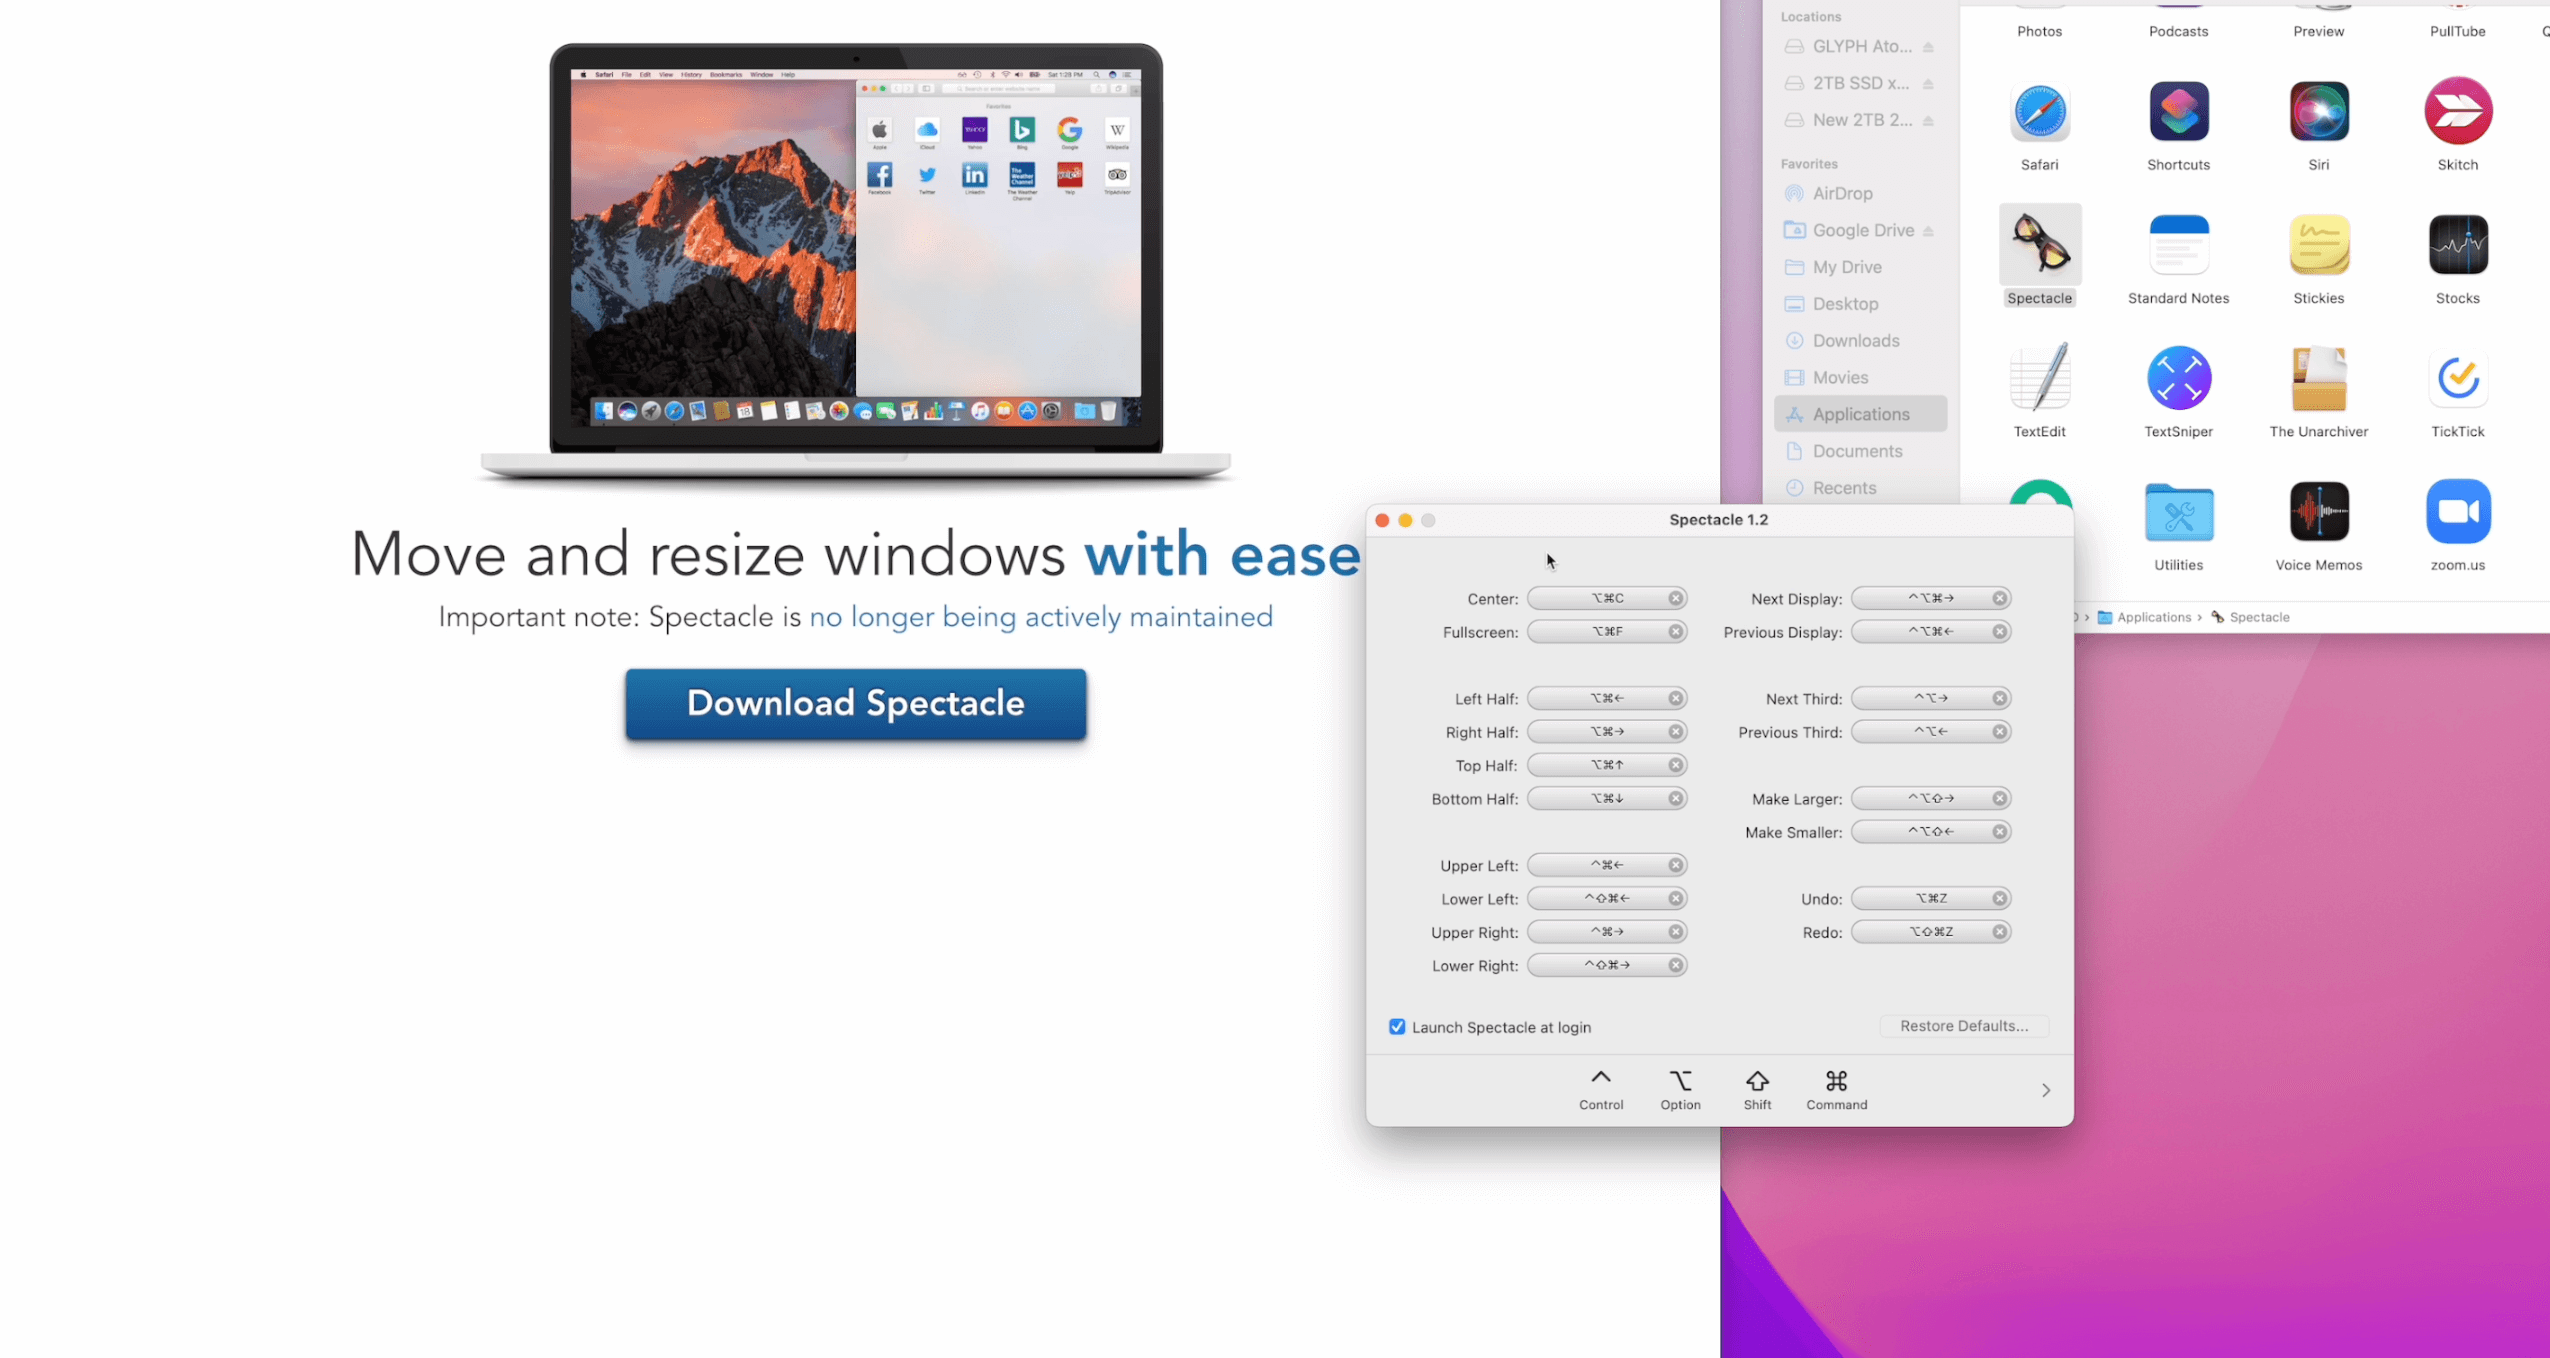
When you open it, you can set certain key commands yourself. I do recommend that first time. It might be a little hard to learn these. Once you learn it, you're going to be really good at opening a new window. Quickly split it into however you want.
8. Extract Text from Images (TextSniper)
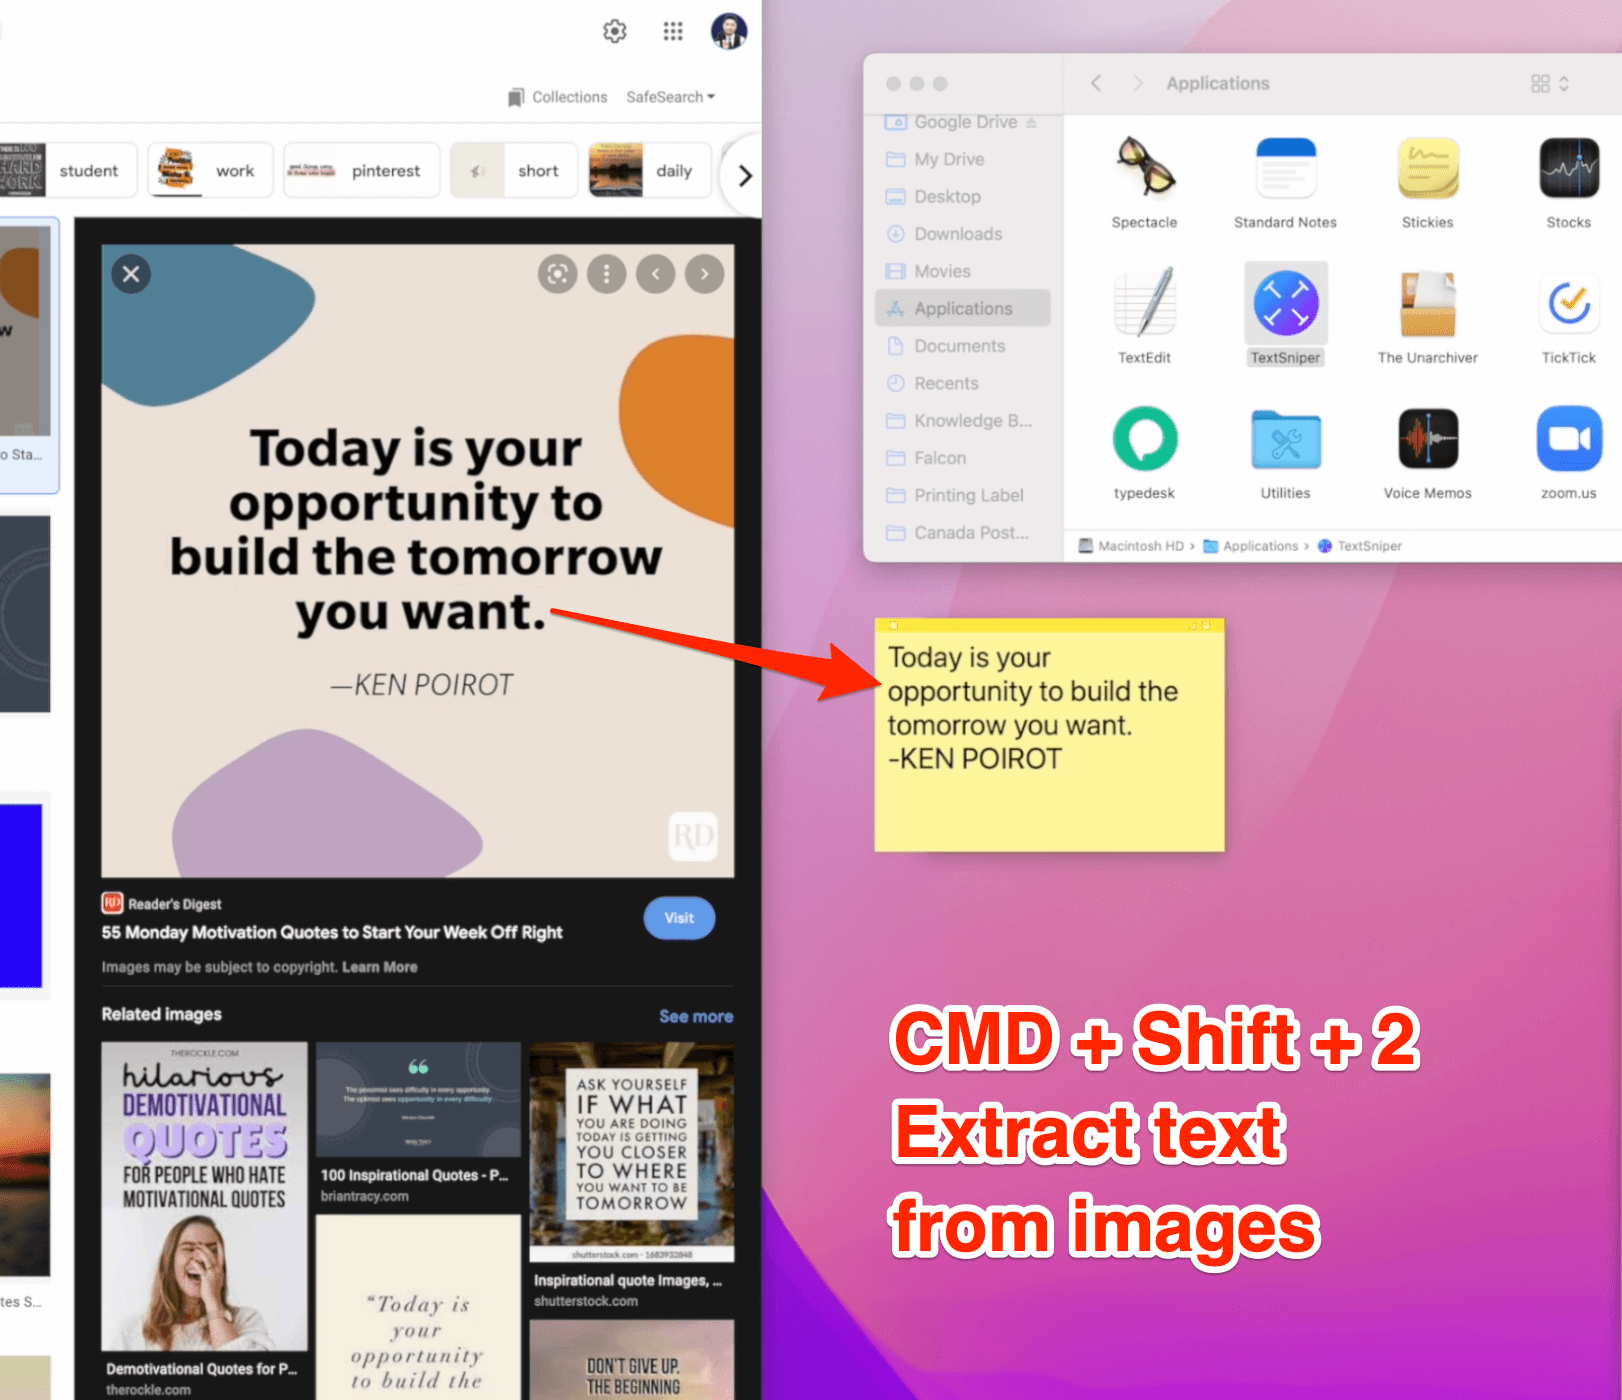
This tip is another small plugin called a TextSniper. When it's running in the background. What you can do with it is sometimes when you're scrolling on the internet and you see a photo that has tax information. So what you can do with this app is click on [CMD + Shift + 2] to select the region you want to extract text from. I just took a snapshot, but it's not on a photo, it's the text I took a screenshot of.
So this way I don't have to look at the picture or the photo and type the words and I can quickly grab that information this way and I can quickly adjust the format and it will save you a whole bunch of time. This way.
9. Screenshot with Drop Shadow
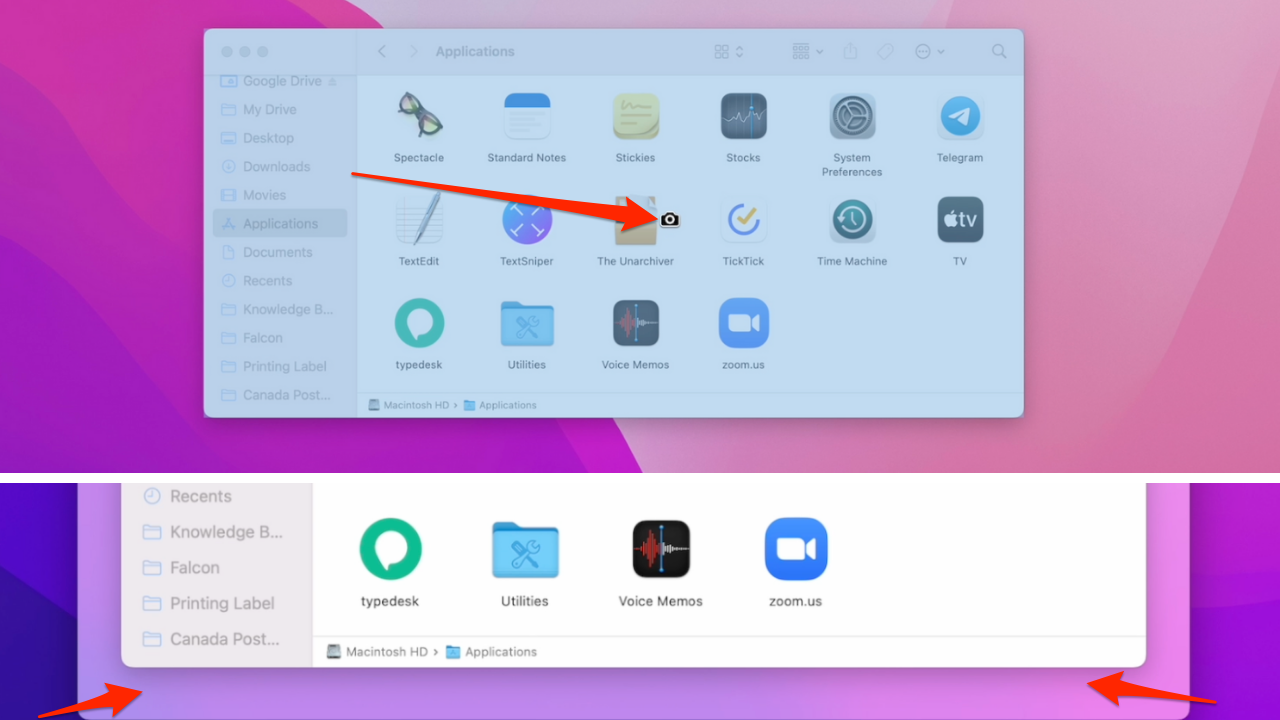
Tip number nine for those who don't know if you hold on Command shift and three, you can take an entire screenshot of your desktop or you can do [CMD + Shift+4] to take a screenshot. However, another cool part is when you do Command shift four and you want to press SPACE once. This way you can take a photo of a certain element on your desktop.
I just took a photo of this folder and the cool part of it is Apple will actually add a little bit shadow to this entire screenshot so it looks much nicer.
10. Cleanup Your Sidebar
Next tip, open your Finder, go to the top left corner, click on File - Preferences or [CMD + ,] for short cut. You want to come to sidebars and you want to keep your sidebars nice and clean. When you just set up your Mac, there's lots of unwanted items, so this way you can check them or Uncheck them to hide them on your Sidebar. Under the same preference.

You can come to general actually check and Uncheck certain things to show on your desktop, and also you can modify when you open a new window in Finder, it's automatically Loading specific folder you set it to.
11. Stick Note Taking App
This next trick is a native app by Apple called a sticky, so you can click on [CMD + SPACE] and search for stickies. Sometimes if you are on a call and you want to quickly draw some notes and you don't have a pen lying around by having this sticky, it's actually pretty handy. Once you draw down your note, you can double click on top until collapse the sticky note and you can drag it around to put it in different positions. And you can also adjust the width as you want and you can click on [CMD + PLUG] and [CMD + MINUS] to increase and decrease the font size.
12. Copy Paste Without Style/Attribute
Sometimes if you want to copy-paste certain elements from a website like this. When you do copy paste [CMD + C] If you come back to your document click on command v to paste it there and you can see here not only I copied the information, I also copied the style of the original content. If you want to avoid the style of the text, what you can do is come to your document still copy and you want to press [CMD + SHIFT + V]. This way you can paste the value of the text, not the attribute or the style.
13. Batch File Rename
This will save you a whole bunch of time. If you have a large batch of files, photos or videos, you want to rename them properly. So look at what I do here. Select the file command or you can select everything in your folder and you want to right-click and something called rename. I can replace certain text.
Let's try that. I'm going to replace how to lessen and click on Rename all my house went to lessons and then click on [CMD + Z] so you can recover what you just did and right-click. Let's go back to rename and here we have two more options which is add text or we want to format. So in this case what I like to do is add certain text. All the videos shot in this video is 1080p.

I want to put it in the front of the name and click on a space. Just make sure that is there and click on rename in batch. Added 1080p into my files so this is really handy again if you want to rename batches of files at once.
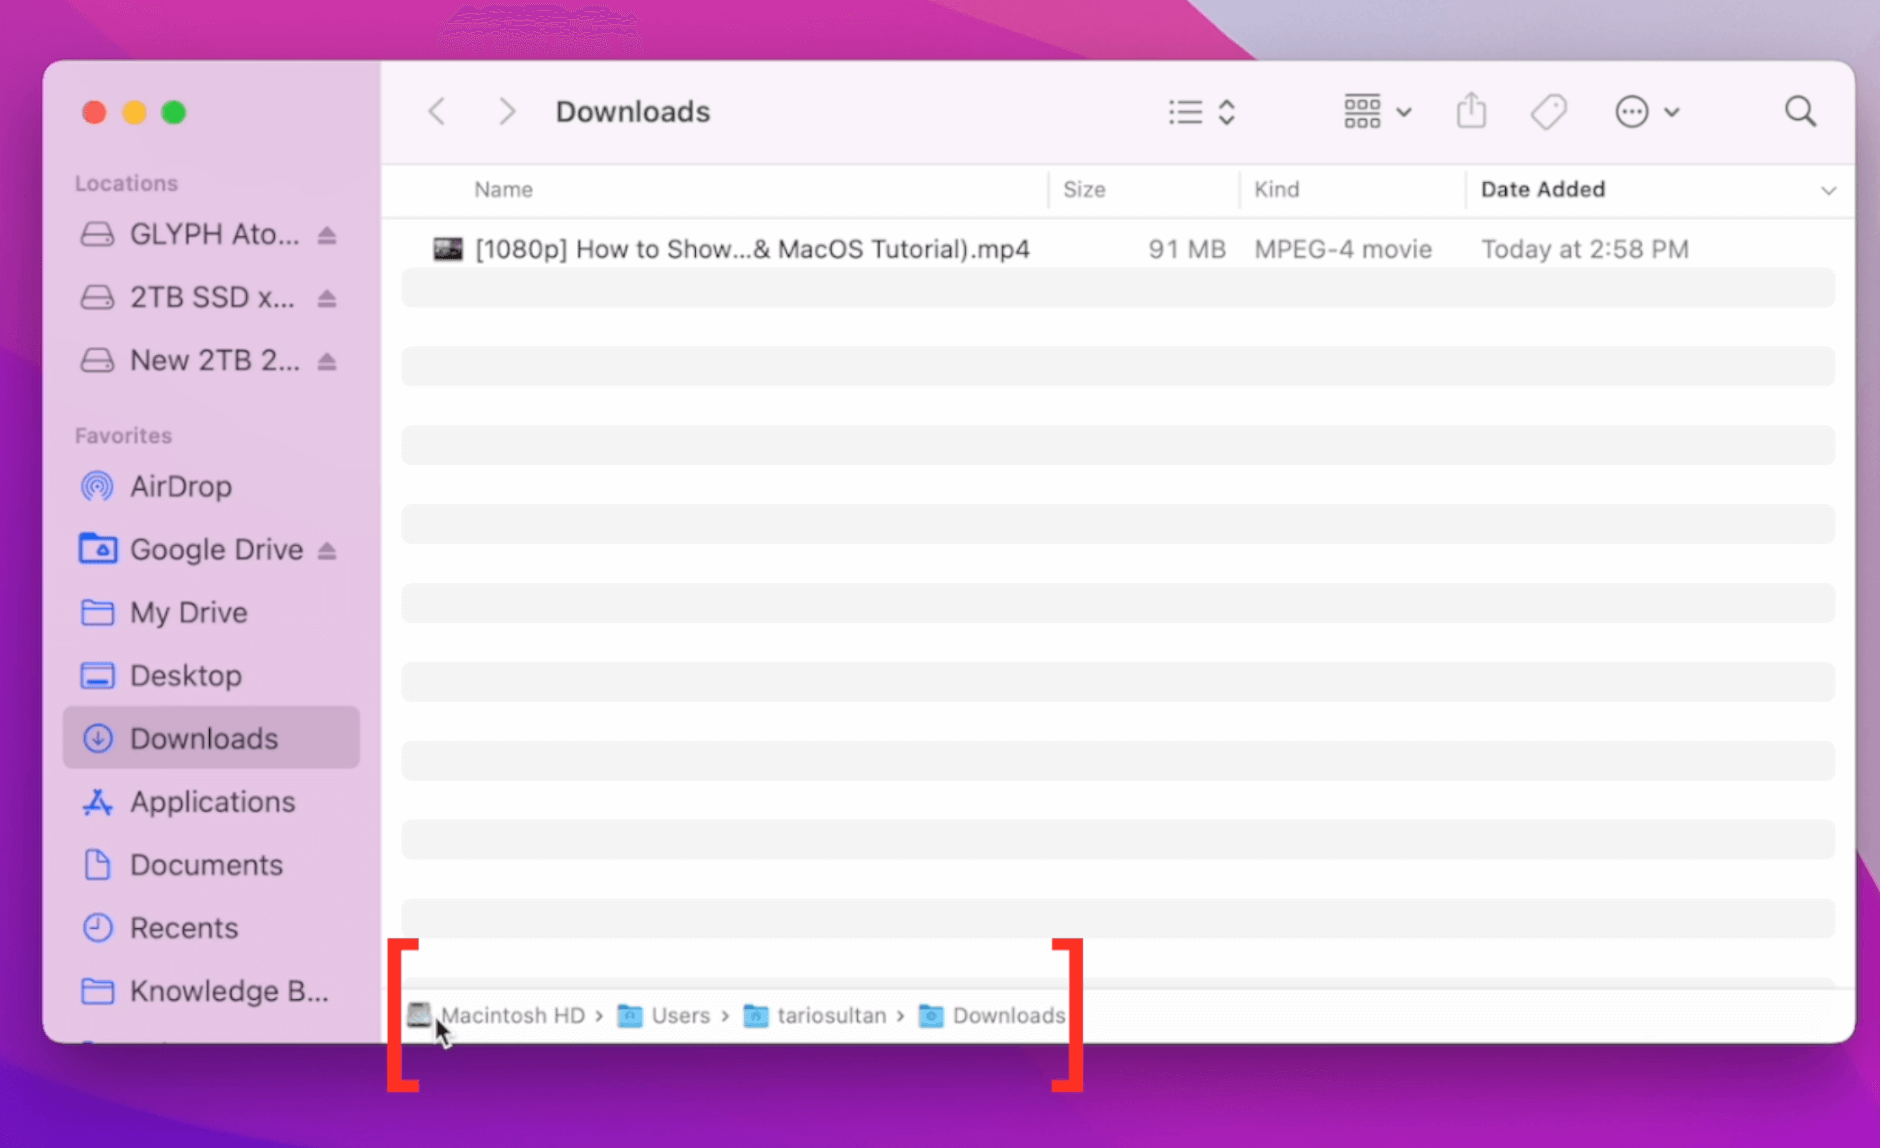
14. Finder Show Path Bar
When you open a new folder and come to the top view you're going to see this option says Show Path bar. When you click on it it will basically show you the path you are at in your entire Mac system.
So this way you can quickly navigate around into the previous folder or just knowing what path you are at the current moment.
15. Hot Corners
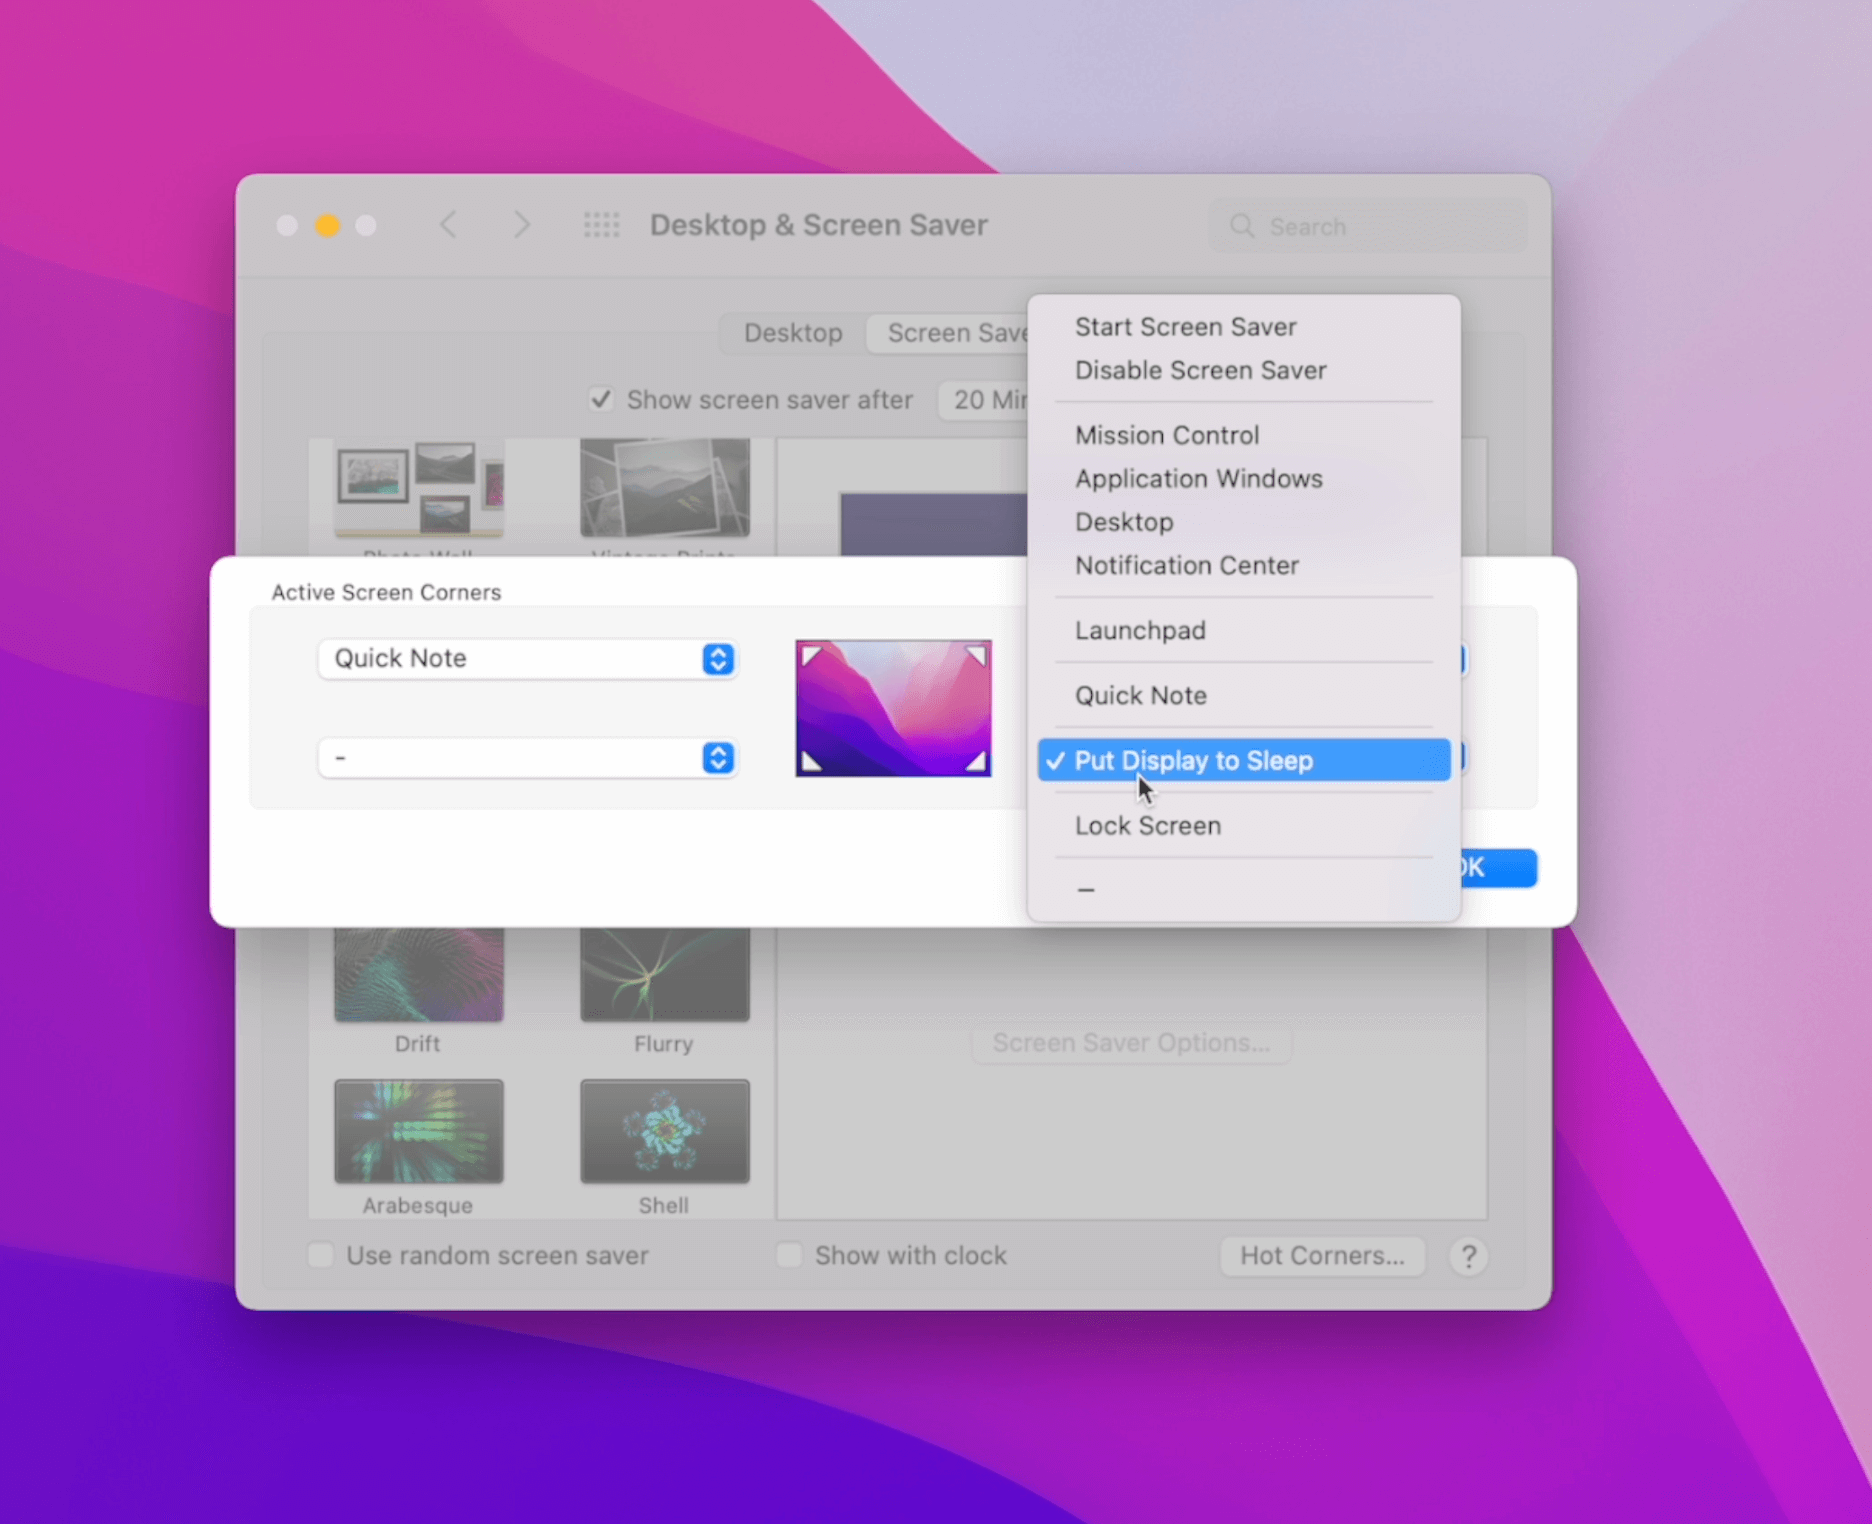
Come to your system preferences and click on Desk and Screen Saver and in the bottom right corner you're going to see this option says Hot corner. Click on it once you're going to have a popup. These are the four corners we can assign certain tasks to.
For example the top left corner I set up a quick note in the bottom right corner I set it to put the display to sleep. If you're in front of your office and you just want to quickly put it into sleep without clicking on here and clicking on sleep. So you can just put your mouse Hover to the bottom right corner and it will go to sleep. Top left corner I have a quick note so if I Hover my mouse over top left corner you're going to see this white bar, click on it once it will automatically open up a new note. Top corner is definitely something useful, but once you set it, don't forget to use it.
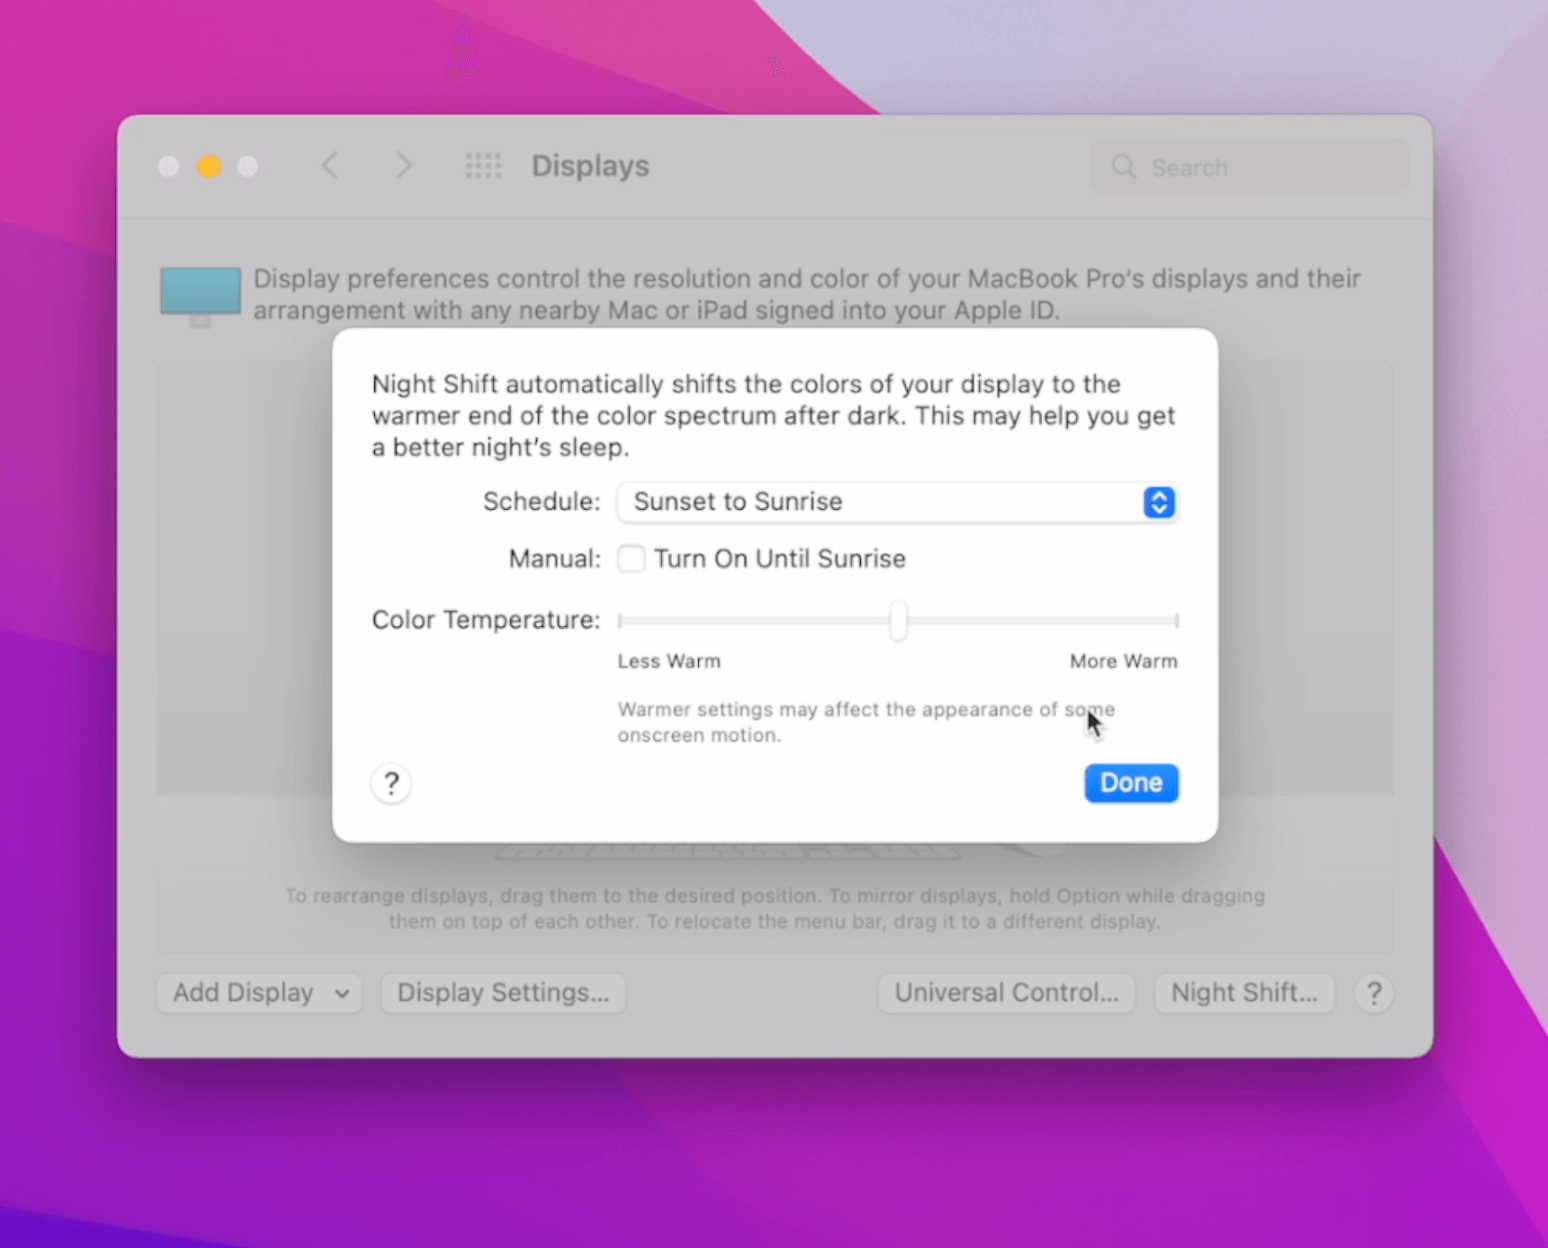
16. Schedule Night Shifts
This is going to save your eyesight a lot. So come to System Preferences and click on Display on the bottom left and you're going to see something called a night shift mode. I set my schedule from sunset to sunrise, so during night time my computer screen will automatically Ding down the blue light and produce this more Orange looking or more warm tone. So it really helps you ease out your eye a little bit more. So I strongly recommend setting night shifts but not during the day but from sunset to sunrise.
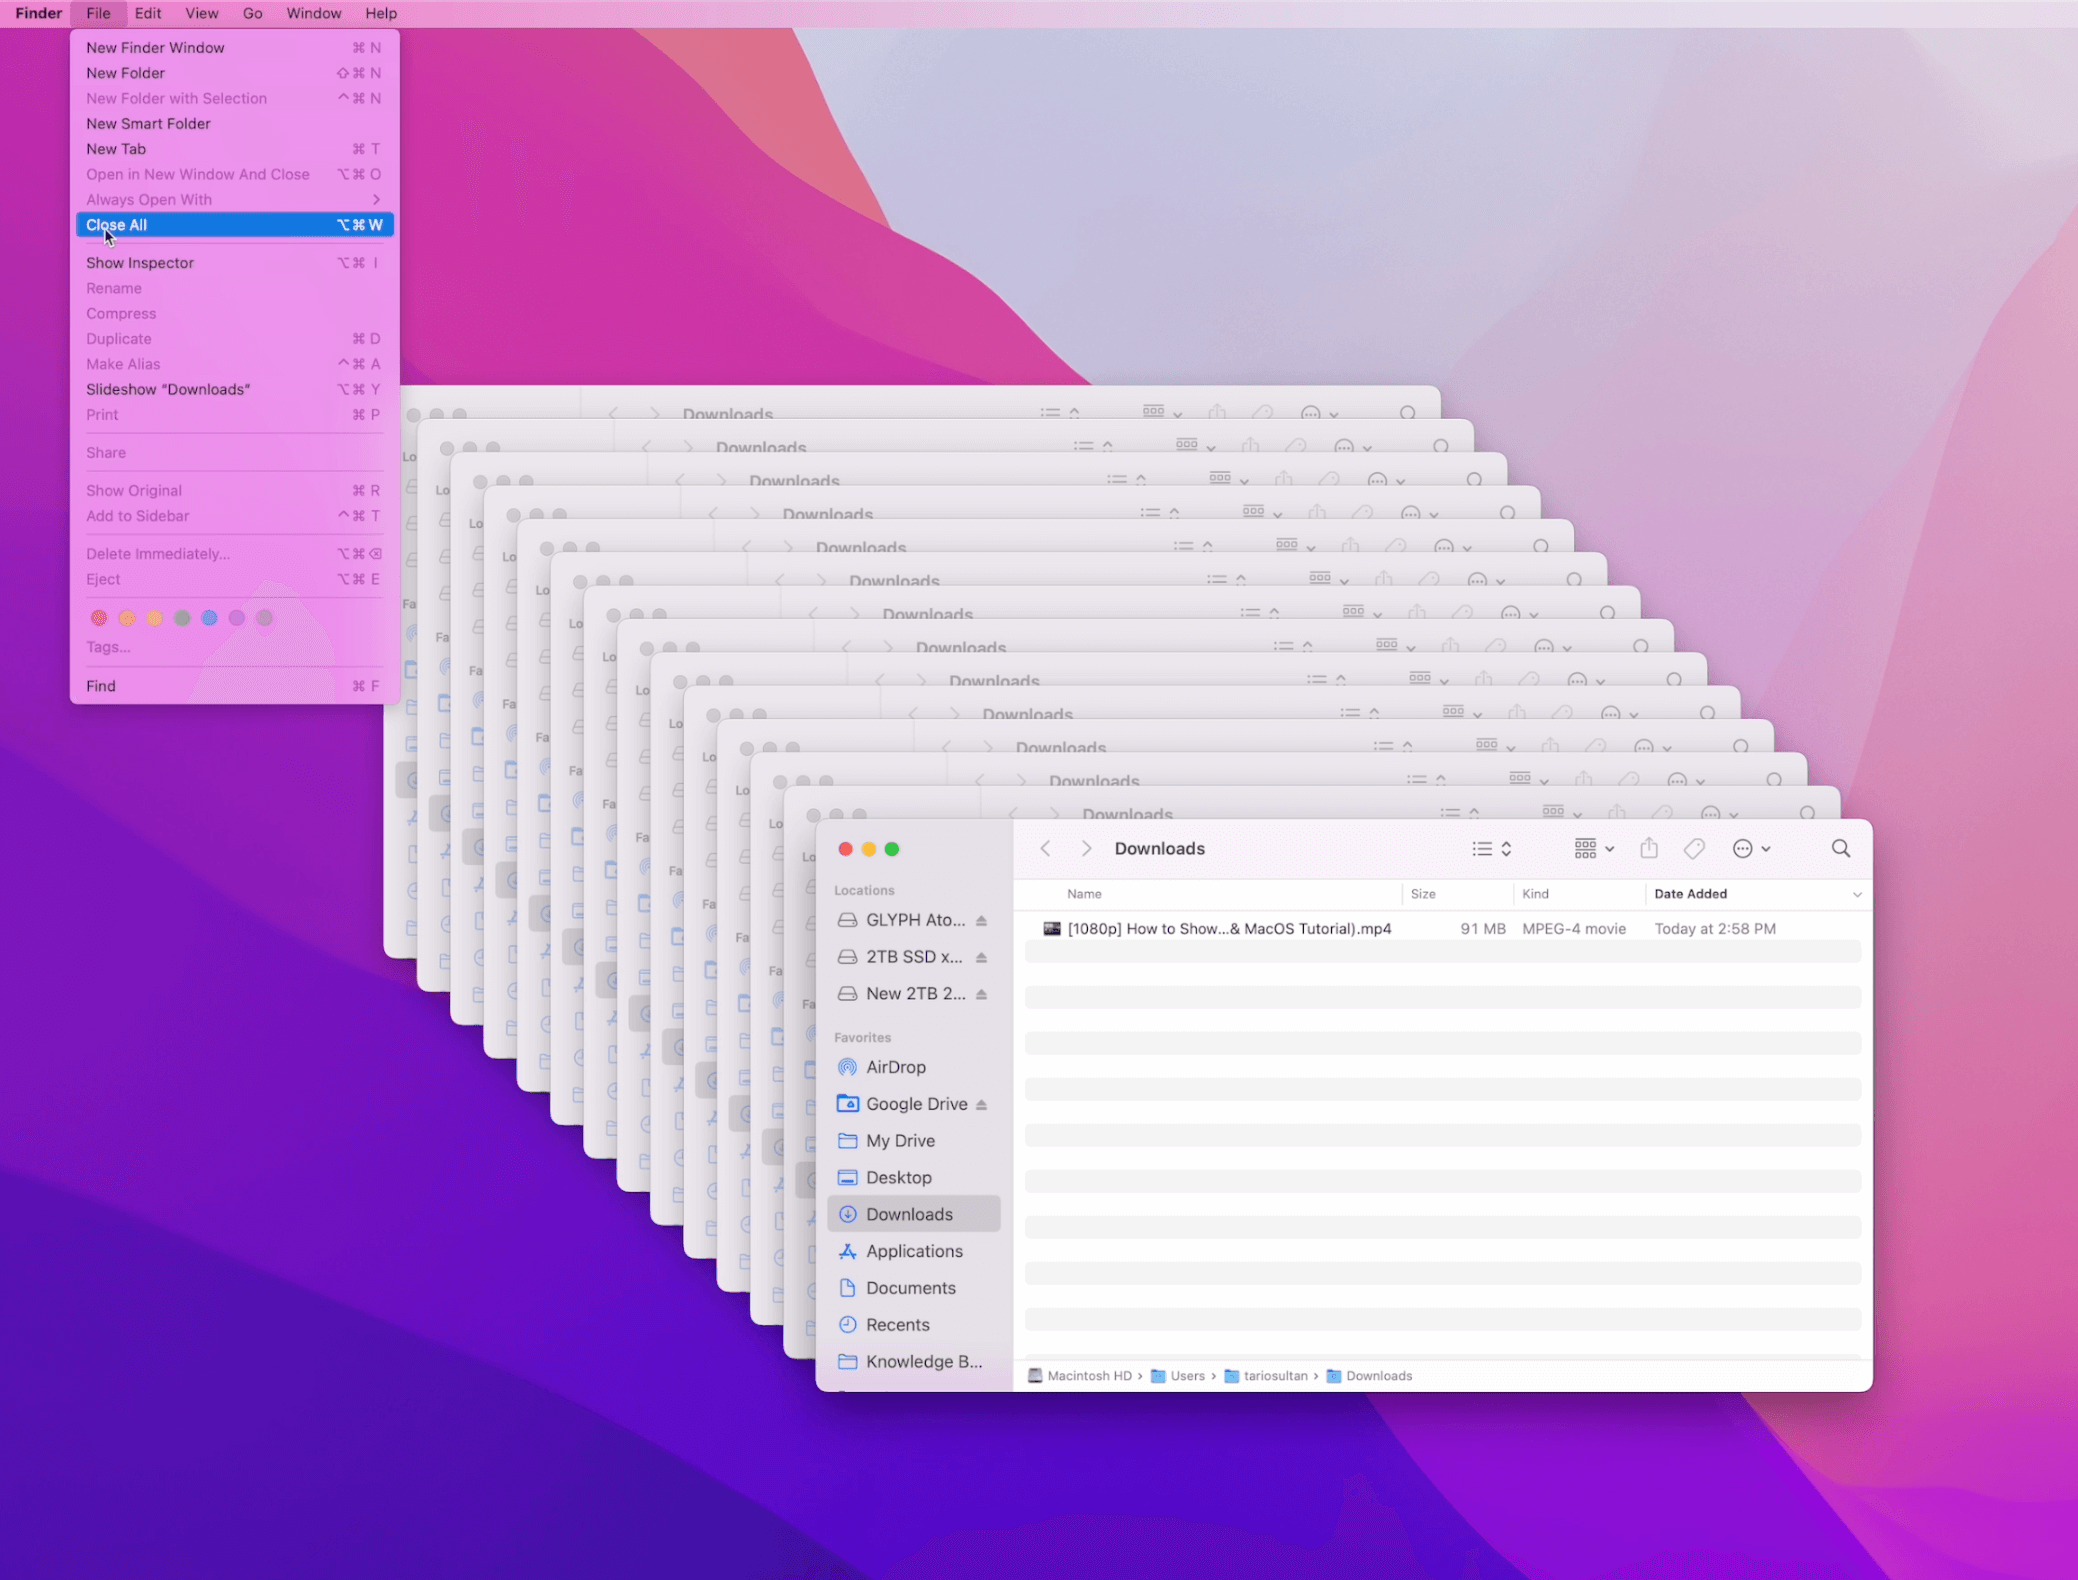
17. Close All Window at Once
This is going to help you to discover a certain hidden menu by Apple. For example the top right corner. I have a Bluetooth icon here. If I click on it, this is how regularly it looks like. But if I hold on option and click on it again, I can extend it with more data and information.
One of my favorite ways to use this method is for example if I have a whole bunch of Finder windows open and I don't want to individually close them. So what you can do is hold on to option and click on File and you're going to see an option says close all. If I don't hold that option key it's going to give me close window. So in this case I want to close everything. All these tabs so I'm going to hold on option and click on close all.
So all my window just closed within a second.
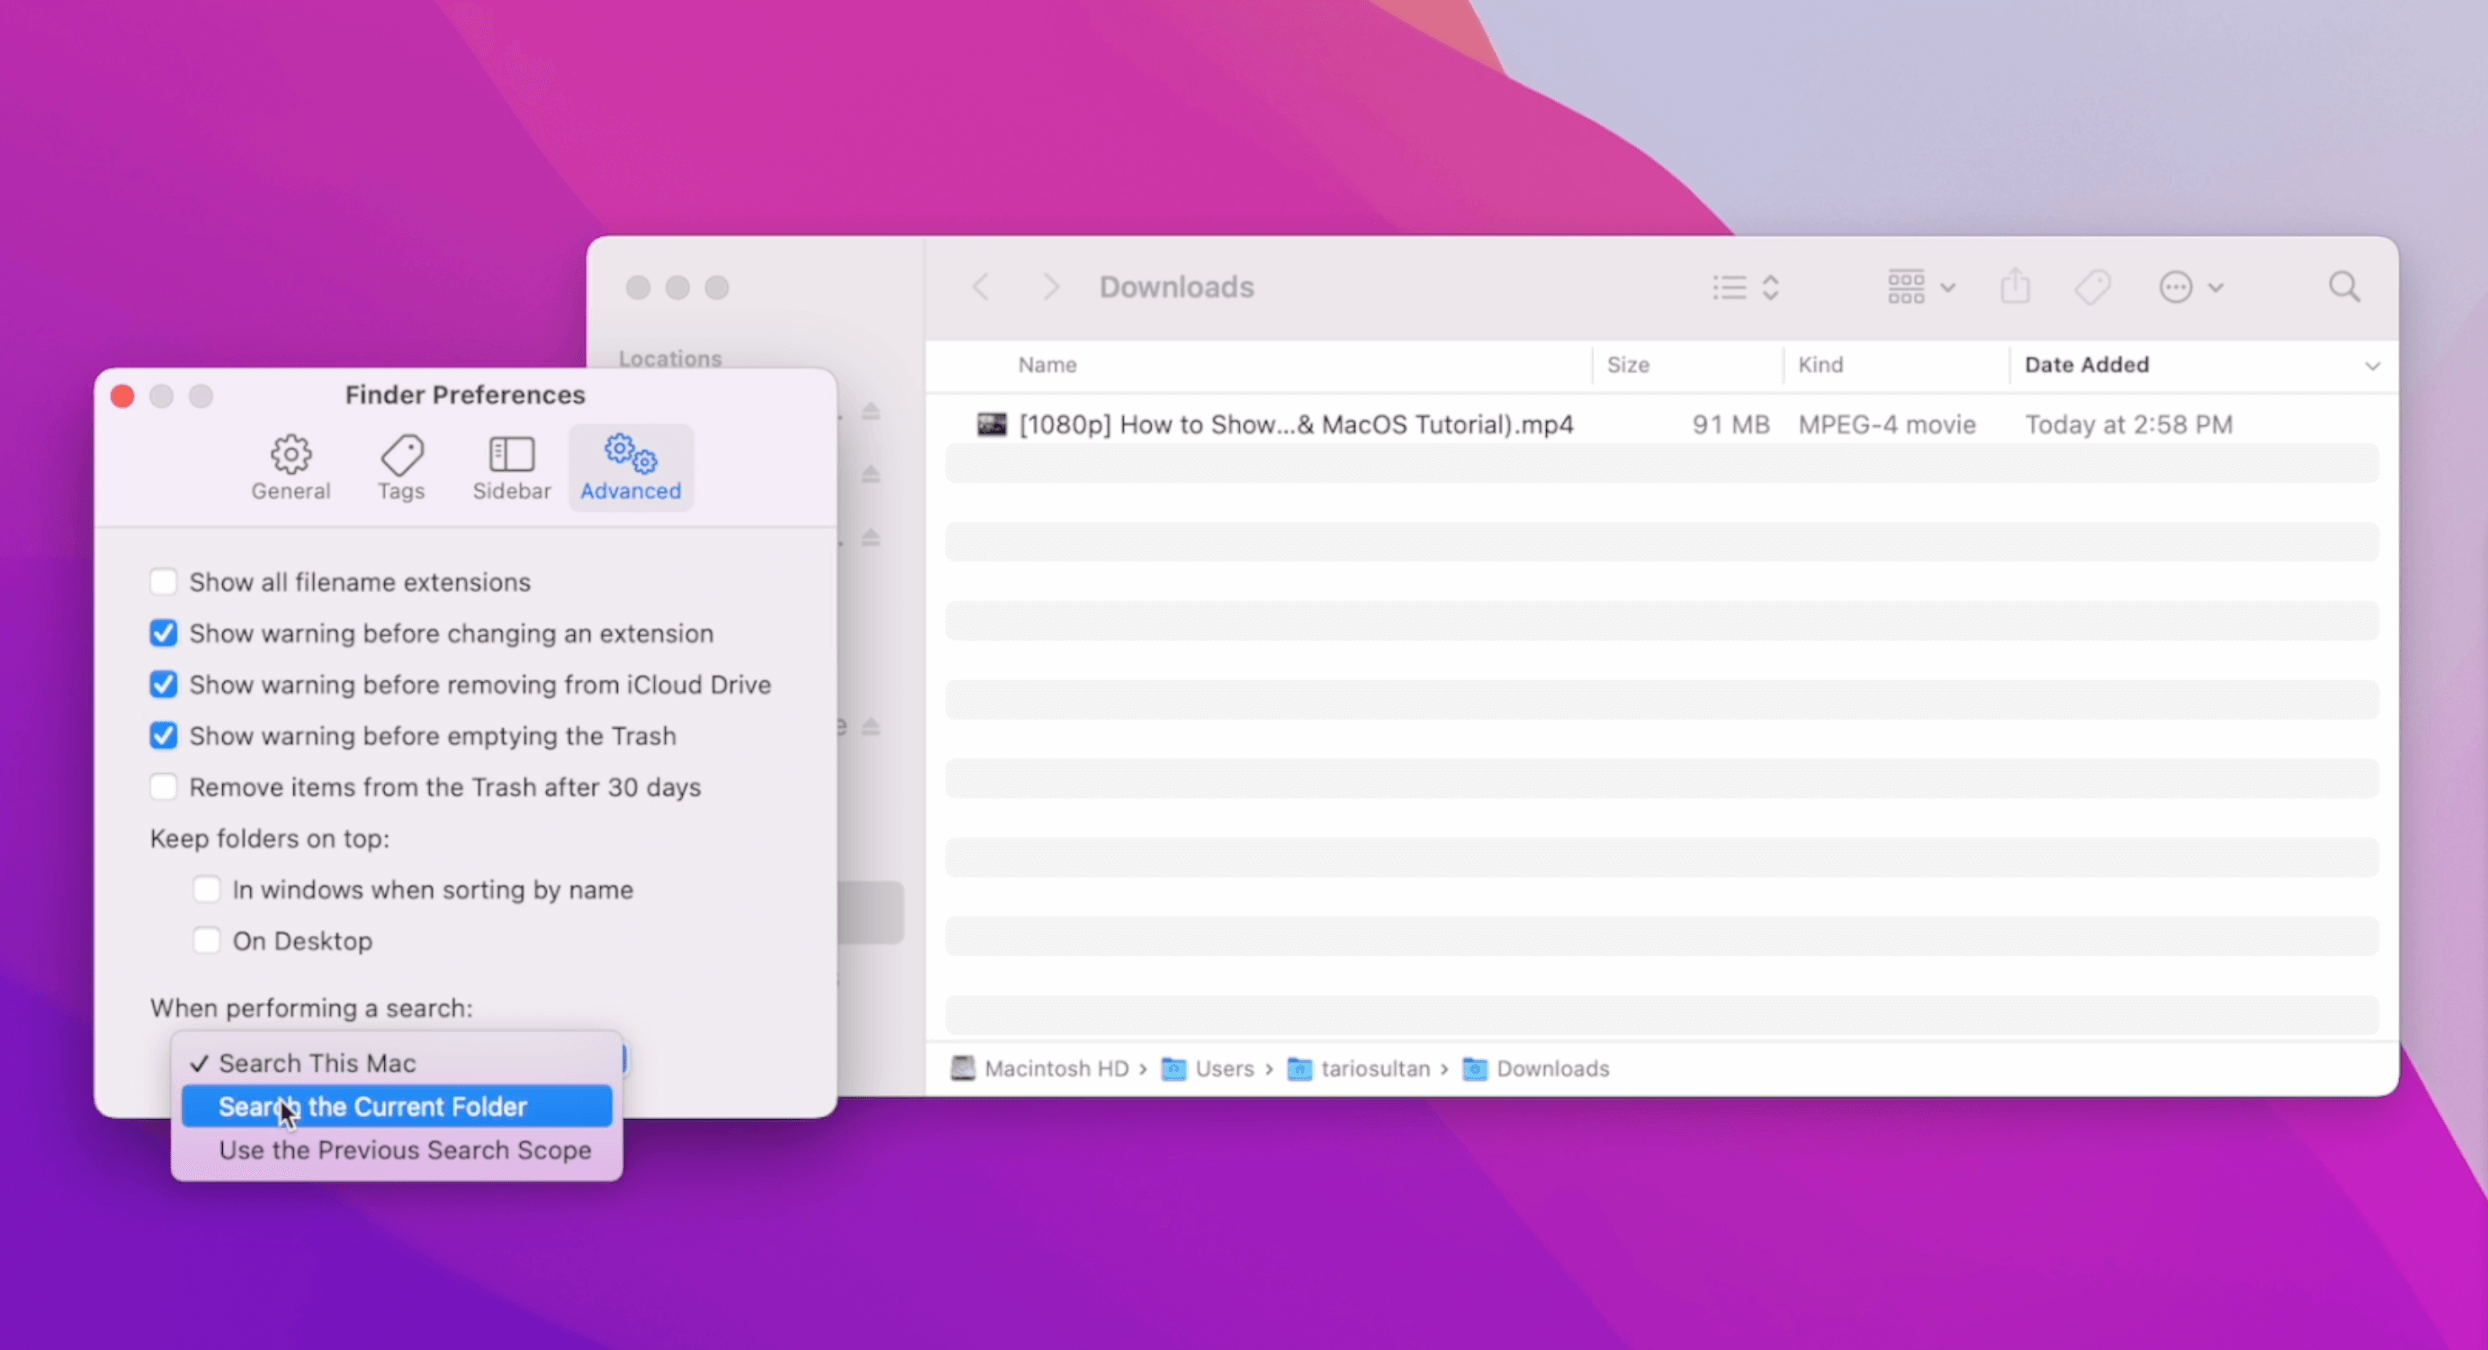
18. Search within Folder
You want to open any folder here and click on Finder and Preferences under the Advanced tab at the bottom. When you perform a search, it's normally searching the entire Mac. What I want to do is search the current folder. So when I close this, if I search HowTo it's going to search on their download folder instead of the entire Mac.
19. Widgets Customization
This is wage customization. Click on top right corner your current date and time. You're going to open up the Sidebar which is also called wedges. You can edit widgets so this way you can drag and drop certain elements. In my case I have Bitcoin and Ethereum pricing in my widget window.
I also have a world clock here so I can quickly navigate on the time and also have weather and a calendar so you can customize it to your own liking. And if you want to bring out the widgets, just click on the top right corner and hide it by clicking on one more time.

20. Dock Customization
Now moving on to the next one is going to be a dock customization. So a couple of things I like to customize my dock here is number one. When you click on System Preferences and you want to click on Dock, what I have it here is I want to automatically hide and show key command for this is [CMD + OPTION + D] you can turn it on and off.
What I do like is automatically hiding it so it creates more real estate on your screen. Another thing I like to do with a dog is come to your Finder on the Sidebar you're going to see the application option. You want to drag this application into your dog at the end right here. When you want to have quick access to certain apps you can actually click on this folder to expand to all your views on your app or you can close it by pressing one more time. I recommend you to remove everything that you don't use on your dock.
If you want to remove certain things on your dock, click and drag it into a trashcan and it will disappear. And if I want to bring it back I just need to go into my application, find the app and bring it to my dock again.
21. Quick Look (Quick Preview)
My next tip is something called a quick look or quick preview in Mac. If you want to preview certain files without opening it, simply select the file. Click on SPACE key.
You can actually preview the file this way. Any document you can press space and preview it this way.
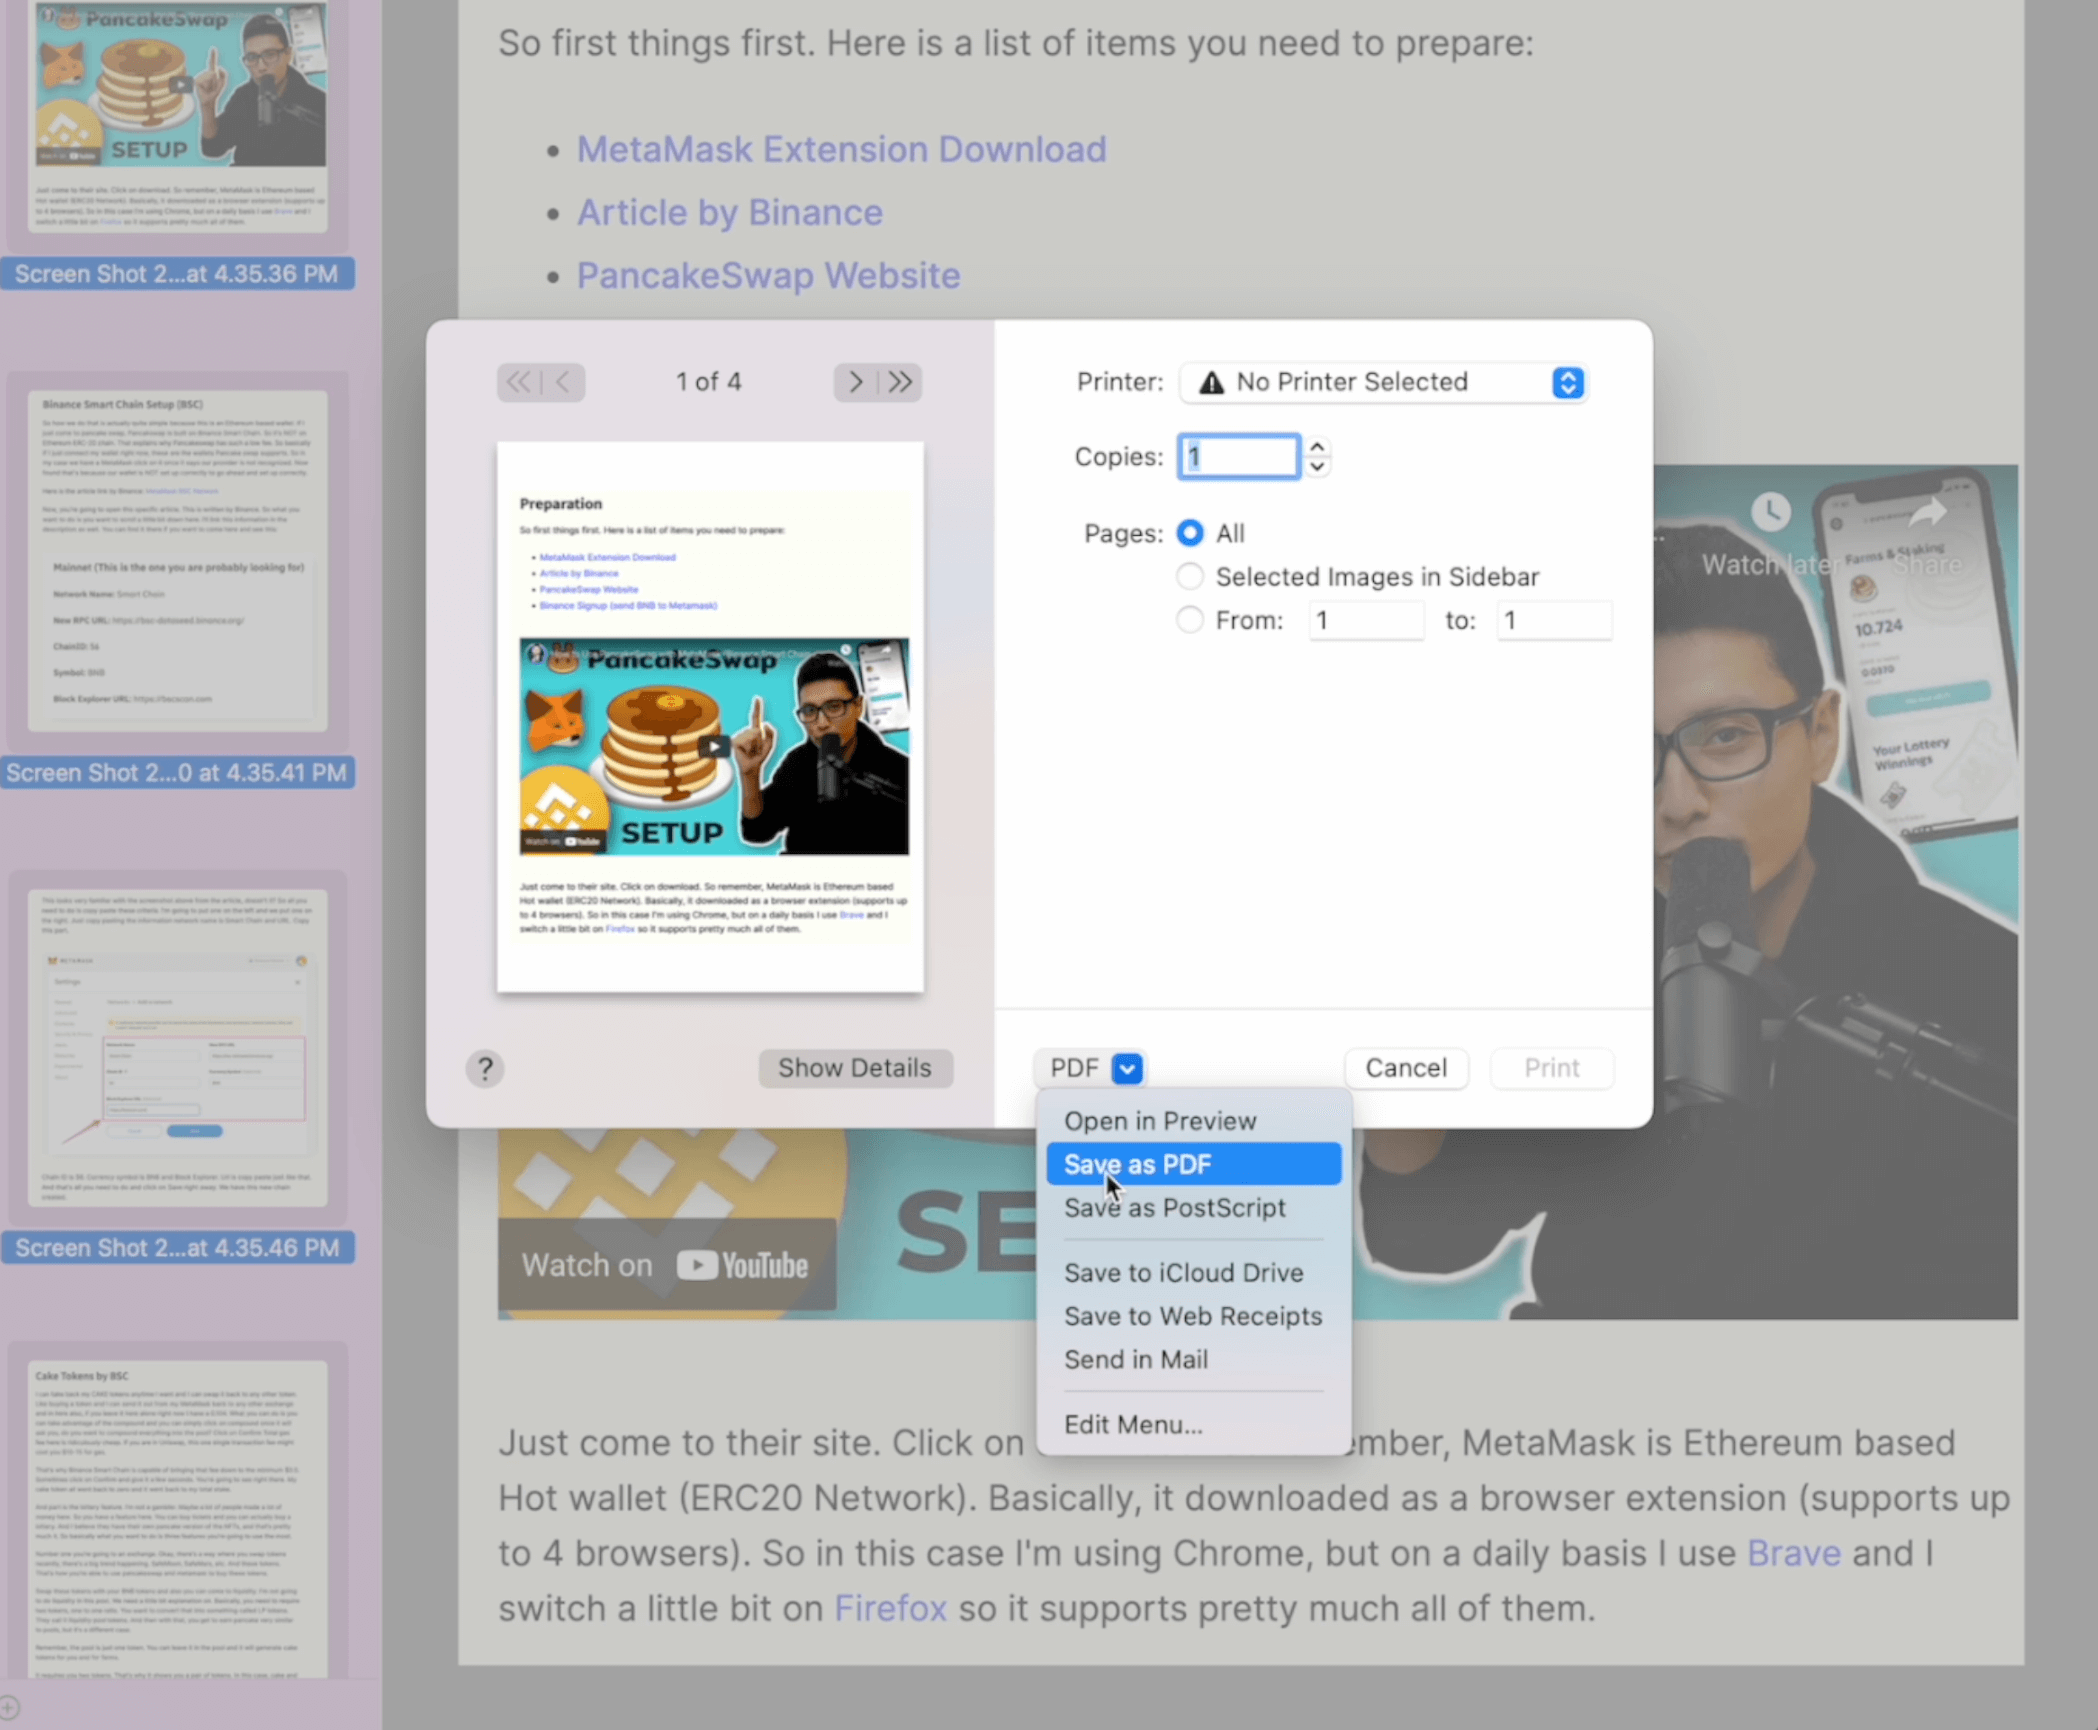
22. Combine Photos into PDF
You can turn individual photos, screenshots or images, combine them and format them into a PDF file. Here I have four different screenshots you want to right-click and you want to open with a preview. And once you have it opened command A I select all the pages here.
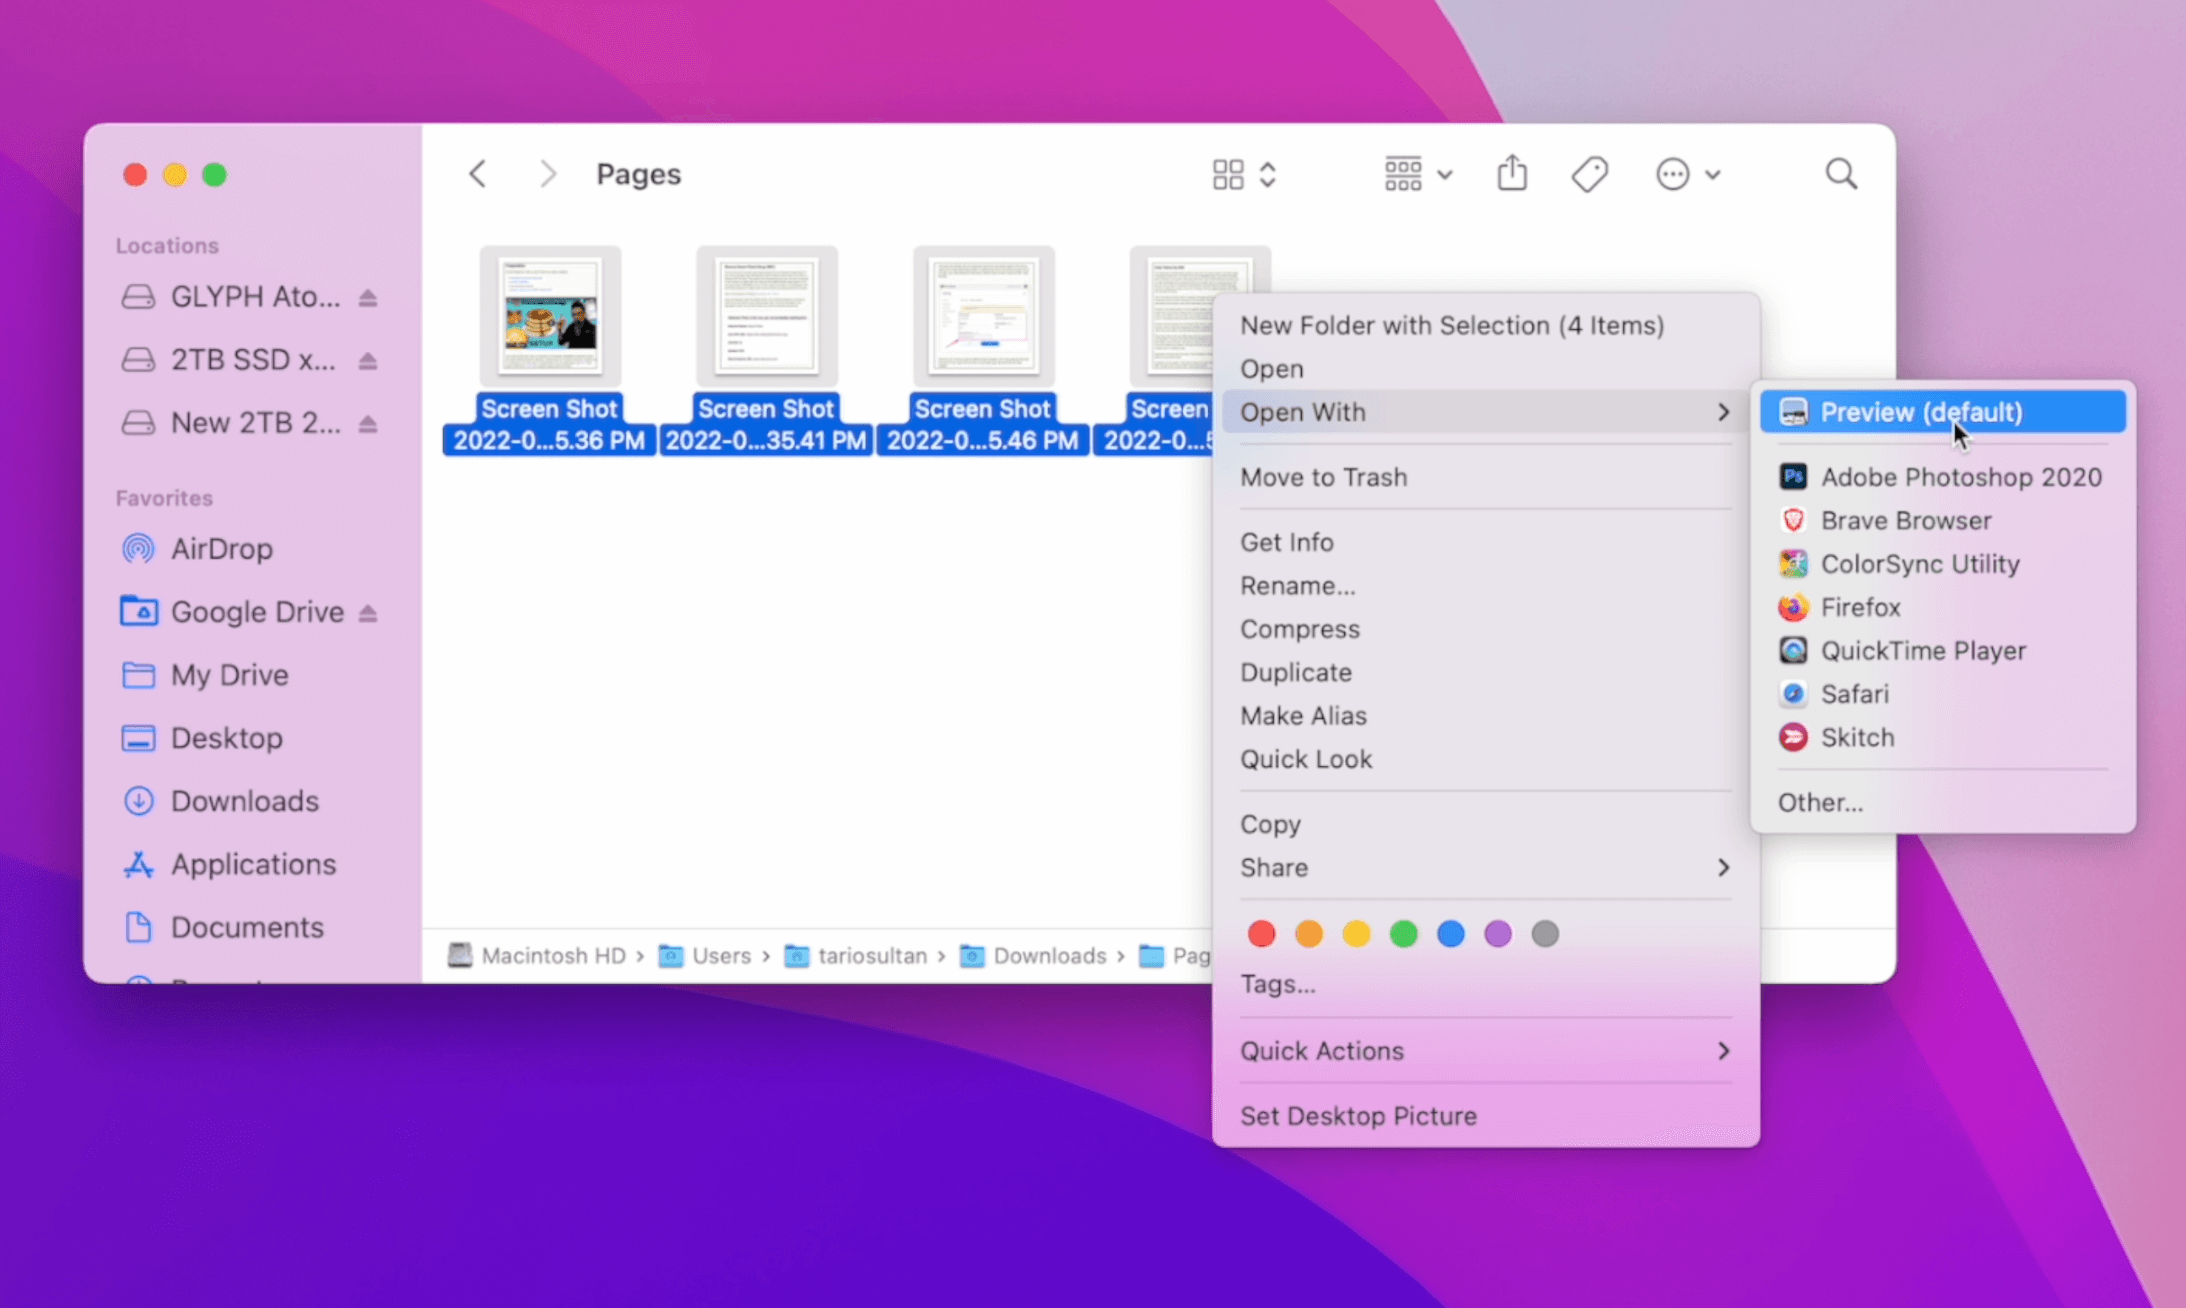
Click on command P so you can bring out the printer option here and then you can see I have something called a PDF at the bottom. Click on it once you can save it as a PDF. Now let's save this into the download folder. Let's call this one two three as a test. Click on Save so we just combine these four photos into one PDF document.
23. Folder View Shortcuts
The next tip is going to be Finder again. So how you can do is you can switch between different views by using command one. Command two, command three you can toggle them between different views again. [CMD + 1, 2, 3, 4] is how you can switch to different view options.
24. Adjust Folder Icon & Font Size
Click on command two so make sure you're on the list. View top right corner click on three dots. You have an option called a show view option so this way you can actually adjust the icon size. This looks a little bit better than a smaller font size because the screen can get bigger items can get really tiny on top of it. You can adjust the text size from 13, let's say to 16.
This way you can adjust the font and the text size inside of your list view.

25.My Favorite Markup App (Skitch)
This is one of the most frequently used app that I use. It all the time and I'm going to link this up in the description as well. It's free it's called something called a sketch. Sometimes I do a screenshot to show people certain things.
Command shift four I want to take an original screenshot of this YouTube page right here and the file is right here. What I like to do is right click on it. I want to open it with the sketch so with the sketch is really cool app it allows you to quickly drop certain arrow like this. You can quickly insert an arrow like this or you can actually insert certain text and combine it with the arrows. You can do a lot of cool things.
.jpg)
You can quickly Mark up some of your ideas and share them within the team. You can drop boxes and if you have sensitive information you can actually hide it by using the blur tool and on top of it there are many other tools you can try it out there's drawing one you can do really useful tool that I use almost every day just quickly sketch some of the ideas with a screenshot.
Final Thoughts
Those were my top 25 tips and tricks every Mac user should know about. Let me know if you enjoyed this video, give it a thumbs up and subscribe to the channel and most importantly drop some comments below. Let me know which tip or which trick you enjoy the most.
It's Tario Sultan and signing I'll see you guys in the next one.
Cheers.
More from
Productivity
category


.png)

